CAUTION
▶
Be careful not to touch or bend the spring contacts on the CPU
socket.
Installing the CPU
▶
Confirm that the CPU model number printed on the top of the CPU fits with
the requirements.
▶
If applicable, remove the protective cap from the bottom side of the CPU.
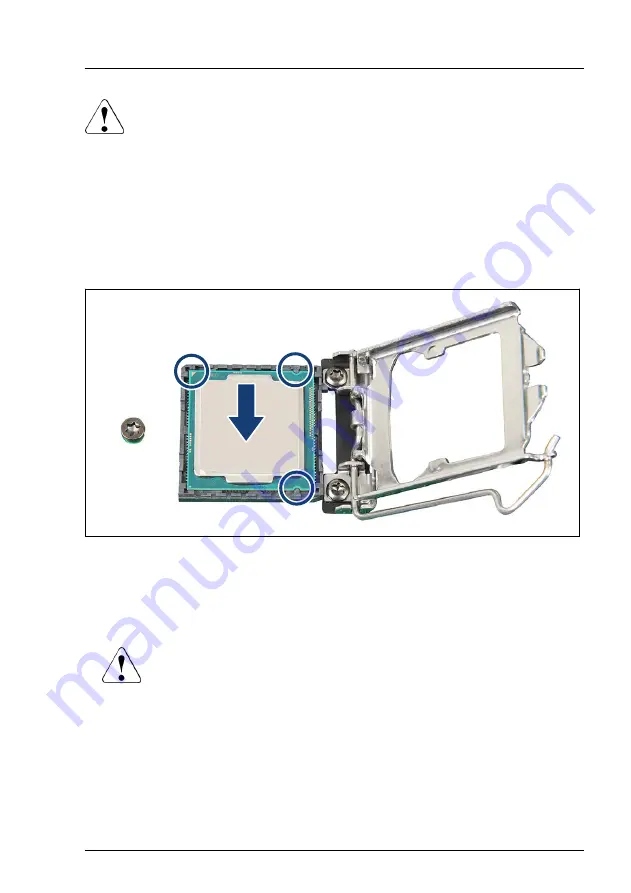
Figure 176: Installing the CPU
▶
Hold the CPU with your thumb and index finger. Make sure that the notches
on the CPU align with the posts on the socket (see circles).
▶
Lower the CPU straight down without tilting or sliding it in the socket.
CAUTION
▶
Ensure that the CPU is level in the socket.
▶
Be careful not to touch or bend the pins on the CPU socket.
▶
Never touch the underside of the CPU. Even minor soiling such
as grease from the skin can impair the CPU’s operation or
destroy the CPU.
▶
Ensure not to scrape or dent the CPU edges.
Processor (CPU)
RX1330 M5
Upgrade and Maintenance Manual
235
Summary of Contents for PRIMERGY RX1330 M5
Page 68: ...Basic hardware procedures 68 Upgrade and Maintenance Manual RX1330 M5 ...
Page 118: ...Power supply unit PSU 118 Upgrade and Maintenance Manual RX1330 M5 ...
Page 178: ...Fans 178 Upgrade and Maintenance Manual RX1330 M5 ...
Page 230: ...Main memory 230 Upgrade and Maintenance Manual RX1330 M5 ...
Page 256: ...Accessible drives 256 Upgrade and Maintenance Manual RX1330 M5 ...
Page 282: ...Front panel 282 Upgrade and Maintenance Manual RX1330 M5 ...
Page 290: ...Serial interface 290 Upgrade and Maintenance Manual RX1330 M5 ...
Page 336: ...System board and components 336 Upgrade and Maintenance Manual RX1330 M5 ...
Page 362: ...Appendix A 362 Upgrade and Maintenance Manual RX1330 M5 ...
Page 403: ...14 RX1330M5S SERIAL ext Cable Plan CA05973 7065 PCIe SLOT2 System Board D3929 SERIAL ...
Page 405: ...List of all used screws for PRIMERGY Servers Assembled in WCZ and FIT June 2021 ...


