208
Upgrade and Maintenance Manual
RX2520
M1
Expansion cards and backup units
Ê
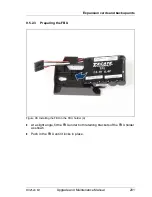
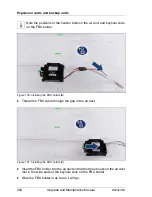
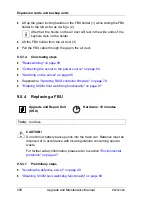
Lift up the green locking handle on the FBU holder (1) while sliding the FBU
holder to the left as far as it will go (2).
I
After that, the hooks on the air duct will rest in the wide ends of the
keyhole slots on the holder.
Ê
Lift the FBU holder from the air duct (3).
Ê
Pull the FBU cable through the gap in the air duct.
9.5.3.4
Concluding steps
Ê
"Reassembling" on page 59
Ê
"Connecting the server to the power source" on page 64
Ê
"Switching on the server" on page 66
Ê
If applicable,
"Updating RAID controller firmware" on page 79
.
Ê
"Enabling SVOM boot watchdog functionality" on page 87
9.5.4
Replacing a FBU
V
CAUTION!
Do not throw battery backup units into the trash can. Batteries must be
disposed of in accordance with local regulations concerning special
waste.
For further safety information, please refer to section
"Environmental
protection" on page 47
.
9.5.4.1
Preliminary steps
Ê
"Locating the defective server" on page 49
Ê
"Disabling SVOM boot watchdog functionality" on page 68
Upgrade and Repair Unit
(URU)
Hardware: 10 minutes
Tools:
tool-less
Summary of Contents for PRIMERGY RX2520 M1
Page 36: ...36 Upgrade and Maintenance Manual RX2520 M1 Before you start ...
Page 120: ...120 Upgrade and Maintenance Manual RX2520 M1 Power supply units ...
Page 162: ...162 Upgrade and Maintenance Manual RX2520 M1 Hard disk drives solid state drives ...
Page 220: ...220 Upgrade and Maintenance Manual RX2520 M1 Expansion cards and backup units ...
Page 230: ...230 Upgrade and Maintenance Manual RX2520 M1 Main memory ...
Page 310: ...310 Upgrade and Maintenance Manual RX2520 M1 Accessible drives ...
Page 410: ...410 Upgrade and Maintenance Manual RX2520 M1 Cables ...

