RX2520 M1
Upgrade and Maintenance Manual
247
Processors
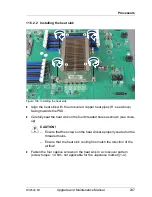
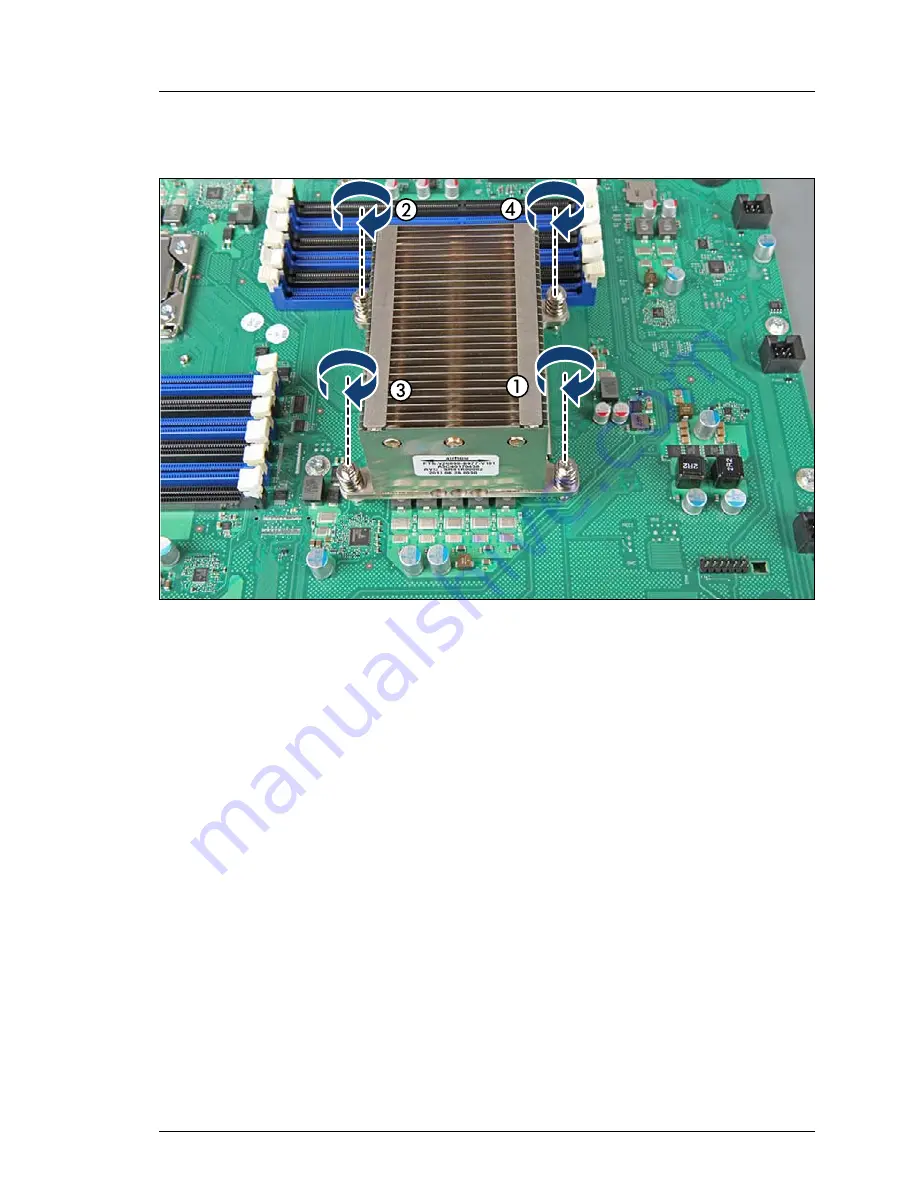
11.5.2.2 Installing the heat sink
Figure 136: Installing the heat sink
Ê
Align the heat sink with the uncovered copper heat pipes (H, see above)
facing towards the PSU.
Ê
Carefully seat the heat sink on the four threaded holes as shown (see close-
up).
V
CAUTION!
– Ensure that the screws on the heat sink are properly seated on the
threaded holes.
– Ensure that the heat sink cooling fins match the direction of the
airflow!
Ê
Fasten the four captive screws on the heat sink in a crossover pattern
(screw torque: 1.0 Nm, not applicable for the Japanese market) (1-4).
Summary of Contents for PRIMERGY RX2520 M1
Page 36: ...36 Upgrade and Maintenance Manual RX2520 M1 Before you start ...
Page 120: ...120 Upgrade and Maintenance Manual RX2520 M1 Power supply units ...
Page 162: ...162 Upgrade and Maintenance Manual RX2520 M1 Hard disk drives solid state drives ...
Page 220: ...220 Upgrade and Maintenance Manual RX2520 M1 Expansion cards and backup units ...
Page 230: ...230 Upgrade and Maintenance Manual RX2520 M1 Main memory ...
Page 310: ...310 Upgrade and Maintenance Manual RX2520 M1 Accessible drives ...
Page 410: ...410 Upgrade and Maintenance Manual RX2520 M1 Cables ...

