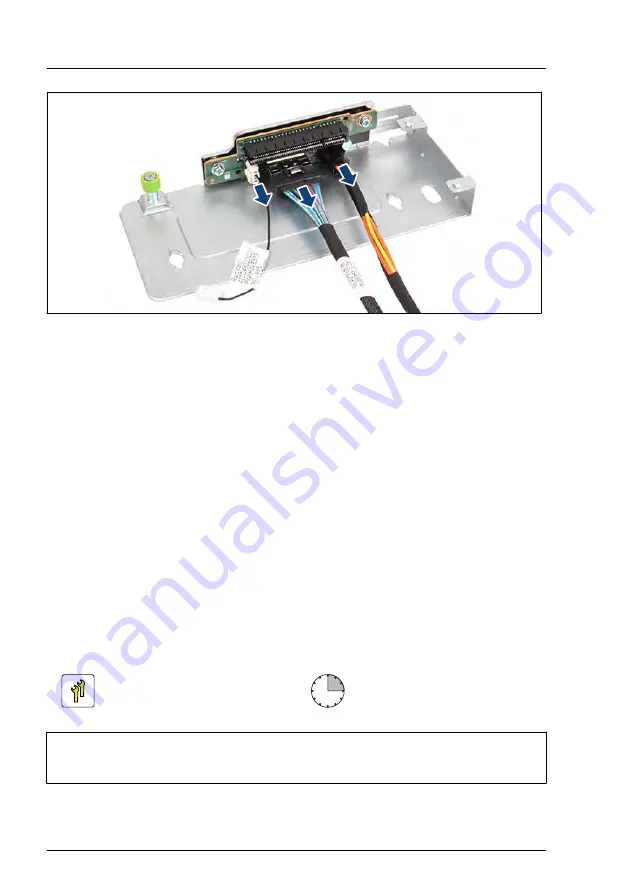
Figure 164: Disconnecting the cables
▶
Disconnect the three cables.
Concluding steps
▶
.
▶
"Connecting the power cord" on page 62
.
▶
"Switching on the server" on page 66
.
▶
If applicable,
"Installing the front cover with lock" on page 66
.
▶
If applicable, update the system information of your server using the Chassis
ID Prom Tool, see
"Using the Chassis ID Prom Tool" on page 98
▶
"Resuming BitLocker functionality" on page 93
9.6.8
Replacing the internal RAID controller
Upgrade and Repair Unit
(URU)
Hardware: 10 minutes
Software: 5 minutes
Tools:
– Phillips PH1 / (+) No. 1 screw driver
– Phillips PH2 / (+) No. 2 screw driver
Expansion cards and backup units
244
Upgrade and Maintenance Manual
RX2530 M6
Summary of Contents for PRIMERGY RX2530 M5
Page 18: ...Content Upgrade and Maintenance Manual RX2530 M6 ...
Page 194: ...Fans 194 Upgrade and Maintenance Manual RX2530 M6 ...
Page 262: ...Expansion cards and backup units 262 Upgrade and Maintenance Manual RX2530 M6 ...
Page 278: ...Main memory 278 Upgrade and Maintenance Manual RX2530 M6 ...
Page 324: ...Accessible drives 324 Upgrade and Maintenance Manual RX2530 M6 ...
Page 336: ...Front panel 336 Upgrade and Maintenance Manual RX2530 M6 ...
Page 344: ...Serial interface 344 Upgrade and Maintenance Manual RX2530 M6 ...
Page 480: ...List of all used screws for PRIMERGY Servers Assembled in Germany and Japan February 2019 ...

