RX2540 M2
Upgrade and Maintenance Manual
Contents
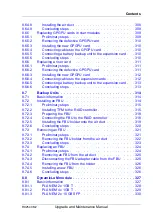
2.5-inch HDDS/SSD in a 3.5-inch installation frame . . . . . . . 155
Preliminary steps . . . . . . . . . . . . . . . . . . . . . . . 155
Concluding steps . . . . . . . . . . . . . . . . . . . . . . . 159
Replacing 3.5-inch HDD/SSD SAS/SATA backplanes . . . . 160
Replacing the 4x 3.5-inch HDD SAS backplanes . . . . . . . . 160
Preliminary steps . . . . . . . . . . . . . . . . . . . . . . . 160
Removing the 4x 3.5-inch SAS HDD backplane 1 . . . . . . 161
Installing the 4x 3.5-inch HDD SAS backplane 1 . . . . . . 163
Removing the 4x 3.5-inch SAS HDD backplane 2 . . . . . . 166
Installing the 4x 3.5-inch HDD SAS backplane 2 . . . . . . 167
Concluding steps . . . . . . . . . . . . . . . . . . . . . . . 169
Upgrading SAS/SATA HDD backplane 2 . . . . . . . . . . . . 170
Preliminary steps . . . . . . . . . . . . . . . . . . . . . . . 170
Installing the 3.5-inch HDD backplane 2 . . . . . . . . . . . 170
Connecting the SAS cables . . . . . . . . . . . . . . . . . 171
Concluding steps . . . . . . . . . . . . . . . . . . . . . . . 172
Replacing the 12x 3.5-inch HDD backplane . . . . . . . . . . . 173
Preliminary steps . . . . . . . . . . . . . . . . . . . . . . . 173
Removing the SAS expander board . . . . . . . . . . . . . 174
Removing the defective 12x 3.5-inch HDD backplane . . . . 175
Installing the new 12x 3.5-inch HDD backplane . . . . . . . 176
Installing the SAS expander board . . . . . . . . . . . . . . 178
Concluding steps . . . . . . . . . . . . . . . . . . . . . . . 179
Replacing the SAS expander board . . . . . . . . . . . . . . . 180
Preliminary steps . . . . . . . . . . . . . . . . . . . . . . . 180
Removing the SAS expander holder . . . . . . . . . . . . . 180
Removing the defective SAS expander board . . . . . . . . 181
Installing the new SAS expander board . . . . . . . . . . . 183
Installing the SAS expander board . . . . . . . . . . . . . . 184
Concluding steps . . . . . . . . . . . . . . . . . . . . . . . 184
Replacing the connector card . . . . . . . . . . . . . . . . . . 185
Preliminary steps . . . . . . . . . . . . . . . . . . . . . . . 185
Removing the SAS expander board . . . . . . . . . . . . . 185
Removing the defective connector card . . . . . . . . . . . 186
Installing the new connector card . . . . . . . . . . . . . . 186
Concluding steps . . . . . . . . . . . . . . . . . . . . . . . 187
Summary of Contents for PRIMERGY RX2540 M2
Page 6: ...Upgrade and Maintenance Manual RX2540 M2 ...
Page 48: ...48 Upgrade and Maintenance Manual RX2540 M2 Before you start ...
Page 128: ...128 Upgrade and Maintenance Manual RX2540 M2 Basic software procedures ...
Page 142: ...142 Upgrade and Maintenance Manual RX2540 M2 Power supply unit PSU ...
Page 392: ...392 Upgrade and Maintenance Manual RX2540 M2 Processor CPU ...
Page 452: ...452 Upgrade and Maintenance Manual RX2540 M2 Accessible drives ...
Page 558: ...558 Upgrade and Maintenance Manual RX2540 M2 System board and components ...
Page 602: ...602 Upgrade and Maintenance Manual RX2540 M2 Appendix ...


