388
Upgrade and Maintenance Manual
RX2540 M2
Processor (CPU)
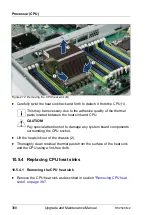
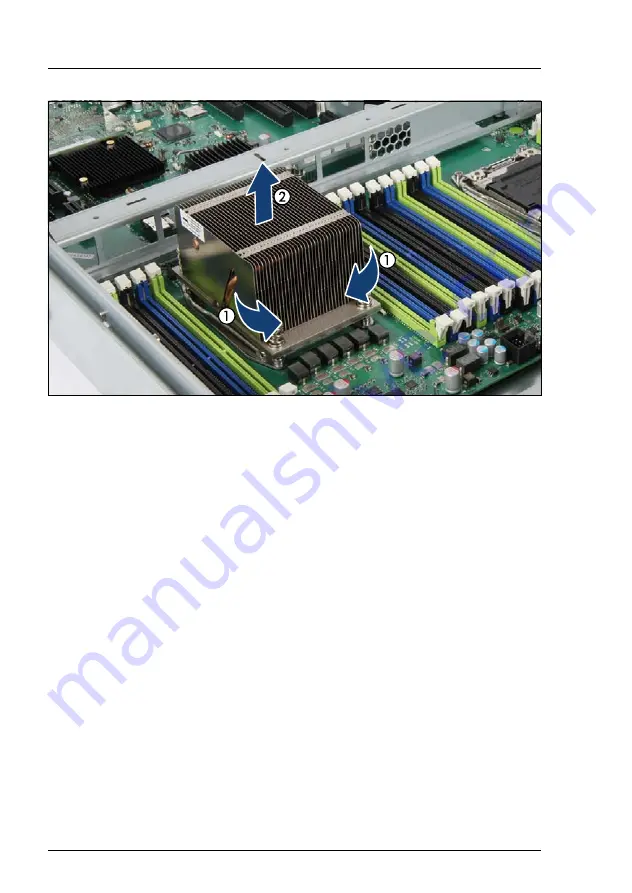
Figure 272: Removing the CPU heat sink (B)
Ê
Carefully twist the heat sink back and forth to detach it from the CPU (1).
I
This may be necessary due to the adhesive quality of the thermal
paste located between the heat sink and CPU.
V
CAUTION!
Pay special attention not to damage any system board components
surrounding the CPU socket.
Ê
Lift the heat sink out of the chassis (2).
Ê
Thoroughly clean residual thermal paste from the surface of the heat sink
and the CPU using a lint-free cloth.
10.5.4 Replacing CPU heat sinks
10.5.4.1 Removing the CPU heat sink
Ê
Remove the CPU heat sink as described in section
Summary of Contents for PRIMERGY RX2540 M2
Page 6: ...Upgrade and Maintenance Manual RX2540 M2 ...
Page 48: ...48 Upgrade and Maintenance Manual RX2540 M2 Before you start ...
Page 128: ...128 Upgrade and Maintenance Manual RX2540 M2 Basic software procedures ...
Page 142: ...142 Upgrade and Maintenance Manual RX2540 M2 Power supply unit PSU ...
Page 392: ...392 Upgrade and Maintenance Manual RX2540 M2 Processor CPU ...
Page 452: ...452 Upgrade and Maintenance Manual RX2540 M2 Accessible drives ...
Page 558: ...558 Upgrade and Maintenance Manual RX2540 M2 System board and components ...
Page 602: ...602 Upgrade and Maintenance Manual RX2540 M2 Appendix ...


