498
Upgrade and Maintenance Manual
RX2540 M2
Front panel and external front connectors
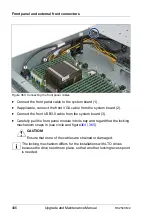
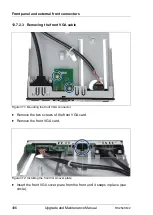
13.7.3.3 Removing the front VGA connector
Ê
"Removing the front VGA connector" on page 495
13.7.3.4 Installing the new front VGA connector
Ê
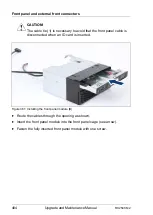
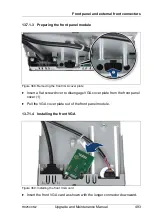
Install the new front VGA connector as described in section
front VGA connector" on page 492
.
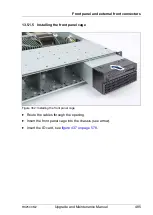
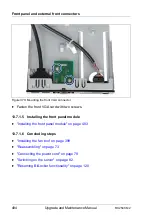
13.7.3.5 Installing the front panel module
Ê
"Installing the front panel module" on page 483
13.7.3.6 Concluding steps
Ê
"Installing the fan box" on page 399
Ê
Ê
"Connecting the power cord" on page 79
Ê
"Switching on the server" on page 82
Ê
"Resuming BitLocker functionality" on page 120
13.8 Front USB3.0 connector 2.5-inch versions
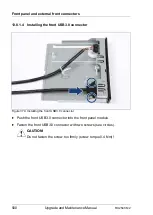
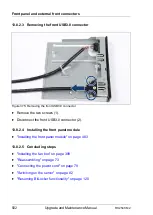
13.8.1 Installing the front USB3.0 connector
13.8.1.1 Preliminary steps
Ê
"Suspending BitLocker functionality" on page 95
Ê
"Locating the defective server" on page 61
Ê
"Shutting down the server" on page 65
Upgrade and Repair Unit
(URU)
Hardware: 10 minutes
Tools:
Phillips PZ2 / (+) No. 2 screw driver / nut driver 5 mm
Summary of Contents for PRIMERGY RX2540 M2
Page 6: ...Upgrade and Maintenance Manual RX2540 M2 ...
Page 48: ...48 Upgrade and Maintenance Manual RX2540 M2 Before you start ...
Page 128: ...128 Upgrade and Maintenance Manual RX2540 M2 Basic software procedures ...
Page 142: ...142 Upgrade and Maintenance Manual RX2540 M2 Power supply unit PSU ...
Page 392: ...392 Upgrade and Maintenance Manual RX2540 M2 Processor CPU ...
Page 452: ...452 Upgrade and Maintenance Manual RX2540 M2 Accessible drives ...
Page 558: ...558 Upgrade and Maintenance Manual RX2540 M2 System board and components ...
Page 602: ...602 Upgrade and Maintenance Manual RX2540 M2 Appendix ...

