532
Upgrade and Maintenance Manual
RX2540 M2
System board and components
Ê
Save your changes and exit the BIOS.
Ê
"Locating the defective server" on page 61
Ê
"Shutting down the server" on page 65
Ê
"Disconnecting the power cord" on page 66
Ê
"Getting access to the component" on page 68
Ê
"Removing the fan box" on page 397
14.4.2.2 Removing the TPM
Ê
"Removing the defective system board" on page 549
.
Ê
Lay the system board on a soft, antistatic surface with its component side
facing down.
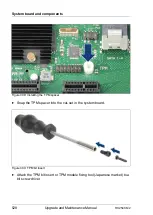
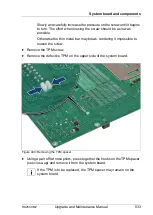
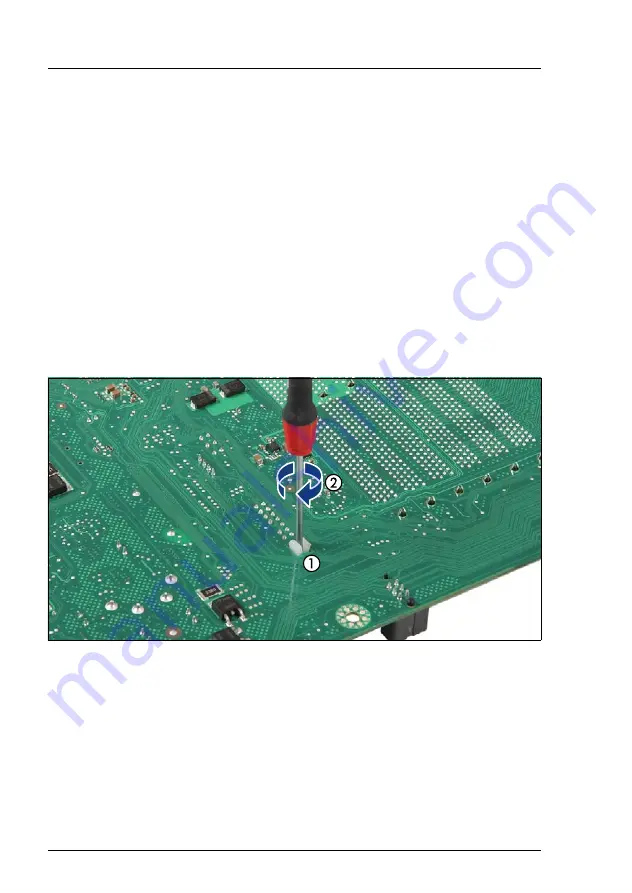
Figure 402: Removing the TPM screw
Ê
Locate the slotted lower end of the TPM screw (1).
Ê
Carefully loosen the TPM screw using a thin slotted screw driver (e.g.
watchmaker's screw driver) or the dedicated TPM screw driver (Japanese
market) (2).
V
CAUTION!
Ensure to turn the screw
clockwise
in order to remove it!
Summary of Contents for PRIMERGY RX2540 M2
Page 6: ...Upgrade and Maintenance Manual RX2540 M2 ...
Page 48: ...48 Upgrade and Maintenance Manual RX2540 M2 Before you start ...
Page 128: ...128 Upgrade and Maintenance Manual RX2540 M2 Basic software procedures ...
Page 142: ...142 Upgrade and Maintenance Manual RX2540 M2 Power supply unit PSU ...
Page 392: ...392 Upgrade and Maintenance Manual RX2540 M2 Processor CPU ...
Page 452: ...452 Upgrade and Maintenance Manual RX2540 M2 Accessible drives ...
Page 558: ...558 Upgrade and Maintenance Manual RX2540 M2 System board and components ...
Page 602: ...602 Upgrade and Maintenance Manual RX2540 M2 Appendix ...

