552
Upgrade and Maintenance Manual
RX2540 M2
System board and components
14.7.1.3 Installing the system board
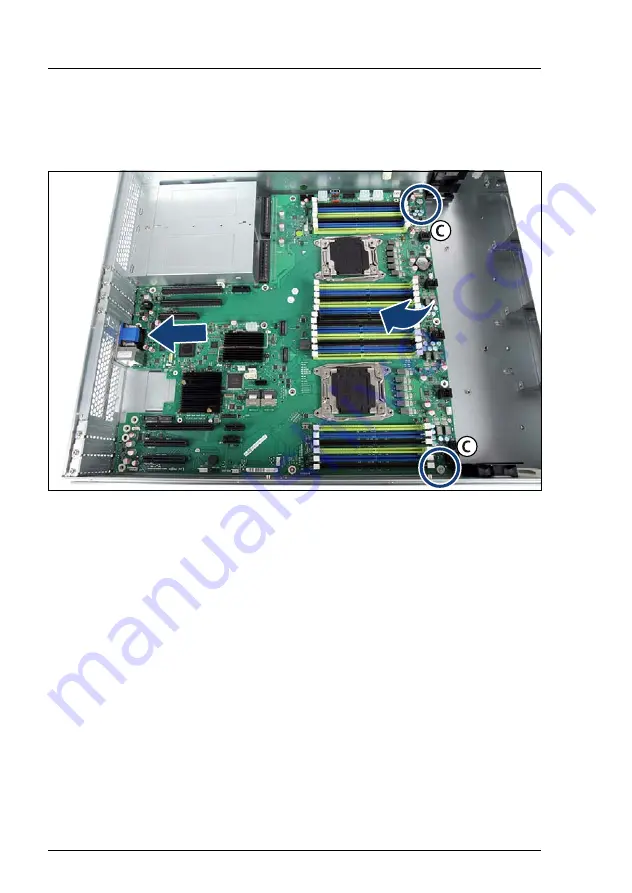
Mounting the system board
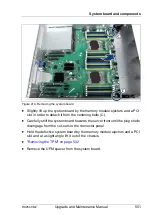
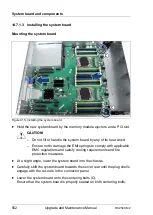
Figure 415: Installing the system board
Ê
Hold the new system board by the memory module ejectors and a PCI slot.
V
CAUTION!
– Do not lift or handle the system board by any of its heat sinks!
– Ensure not to damage the EMI springs to comply with applicable
EMC regulations and satisfy cooling requirements and fire
protection measures.
Ê
At a slight angle, lower the system board into the chassis.
Ê
Carefully shift the system board towards the server rear until the plug shells
engage with the cut-outs in the connector panel.
Ê
Lower the system board onto the centering bolts (C).
Ensure that the system board is properly seated on both centering bolts.
Summary of Contents for PRIMERGY RX2540 M2
Page 6: ...Upgrade and Maintenance Manual RX2540 M2 ...
Page 48: ...48 Upgrade and Maintenance Manual RX2540 M2 Before you start ...
Page 128: ...128 Upgrade and Maintenance Manual RX2540 M2 Basic software procedures ...
Page 142: ...142 Upgrade and Maintenance Manual RX2540 M2 Power supply unit PSU ...
Page 392: ...392 Upgrade and Maintenance Manual RX2540 M2 Processor CPU ...
Page 452: ...452 Upgrade and Maintenance Manual RX2540 M2 Accessible drives ...
Page 558: ...558 Upgrade and Maintenance Manual RX2540 M2 System board and components ...
Page 602: ...602 Upgrade and Maintenance Manual RX2540 M2 Appendix ...


