


TX100 S2
Service Supplement
101
Replacement routines
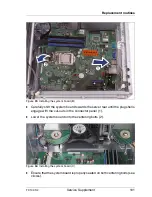
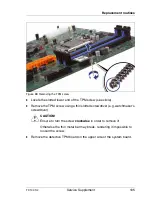
Figure 85: Installing the system board (B)
Ê
Carefully shift the system board towards the server rear until the plug shells
engage with the cut-outs in the connector panel (1).
Ê
Lower the system board onto the centering bolts (2).
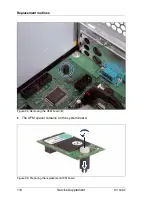
Figure 86: Installing the system board (C)
Ê
Ensure that the system board is properly seated on both centering bolts (see
circles).
Summary of Contents for PRIMERGY TX100 S2
Page 1: ...Service Supplement English PRIMERGY TX100 S2 Server Service Supplement Edition July 2010 ...
Page 6: ......
Page 14: ......
Page 22: ......


