


TX140 S1
Upgrade and Maintenance Manual
277
Expansion cards and backup units
9.4.1.2
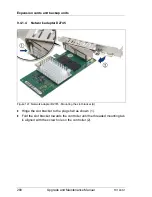
General instructions
Ê
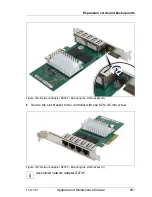
Place the controller on the mounting tabs on the slot bracket.
Ê
Secure the slot bracket to the controller with two M3 x 4.5 mm screws.
Removal is carried out in reverse order.
I
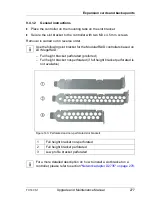
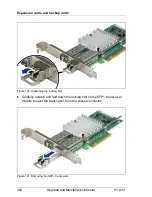
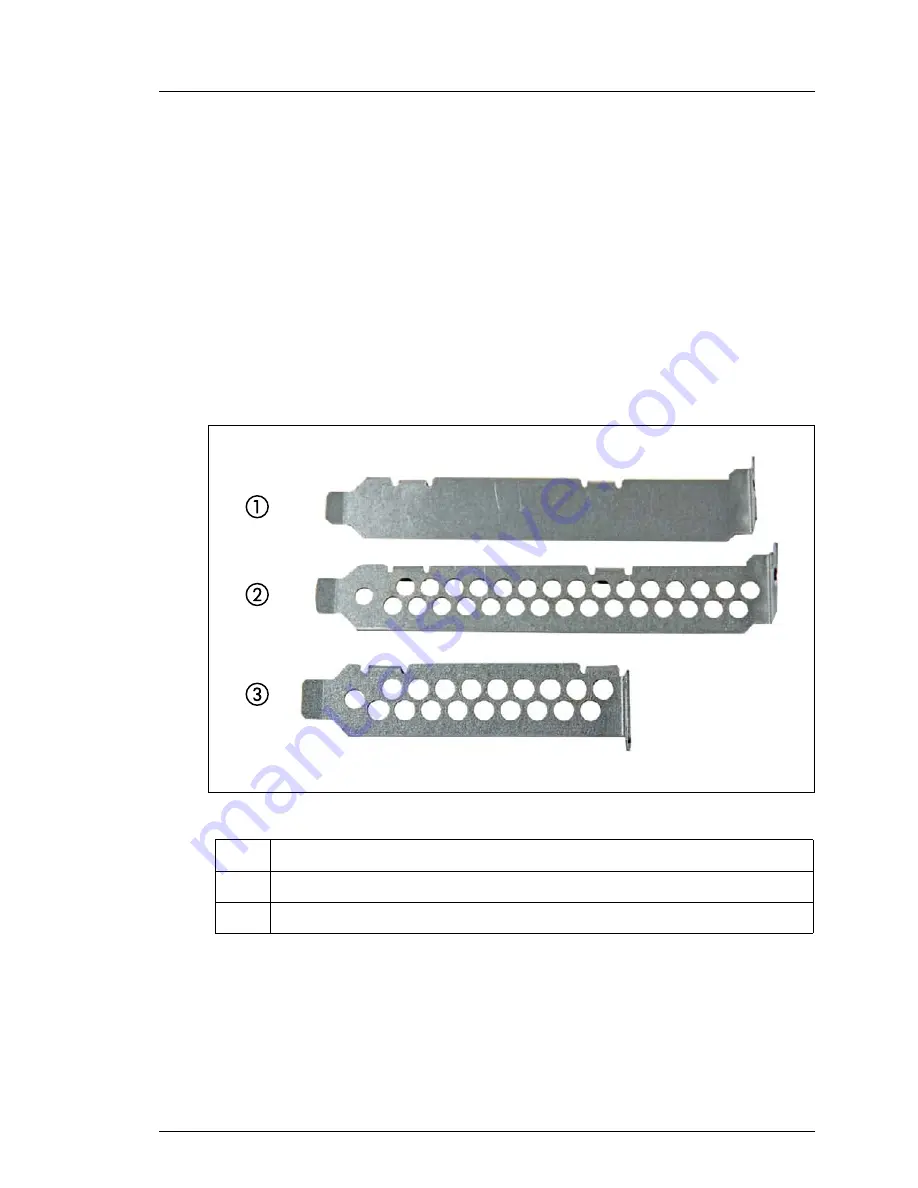
Use the following slot bracket for the ModularRAID controllers based on
LSI MegaRAID:
– Full height bracket perforated (preferred)
– Full height bracket not-perforated (if full height bracket perforated is
not available)
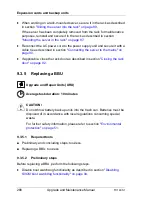
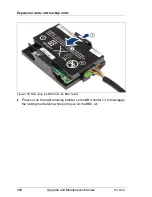
Figure 143: Perforated and non-perforated slot brackets
I
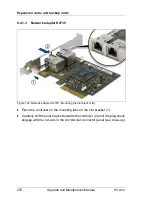
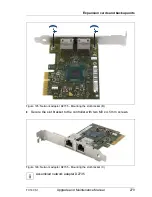
For a more detailed description on how to install a slot bracket on a
controller, please refer to section
"Network adapter D2735" on page 278
.
1
Full height bracket non-perforated
2
Full height bracket perforated
3
Low profile bracket perforated
Summary of Contents for PRIMERGY TX140 S1
Page 6: ...Upgrade and Maintenance Manual TX140 S1 ...
Page 22: ...Upgrade and Maintenance Manual TX140 S1 Contents ...
Page 24: ...24 Upgrade and Maintenance Manual TX140 S1 ...
Page 40: ...40 Upgrade and Maintenance Manual TX140 S1 Before you start ...
Page 204: ...204 Upgrade and Maintenance Manual TX140 S1 Hard disk drives solid state drives ...
Page 292: ...292 Upgrade and Maintenance Manual TX140 S1 Expansion cards and backup units ...
Page 306: ...306 Upgrade and Maintenance Manual TX140 S1 Main memory ...
Page 370: ...370 Upgrade and Maintenance Manual TX140 S1 Accessible drives ...
Page 414: ...414 Upgrade and Maintenance Manual TX140 S1 Front panel and external connectors ...
Page 472: ...472 Upgrade and Maintenance Manual TX140 S1 System board and components ...
Page 568: ...568 Upgrade and Maintenance Manual TX140 S1 Cabling ...


