134
Upgrade and Maintenance Manual
TX140
S2
Hard disk drives / solid state drives
7.3.3
Installing 3.5-inch HDD modules
7.3.3.1
Preliminary steps
Ê
If applicable,
"Removing the HDD bay cover" on page 55
Ê
Locate the correct drive bay as described in section
"3.5-inch HDD
configurations" on page 133
.
7.3.3.2
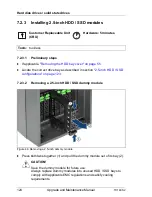
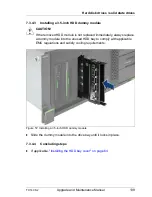
Removing a 3.5-inch HDD dummy module
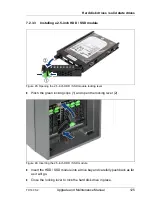
Figure 53: Removing a 3.5-inch dummy module
Ê
Press in on the locking tabs on both sides of the dummy module to
disengage the locking mechanism (1).
Customer Replaceable Unit
(CRU)
Hardware: 5 minutes
Tools:
tool-less
Summary of Contents for PRIMERGY TX140 S2
Page 30: ...30 Upgrade and Maintenance Manual TX140 S2 Before you start ...
Page 98: ...98 Upgrade and Maintenance Manual TX140 S2 Basic software procedures ...
Page 120: ...120 Upgrade and Maintenance Manual TX140 S2 Power supply ...
Page 148: ...148 Upgrade and Maintenance Manual TX140 S2 Hard disk drives solid state drives ...
Page 158: ...158 Upgrade and Maintenance Manual TX140 S2 System fan and air duct ...
Page 208: ...208 Upgrade and Maintenance Manual TX140 S2 Expansion cards and backup units ...
Page 216: ...216 Upgrade and Maintenance Manual TX140 S2 Main memory ...
Page 314: ...314 Upgrade and Maintenance Manual TX140 S2 Cabling ...
Page 332: ...332 Upgrade and Maintenance Manual TX140 S2 Appendix ...


