254
Upgrade and Maintenance Manual
TX140
S2
System board and components
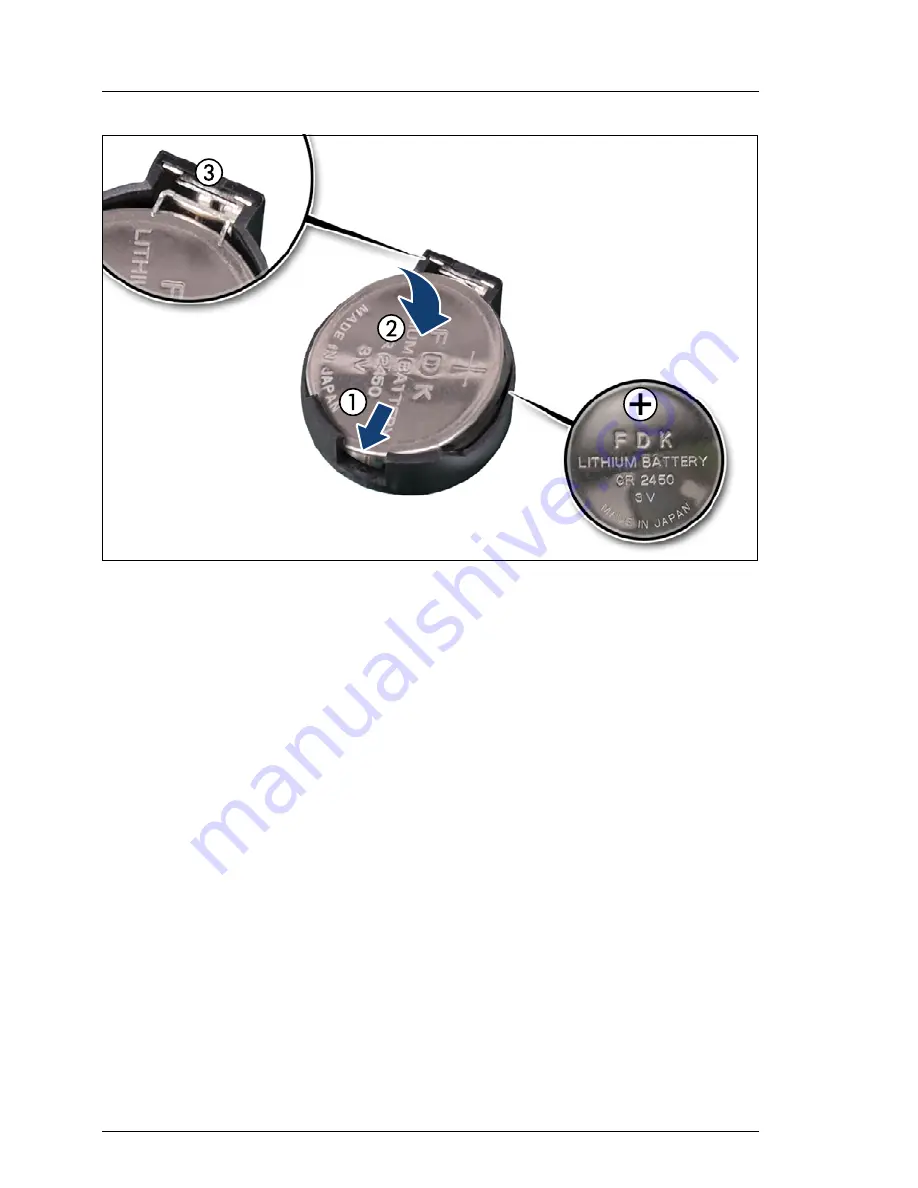
Figure 159: Installing the CMOS battery
Ê
At a slight angle, fit the new CMOS battery into its socket as shown (1).
V
CAUTION!
Ensure to insert the CMOS battery with the positive pole (label side)
facing up as shown (see close-up).
Ê
Fold down the CMOS battery (2) until it locks in place.
Ê
Ensure that the locking spring (3) is properly engaged.
14.2.3 Concluding steps
Ê
Dispose of the CMOS battery in accordance with local regulations
concerning special waste.
Ê
"Reassembling" on page 58
Ê
"Connecting the server to the mains" on page 67
Ê
"Verifying system information backup / restore" on page 79
Ê
"Verifying the system time settings" on page 87
Ê
"Switching on the server" on page 68
Summary of Contents for PRIMERGY TX140 S2
Page 30: ...30 Upgrade and Maintenance Manual TX140 S2 Before you start ...
Page 98: ...98 Upgrade and Maintenance Manual TX140 S2 Basic software procedures ...
Page 120: ...120 Upgrade and Maintenance Manual TX140 S2 Power supply ...
Page 148: ...148 Upgrade and Maintenance Manual TX140 S2 Hard disk drives solid state drives ...
Page 158: ...158 Upgrade and Maintenance Manual TX140 S2 System fan and air duct ...
Page 208: ...208 Upgrade and Maintenance Manual TX140 S2 Expansion cards and backup units ...
Page 216: ...216 Upgrade and Maintenance Manual TX140 S2 Main memory ...
Page 314: ...314 Upgrade and Maintenance Manual TX140 S2 Cabling ...
Page 332: ...332 Upgrade and Maintenance Manual TX140 S2 Appendix ...


