67
C a r e a n d M a i n t e n a n c e
machine and remove it as soon as possible or have your
notebook hand-inspected by security personnel. Secu-
rity officials may require you to turn your notebook
On. Make sure you have a charged battery on hand.
■
When traveling with the hard drive removed, wrap the
drive in a non-conducting materials (cloth or paper). If
you have the drive checked by hand, be ready to install
the drive if needed. Never put your hard drive through a
metal detector. Have your hard drive hand-inspected by
security personnel. You can however, put your hard
drive through a properly tuned X-ray machine.
■
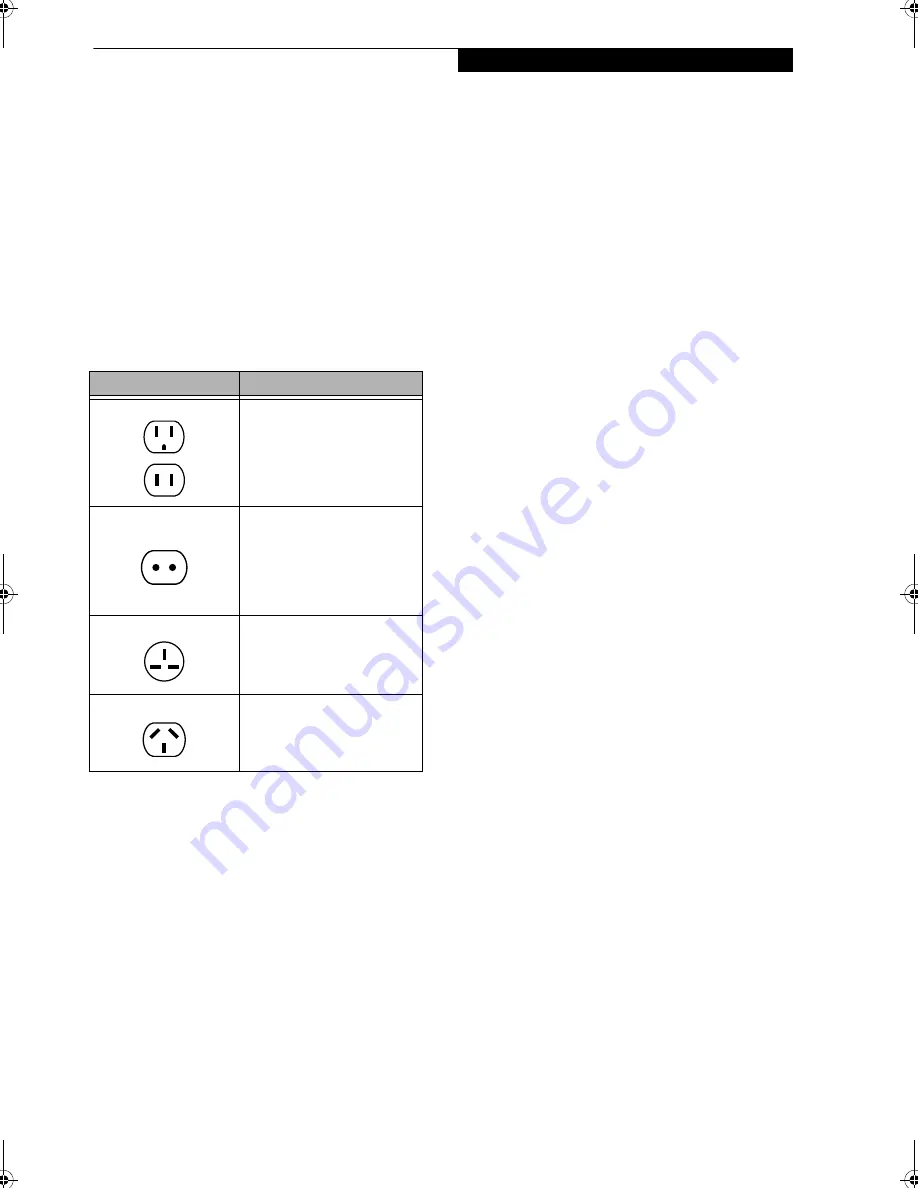
Take the necessary plug adapters if you're traveling over-
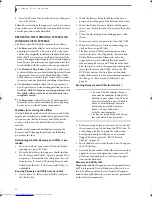
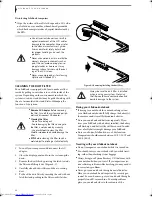
seas. Check the following diagram to determine which
plug adapter you'll need or ask your travel agent.
BATTERIES
Caring for your Batteries
■
Always handle batteries carefully.
■
Do not short-circuit the battery terminals (that is, do
not touch both terminals with a metal object). Do not
carry lose batteries in a pocket or purse where they may
mix with coins, keys, or other metal objects. Doing so
may cause an explosion or fire.
■
Do not drop, puncture, disassemble, mutilate or incin-
erate the battery.
■
Recharge batteries only as described in this manual and
only in ventilated areas.
■
Do not leave batteries in hot locations for more than a
day or two. Intense heat can shorten battery life.
■
Do not leave a battery in storage for longer than 6
months without recharging it.
Increasing Battery Life
■
Power your LifeBook notebook through the AC or
optional auto/airline adapter whenever possible.
■
If your notebook is running on battery power all day,
connect it to the AC adapter overnight to recharge the
battery.
■
Keep brightness to the lowest level comfortable.
■
Set the power management for maximum battery life.
■
Put your notebook in Suspend mode when it is turned
on and you are not actually using it.
■
Limit your media drive access.
■
Disable the Media Player auto insert notification
function.
■
Always use fully charged batteries.
■
Eject ExpressCards when not in use.
FLOPPY DISKS AND DRIVES
Caring for your Floppy Disks
If you have an optional external floppy disk drive:
■
Avoid using the floppy disks in damp and dusty
locations.
■
Never store a floppy disk near a magnet or magnetic
field.
■
Do not use a pencil or an eraser on a disk or disk label.
■
Avoid storing the floppy disks in extremely hot or cold
locations, or in locations subject to severe temperature
changes. Store at temperatures between 50º F (10ºC)
and 125ºF (52ºC).
■
Do not touch the exposed part of the disk behind the
metal shutter.
■
Never use the floppy disk drive with any liquid, metal,
or other foreign matter inside the floppy disk drive
or disk.
■
Never disassemble your floppy disk drive.
MEDIA CARE
Caring for your Media (DVD/CD/CD-R)
Media discs are precision devices and will function reli-
ably if given reasonable care.
■
Always store your media disc in its case when it is not in
use.
■
Always handle discs by the edges and avoid touching the
surface.
■
Avoid storing any media discs in extreme temperatures.
■
Do not bend media discs or set heavy objects on them.
■
Do not spill liquids on media discs.
■
Do not scratch media discs.
Outlet Type
Location
United States, Canada,
parts of Latin America,
Mexico, Japan, Korea,
the Philippines, Taiwan
Russia and the Commonwealth
of Independent States (CIS),
most of Europe, parts of Latin
America, the Middle East, parts
of Africa, Hong Kong, India,
most of South Asia
United Kingdom,
Ireland, Malaysia, Singapore,
parts of Africa
China, Australia,
New Zealand
Elf Lite S7211.book Page 67 Thursday, September 13, 2007 1:34 PM
Summary of Contents for S7211 - LifeBook - Core 2 Duo GHz
Page 1: ...Fujitsu LifeBook S7211 Notebook User s Guide ...
Page 2: ......
Page 8: ...L i f e B o o k S 7 0 0 0 N o t e b o o k ...
Page 9: ...1 Preface ...
Page 10: ...L i f e B o o k S 7 0 0 0 N o t e b o o k ...
Page 12: ...2 L i f e B o o k S 7 0 0 0 N o t e b o o k ...
Page 13: ...3 2 Getting to Know Your LifeBook Notebook ...
Page 14: ...4 L i f e B o o k S 7 0 0 0 N o t e b o o k ...
Page 34: ...24 L i f e B o o k S 7 0 0 0 N o t e b o o k ...
Page 35: ...25 3 Getting Started ...
Page 36: ...26 L i f e B o o k S 7 0 0 0 N o t e b o o k ...
Page 44: ...34 L i f e B o o k S 7 0 0 0 N o t e b o o k ...
Page 45: ...35 4 User Installable Features ...
Page 46: ...36 L i f e B o o k S 7 0 0 0 N o t e b o o k ...
Page 57: ...47 5 Troubleshooting ...
Page 58: ...48 L i f e B o o k S 7 0 0 0 N o t e b o o k ...
Page 72: ...62 L i f e B o o k S 7 0 0 0 N o t e b o o k ...
Page 73: ...63 6 Care and Maintenance ...
Page 74: ...64 L i f e B o o k S 7 0 0 0 N o t e b o o k ...
Page 79: ...69 7 System Specifications ...
Page 80: ...70 L i f e B o o k S 7 0 0 0 N o t e b o o k ...
Page 84: ...74 L i f e B o o k S 7 0 0 0 N o t e b o o k ...
Page 85: ...75 8 Glossary ...
Page 86: ...76 L i f e B o o k S 7 0 0 0 N o t e b o o k ...
Page 95: ...85 Appendix Integrated Wireless LAN User s Guide Optional device ...
Page 96: ...86 L i f e B o o k S 7 0 0 0 N o t e b o o k ...
Page 108: ...98 L i f e B o o k S 7 0 0 0 N o t e b o o k ...
Page 109: ......
Page 110: ......
Page 111: ......
Page 112: ......

