Cleaning the Inside of the ScanSnap
401
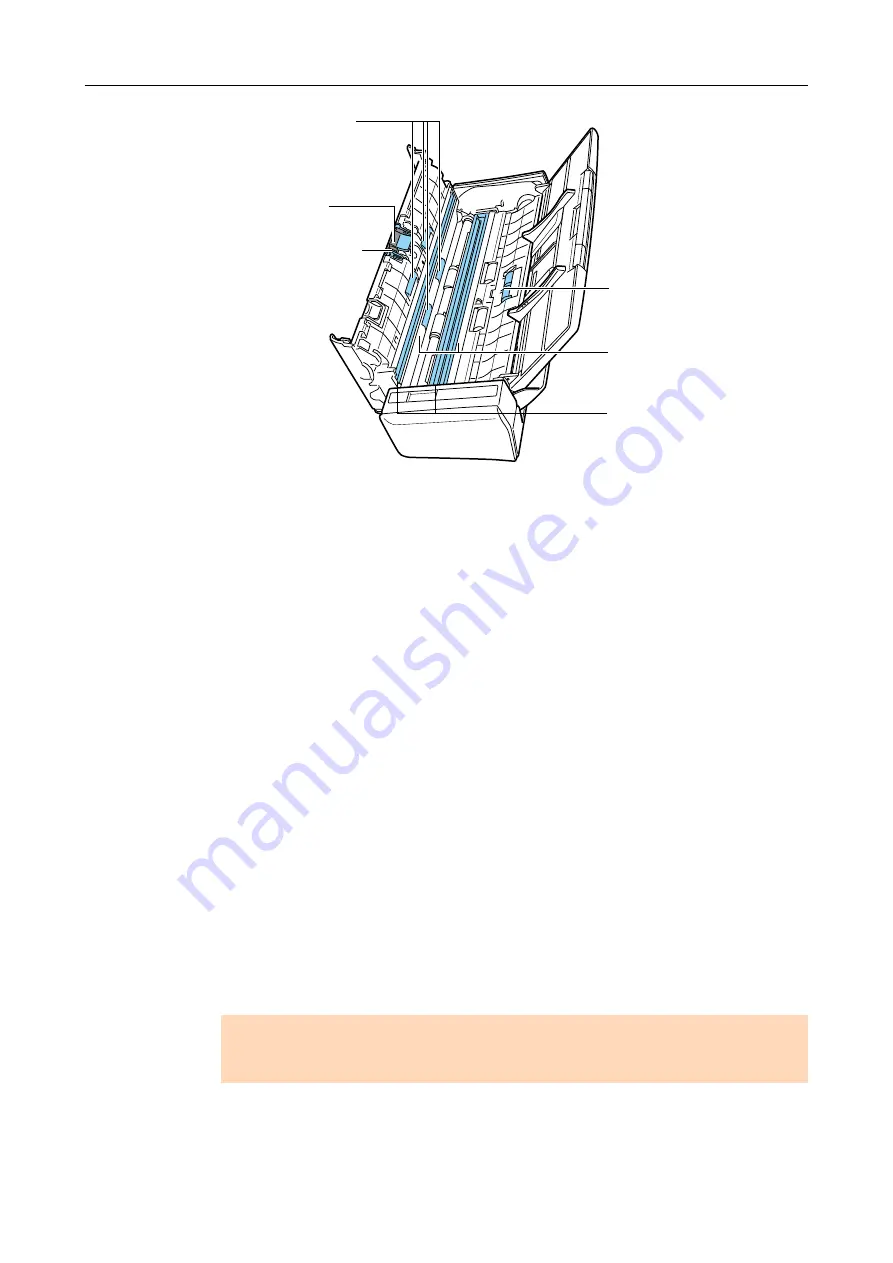
Idler roller (X 4, located on the ADF top section)
Gently wipe the dirt and dust off the rollers as you rotate them manually. Be
careful not to damage the surface of the rollers. Make sure that it is cleaned
properly because residue on the roller will affect the feeding performance.
Pad assy (X 1, located on the ADF top section)
Gently wipe the rubber pads downwards. Be careful not to get your hand or the
cloth caught on the pick spring (metal part).
Pick roller (X 1)
Gently wipe the dirt and dust off the roller as you rotate it manually. Be careful not
to damage the surface of the roller. Make sure that it is cleaned properly because
residue on the roller will affect the feeding performance.
Glass (X 2, one on the ADF top section and one on its opposite side)
Gently wipe the dirt and dust off the surface of the glass sections. Make sure that
it is cleaned properly because dirty glass can cause vertical lines to appear in the
scanned image.
White backing strip (X 2, one on the ADF top section and one on its opposite side)
White strips along the edge of the glass. Clean the surface gently with a soft cloth.
2.
Clean the feed roller and eject roller.
1.
Connect the power cable (or the USB bus power cable) to the ScanSnap and the
computer, then press the [Scan] button for 3 seconds with the ADF top section open.
ATTENTION
Connect the power cable or the USB bus power cable only when cleaning the feed rollers and
eject rollers.
Pick spring (metal part)
*gray part
Idler roller (×4)
Glass (×2)
(including the one on the ADF
top section)
Pick roller
White backing strip (×2)
(including the one on the ADF
top section)
Pad assy


