7
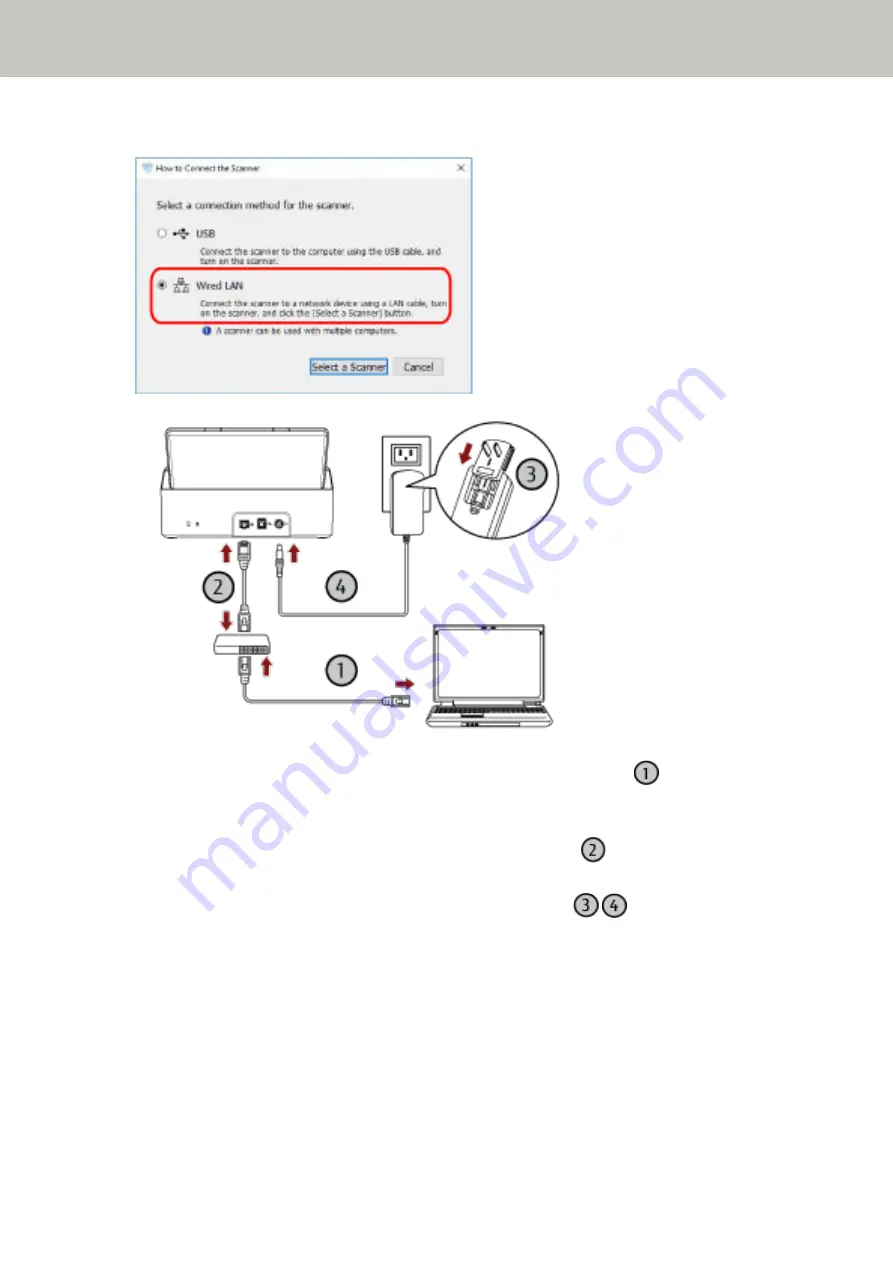
Select [Wired LAN] and connect the scanner to the computer as follows.
a
Connect the computer to a network device via a wired LAN or Wi-Fi (
).
For details about how to connect the computer to the network, refer to the computer manual.
b
Connect the scanner to the network device via a wired LAN (
).
c
Connect the power cable to the scanner and the AC outlet (
,
).
d
Turn on the scanner.
For details, refer to
How to Turn the Power ON (page 29)
8
Click the [Select a Scanner] button in the [How to Connect the Scanner] window.
The [Scanner Selection Tool] window appears.
9
Click the [Set an IP Address] button.
A message appears, prompting you to connect the scanner to the computer via the USB cable.
Scanner Setup
24
Summary of Contents for SP-1130Ne
Page 1: ...P3PC 7082 01ENZ2 FUJITSU Image Scanner SP 1130Ne Operator s Guide ...
Page 35: ...2 Lift up the stacker extension 1 towards you Basic Operations 35 ...
Page 36: ...3 Lift up the stacker extension 2 towards you Basic Operations 36 ...
Page 126: ...4 Click the OK button The password is set Scanner Settings Software Operation Panel 126 ...
Page 128: ...The password is cleared Scanner Settings Software Operation Panel 128 ...
Page 130: ...4 Click the OK button The password is set Scanner Settings Software Operation Panel 130 ...
Page 141: ...Outer Dimensions The outer dimensions are as follows Unit mm in Appendix 141 ...


