Chapter 6
Storage Devices Replacement
6-5
6.1.3
Installing the Hard Disk Drive
Caution –
Do not force
the hard disk drive into the slot. Doing so can cause damage
to the component and server.
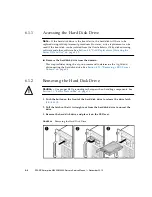
1. Pull the latch so that it is straight out from the drive.
2. Align the drive in the slot and push it gently into position until it stops.
3. Secure the latch.
6.1.4
Securing the Server
1. Add the hard disk drive to the domain.
This step includes using the
cfgadm
command to connect and confirm the hard
disk drive has been added to the domain. See
Section 4.2.3, “Adding a FRU Into a
2. Verify the state of the status LEDs on the hard disk drive.
Summary of Contents for SPARC Enterprise M4000
Page 4: ......
Page 62: ...2 38 SPARC Enterprise M4000 M5000 Servers Service Manual December 2010 ...
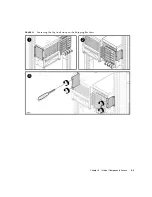
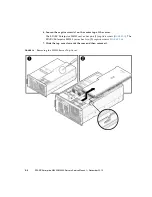
Page 89: ...Chapter 5 Internal Components Access 5 7 FIGURE 5 4 Removing the M5000 Server Top Cover ...
Page 126: ...6 34 SPARC Enterprise M4000 M5000 Servers Service Manual December 2010 ...
Page 132: ...7 6 SPARC Enterprise M4000 M5000 Servers Service Manual December 2010 ...
Page 158: ...8 26 SPARC Enterprise M4000 M5000 Servers Service Manual December 2010 ...
Page 245: ...Chapter 14 Backplane Unit Replacement 14 11 FIGURE 14 4 Removing the M5000 Server Backplane ...
Page 248: ...14 14 SPARC Enterprise M4000 M5000 Servers Service Manual December 2010 ...
Page 256: ...15 8 SPARC Enterprise M4000 M5000 Servers Service Manual December 2010 ...
Page 288: ...E 6 SPARC Enterprise M4000 M5000 Servers Service Manual December 2010 ...
Page 304: ...F 16 SPARC Enterprise M4000 M5000 Servers Service Manual December 2010 ...
Page 308: ...G 4 SPARC Enterprise M4000 M5000 Servers Service Manual December 2010 ...

