background image

Preface

xvii

Product Handling

Maintenance

Warning –

Certain tasks in this manual should only be performed by a certified

service engineer. User must not perform these tasks. Incorrect operation of these
tasks may cause electric shock, injury, or fire.

Installation and reinstallation of all components, and initial settings

Removal of front, rear, or side covers

Mounting/de-mounting of optional internal devices

Plugging or unplugging of external interface cards

Maintenance and inspections (repairing, and regular diagnosis and maintenance)

Caution –

The following tasks regarding this product and the optional products

provided from Fujitsu should only be performed by a certified service engineer.
Users must not perform these tasks. Incorrect operation of these tasks may cause
malfunction.

Unpacking optional adapters and such packages delivered to the users

Plugging or unplugging of external interface cards

Remodeling/Rebuilding

Caution –

Do not make mechanical or electrical modifications to the equipment.

Using this product after modifying or reproducing by overhaul may cause
unexpected injury or damage to the property of the user or bystanders.

Summary of Contents for SPARC Enterprise T5120

Page 1: ......

Page 2: ......

Page 3: ...SPARC EnterpriseTM T5120 and T5220 Servers Installation Guide Part No 875 4191 12 July 2009 Revision A Manual Code C120 E462 03EN ...

Page 4: ...demarks of Fujitsu Limited All SPARC trademarks are used under license and are registered trademarks of SPARC International Inc in the U S and other countries Products bearing SPARC trademarks are based upon architecture developed by Sun Microsystems Inc SPARC64 is a trademark of SPARC International Inc used under license by Fujitsu Microelectronics Inc and Fujitsu Limited SSH is a registered trad...

Page 5: ...ce et sont des marques de fabrique ou des marques déposées de SPARC International Inc aux Etats Unis et dans d autres pays Les produits portant les marques SPARC sont basés sur une architecture développée par Sun Microsystems Inc SPARC64 est une marques déposée de SPARC International Inc utilisée sous le permis par Fujitsu Microelectronics Inc et Fujitsu Limited SSH est une marque déposée registre...

Page 6: ......

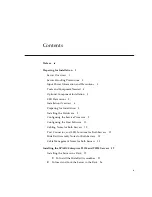
Page 7: ...stallation 8 Installing the Hardware 8 Configuring the Service Processor 9 Configuring the Host Software 10 Cabling Notes for Both Servers 10 Port Connector and LED Locations for Both Servers 12 Slide Rail Assembly Notes for Both Servers 15 Cable Management Notes for Both Servers 18 Installing the SPARC Enterprise T5120 and T5220 Servers 19 Installing the Servers in a Rack 19 To Install the Slide ...

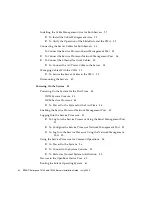
Page 8: ... in the CMA 39 Dismounting the Servers 40 Powering On the System 43 Powering On the System for the First Time 43 ILOM System Console 43 ILOM Service Processor 44 To Power On the System for the First Time 44 Enabling the Service Processor Network Management Port 49 Logging Into the Service Processor 51 To Log Into the Service Processor Using the Serial Management Port 51 To Configure the Service Pr...

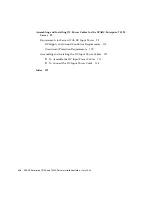
Page 9: ... the Express Rail Rackmounting Kit 74 Installing the Servers in a Rack With Express Rails 76 To Install the Slide Rail Assemblies 76 To Insert and Lock the Server in the Rack 81 Installing the Cable Management Arm 83 Dismounting the Server 84 Assembling and Installing DC Power Cables for the SPARC Enterprise T5120 Server 85 Requirements for Servers With DC Input Power 85 DC Supply and Ground Condu...

Page 10: ... the SPARC Enterprise T5220 Server 99 Requirements for Servers With DC Input Power 99 DC Supply and Ground Conductor Requirements 100 Overcurrent Protection Requirements 100 Assembling and Installing the DC Input Power Cables 101 To Assemble the DC Input Power Cables 101 To Connect the DC Input Power Cords 104 Index 107 ...

Page 11: ...ts except hard drives must be installed by qualified service technicians only For Safe Operation This manual contains important information regarding the use and handling of this product Read this manual thoroughly Pay special attention to the section Notes on Safety on page xvi Use the product according to the instructions and information available in this manual Keep this manual handy for furthe...

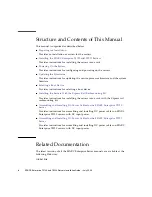
Page 12: ...oot Device Provides instructions for selecting a boot device Installing the Servers With the Express Rail Rackmounting Kit Provides instructions for installing the servers into a rack with the Express rail rackmounting kit Assembling and Installing DC Power Cables for the SPARC Enterprise T5120 Server Provides instructions for assembling and installing DC power cables on SPARC Enterprise T5120 ser...

Page 13: ...E458 Important Safety Information for Hardware Systems Safety information that is common to all SPARC Enterprise series servers C120 E391 SPARC Enterprise T5120 and T5220 Servers Safety and Compliance Guide Safety and compliance information that is specific to the servers C120 E461 SPARC Enterprise PRIMEQUEST Common Installation Planning Manual Requirements and concepts of installation and facilit...

Page 14: ...de Information and procedures for accessing ILOM 3 0 functions using the ILOM web interface C120 E574 Integrated Lights Out Manager ILOM 3 0 CLI Procedures Guide Information and procedures for accessing ILOM 3 0 functions using the ILOM CLI C120 E575 Integrated Lights Out Manager ILOM 3 0 SNMP and IPMI Procedures Guide Information and procedures for accessing ILOM 3 0 functions using SNMP or IPMI ...

Page 15: ...com Text Conventions The settings on your browser might differ from these settings Typeface Meaning Examples AaBbCc123 The names of commands files and directories on screen computer output Edit your login file Use ls a to list all files You have mail AaBbCc123 What you type when contrasted with on screen computer output su Password AaBbCc123 Book titles new words or terms words to be emphasized Re...

Page 16: ...the user does not perform the procedure correctly Caution This indicates a hazardous situation that could result in minor or moderate personal injury if the user does not perform the procedure correctly This signal also indicates that damage to the product or other property may occur if the user does not perform the procedure correctly Caution This indicates that hazardous voltages are present To ...

Page 17: ...wed by an alert statement A space of one line precedes and follows an alert statement Caution The following tasks regarding this product and the optional products provided from Fujitsu should only be performed by a certified service engineer Users must not perform these tasks Incorrect operation of these tasks may cause malfunction Also important alert messages are shown in Important Alert Message...

Page 18: ...k of electric shock and danger to personal health follow the instructions Task Warning Installation Damage Deploy the antitilt feature on the rack before beginning an installation The SPARC Enterprise T5220 server weighs approximately 55 lb 25 kg Two people are required to lift and mount the system into a rack enclosure when using the procedures in this book When completing a two person procedure ...

Page 19: ...d inspections repairing and regular diagnosis and maintenance Caution The following tasks regarding this product and the optional products provided from Fujitsu should only be performed by a certified service engineer Users must not perform these tasks Incorrect operation of these tasks may cause malfunction Unpacking optional adapters and such packages delivered to the users Plugging or unpluggin...

Page 20: ...erprise T5120 and T5220 Servers Installation Guide July 2009 Alert Label The following is a label attached to this product Never peel off the label The following label provides information to the users of this product ...

Page 21: ...ment or if you find any unclear statements in the document please state your points specifically on the form at the following URL For Users in U S A Canada and Mexico https download computers us fujitsu com For Users in Other Countries http www fujitsu com global contact computing sparce_index ht ml ...

Page 22: ...xx SPARC Enterprise T5120 and T5220 Servers Installation Guide July 2009 ...

Page 23: ... on page 5 Installation Overview on page 6 Preparing for Installation on page 8 Installing the Hardware on page 8 Configuring the Service Processor on page 9 Configuring the Host Software on page 10 Cabling Notes for Both Servers on page 10 Port Connector and LED Locations for Both Servers on page 12 Slide Rail Assembly Notes for Both Servers on page 15 Cable Management Notes for Both Servers on p...

Page 24: ...tallation Guide July 2009 FIGURE SPARC Enterprise T5120 Server FIGURE SPARC Enterprise T5220 Server Related Information SPARC Enterprise T5120 and T5220 Servers Getting Started Guide SPARC Enterprise T5120 and T5220 Servers Getting Started Guide DC ...

Page 25: ...n completing a two person procedure always communicate your intentions clearly before during and after each step to minimize confusion Related Information Input Power Information and Precautions on page 3 SPARC Enterprise T5120 and T5220 Servers Getting Started Guide SPARC Enterprise T5120 and T5220 Servers Getting Started Guide DC Input Power Information and Precautions The SPARC Enterprise T5120...

Page 26: ...s input power from one of the power supplies Failure of one of the power supplies Service actions which require removal of one of the power supplies Refer to the SPARC Enterprise T5120 and T5220 Servers Site Planning Guide for input power specifications Note Input AC DC power cables To avoid missing initialization messages do not attach power cables to the power supplies until you have finished co...

Page 27: ...stalled see the SPARC Enterprise T5120 and T5220 Servers Service Manual for installation instructions Note The list of optional components can be updated without notice See the product web pages for the most current list of components supported in the server Related Information SPARC Enterprise T5120 and T5220 Servers Getting Started Guide SPARC Enterprise T5120 and T5220 Servers Getting Started G...

Page 28: ...nicians place components on an antistatic surface such as an antistatic discharge mat an antistatic bag or a disposable antistatic mat Wear an antistatic grounding strap connected to a metal surface on the chassis when you work on system components Related Information Installation Overview on page 6 Installation Overview This installation guide provides procedures that are to be performed in the f...

Page 29: ...Preparing for Installation 7 FIGURE Installation Overview Figure Legend 1 Preparing for installation 2 Installing the hardware 3 Configuring the service processor 4 Configuring the host software ...

Page 30: ...memory install them prior to mounting the server in a rack Related Information Optional Component Installation on page 5 Installing the Hardware 1 Mount the server into a rack or cabinet See Installing the Servers in a Rack on page 19 for both the 1U and 2U servers Or if you ordered the express rail rackmounting kit which has the same rack rail assemblies for both servers see Installing the Server...

Page 31: ...43 Caution There is a potential for electric shock if the server and related equipment are not properly grounded Note The service processor runs on the 3 3V standby voltage As soon as AC power is connected to the system the service processor immediately powers on runs diagnostics and initializes the ILOM firmware Related Information Configuring the Service Processor on page 9 Configuring the Servi...

Page 32: ...Enterprise T5120 and T5220 Server Product Notes for a list of required patches 3 Load additional software from the Solaris media kit optional The Solaris media kit sold separately includes several CDs containing software to help you operate configure and administer your server Refer to the documentation provided with the media kit for a complete listing of included software and detailed installati...

Page 33: ...al devices This port appears as ttya in Solaris OS and OpenBoot messages This port is not connected to the service processor serial management port USB Ports USB ports support hot plugging You can connect and disconnect USB cables and peripheral devices while the system is running without affecting system operations You can only perform USB hot plug operations while the OS is running USB hot plug ...

Page 34: ... are shown in the figures below FIGURE Rear Panel Cable Connectors and LEDs on the SPARC Enterprise T5120 Server USB ports 2 and 3 are located on the front panel Figure Legend 1 Power supply 0 10 Gbit Enet port NET2 2 Power supply 1 11 Gbit Enet port NET3 3 Locator LED button 12 USB port 0 4 Service Required LED 13 USB port 1 5 Power OK LED 14 TTYA serial port 6 Service processor serial management...

Page 35: ...ce Required LED Power OK LED Power button 5 Hard drive HDD3 2 Hard drive HDD0 6 USB port 2 3 Hard drive HDD1 7 USB port 3 4 Hard drive HDD2 Figure Legend 1 Power supply 0 11 Gbit Enet port NET3 2 Power supply 1 12 USB port 0 3 Locator LED button 13 USB port 1 4 Service Required LED 14 TTYA serial port 5 Power OK LED 15 PCIe slot 3 6 Service processor serial management port 16 PCIe or XAUI slot 0 7...

Page 36: ...tting Started Guide DC SPARC Enterprise T5120 and T5220 Servers Service Manual 8 Gbit Enet port NET0 18 PCIe or XAUI slot 1 9 Gbit Enet port NET1 19 PCIe slot 5 10 Gbit Enet port NET2 20 PCIe slot 2 Figure Legend 1 System status indicators Top to bottom Locator LED button Service Required LED Power OK LED Power button 7 Hard drive HDD5 2 Hard drive HDD0 8 Hard drive HDD6 3 Hard drive HDD1 9 Hard d...

Page 37: ...The removable mounting bracket of the SPARC Enterprise T5120 rails slides 13 in 33 cm out of the slide rail then locks in place The removable mounting bracket of the SPARC Enterprise T5220 rails slide 14 in 35 5 cm before locking Each slide rail assembly consists of a three section slide rail and a removable mounting bracket FIGURE Sections of the Slide Rail Assembly on the SPARC Enterprise T5220 ...

Page 38: ...he removable mounting bracket slides 14 in 35 5 cm out of the slide rail then locks in place If you unlock the mounting bracket at this point it slides an additional 12 in 30 cm before separating from the slide rail You can then mount the mounting bracket to the right or left side of the server chassis Note that there are five locks in a slide rail assembly Four are on the mounting bracket One loc...

Page 39: ...Preparing for Installation 17 FIGURE Locating the Locks on the Slide Rail Assembly for the SPARC Enterprise T5220 Server ...

Page 40: ...th Servers on page 18 Installing the Servers in a Rack on page 19 Cable Management Notes for Both Servers The same cable management arm CMA is included with the rackmounting kit for each server The CMA clips onto the slide rails Use the velcro straps to secure cabling to the CMA FIGURE Cable Management Arm for Both Servers ...

Page 41: ...sections Installing the Servers in a Rack on page 19 Installing the Cable Management Arm for Both Servers on page 27 Connecting the Server Cables for Both Servers on page 34 Managing Cables With the CMA on page 39 Dismounting the Servers on page 40 Note References to left and right are from your viewpoint as you face either the front or rear of the equipment Installing the Servers in a Rack Note E...

Page 42: ...taches to the server chassis See Slide Rail Assembly Notes for Both Servers on page 15 for more information about slide rail assemblies Related Information Slide Rail Assembly Notes for Both Servers on page 15 To Install the Slide Rail Assemblies on page 20 To Install the Slide Rail Assemblies 1 Pull both mounting brackets completely out of their respective slide rails a Simultaneously press and h...

Page 43: ...elease button out in the direction shown then slide the mounting bracket out of the slide rail FIGURE Location of the Mounting Bracket Release Button Either Server d Press the metal lever labeled Push on the middle section of the sliding rail then push the middle section back into the rack ...

Page 44: ...Middle Section Either Server 2 Attach a mounting bracket to the right side of the chassis a Position the mounting bracket against the chassis Ensure that the slide rail lock is at the front and the three keyed openings on the mounting bracket are aligned with the three locating pins on the side of the chassis ...

Page 45: ... has engaged the mounting bracket lock 3 Attach the second mounting bracket to the left side of the chassis 4 Determine which rack hole numbers to use when attaching the slide rails to the rack posts If the server is two rack units high 2U the slide rails occupy the lower half of the 2U space 5 Determine which screws you will use to mount the slide rails If your rack has threaded mounting holes in...

Page 46: ...erver b Adjust the length of the slide rail by sliding the rear mounting flange to reach the outside edge of the rear rack post c Loosely attach the rear of the slide rail to the rear rack post with two screws 7 Attach the second slide rail to the left rack posts in a similar manner Do not tighten the screws 8 Use the slide rail spacing tool to adjust the distance between the slide rails a At the ...

Page 47: ... c Slide the end of the rail to the right or left as needed to allow the ends of the tool to enter the ends of both rails The distance between the rails is now equal to the width of the server with mounting brackets d Tighten the screws to lock the ends of the rails in place e At the rear of the rack repeat Step a through Step d for the rear ends of the rails Related Information To Insert and Lock...

Page 48: ...ough to overturn an equipment rack Caution The 2U server weighs approximately 55 lb 25 kg Two people are required to lift and mount the server into a rack enclosure when using the procedures in this chapter Caution Before continuing verify that the server is securely mounted in the rack and that the slide rails are locked to the mounting brackets 2 Deploy the antitilt bar if the chassis or rack ha...

Page 49: ...ement Arm for Both Servers on page 27 Installing the Cable Management Arm for Both Servers The rackmounting kit for each server comes with the same cable management arm CMA assembly The CMA installation and cable management procedures are the same for both servers See Cable Management Notes for Both Servers on page 18 for more information on the cable management arm ...

Page 50: ... Install the Cable Management Arm Caution Support the CMA during this installation Do not allow the assembly to hang by its own weight until it is secured by all three attachment points 1 Remove the tape from the CMA rail extension on the left of the CMA and remove the CMA rail extension 2 Attach the CMA rail extension to rear left slide rail At the rear of the rack plug the CMA rail extension int...

Page 51: ... the smaller extension is called the CMA Connector for Inner Member This extension attaches to the right mounting bracket The larger extension is called the CMA Connector for Outer Member and attaches to the right sliding rail 3 Insert the smaller extension into the clip located at the end of the mounting bracket Slide the smaller extension into the square hole on the middle in width of the clip t...

Page 52: ...30 SPARC Enterprise T5120 and T5220 Servers Installation Guide July 2009 FIGURE Mounting the Inner CMA Connector Either Server 4 Insert the larger extension into the end of the right sliding rail ...

Page 53: ...ervers 31 FIGURE Attaching the Outer CMA Connector Either Server 5 Insert the hinged plastic connector at the left side of the CMA fully into the CMA rail extension The plastic tab on the CMA rail extension locks the hinged plastic connector in place ...

Page 54: ...on To Verify the Operation of the Slide Rails and the CMA on page 32 Cable Management Notes for Both Servers on page 18 To Verify the Operation of the Slide Rails and the CMA Tip Two people are needed for this procedure one to move the server in and out of the rack and one to observe the cables and CMA 1 For a free standing rack deploy the antitilt bar ...

Page 55: ...mbly Either Server 4 Inspect any attached cables for binding or kinks 5 Verify that the CMA extends fully and does not bind in the slide rails 6 Verify that the server extends fully and locks in the maintenance position The server should stop after approximately 15 in 40 cm of travel 7 Pull both slide rail release buttons toward you simultaneously and slide the server back into the rack The server...

Page 56: ...g Cables With the CMA on page 39 Connecting the Server Cables for Both Servers To boot the server you must connect and configure the network and serial ports The procedures are given in the following sections Managing Cables With the CMA on page 39 Dismounting the Servers on page 40 The servers also have serial and USB ports available for connections to optional devices See Port Connector and LED ...

Page 57: ...ify the Operation of the Slide Rails and the CMA on page 32 To Connect the Service Processor Serial Management Port on page 35 To Connect the Service Processor Network Management Port on page 36 To Connect the Service Processor Serial Management Port The service processor serial management port is marked SER MGT This port is the farthest left RJ 45 port on the rear panel Note The cable and DB 9 RJ...

Page 58: ... SER MGT serial management port to the terminal device 2 When connecting either a DB 9 or a DB 25 cable use an adapter to perform the crossovers given for each connector Caution Do not attach a modem to this port Related Information Enabling the Service Processor Network Management Port on page 49 To Connect the Service Processor Network Management Port on page 36 To Connect the Service Processor ...

Page 59: ...ve access to a DHCP server on the network you can see the service processor get an IP address because the DHCP client is enabled by default Note The service processor network management port is configured by default to retrieve network settings with Dynamic Host Configuration Protocol DHCP and allow connections using Solaris Secure Shell SSH You might need to modify these settings for your network...

Page 60: ...the farthest left port in the 4 port network cluster 2 Connect Category 5 cables from your network switch or hub to the remaining Ethernet ports NET1 NET2 NET3 as needed FIGURE Service Processor Ethernet Network Ports Rear Panel Related Information To Connect the AC Power Cable to the Server on page 38 To Connect the AC Power Cable to the Server Powering on the system for the first time requires s...

Page 61: ... initializes as soon as the AC power cable is connected to the power source Go to Powering On the System for the First Time on page 43 for instructions on connecting the server to AC power Related Information Powering On the System for the First Time on page 43 Managing Cables With the CMA Managing the cables with the CMA is the same for both servers Related Information To Secure the Server Cables...

Page 62: ...operation of the slide rails and CMA and cable service loops Perform the steps in the following procedure again before continuing To Verify the Operation of the Slide Rails and the CMA on page 32 Related Information Dismounting the Servers on page 40 Dismounting the Servers To install or replace internal parts in the server you must first remove the server from the rack ...

Page 63: ...Installing the SPARC Enterprise T5120 and T5220 Servers 41 Related Information SPARC Enterprise T5120 and T5220 Servers Service Manual ...

Page 64: ...42 SPARC Enterprise T5120 and T5220 Servers Installation Guide July 2009 ...

Page 65: ...Solaris Operating System on page 61 Verifying System Functionality on page 65 Powering On the System for the First Time This section provides an overview and instructions for powering on your system the first time Related Information ILOM System Console on page 43 Enabling the Service Processor Network Management Port on page 49 Verifying System Functionality on page 65 ILOM System Console When yo...

Page 66: ...lizes and runs a higher level of diagnostics When you access the ILOM service processor using a device connected to the serial management port you see the output of the ILOM diagnostics By default the service processor configures the network management port automatically retrieving network configuration settings using the Dynamic Host Configuration Protocol DHCP and allowing connections using Secu...

Page 67: ...You can use the supplied RJ 45 crossover adapters with a standard RJ 45 cable to achieve the null modem configuration Note When you power on the server for the first time and you do not have a terminal or terminal emulator PC or workstation connected to the service processor serial management port you will not see system messages Optional Connect an Ethernet cable between the server s NET MGT port...

Page 68: ...nto the power supplies and into separate power sources To provide redundancy plug both power supplies into separate power sources Figure Legend 1 Power Cables 5 RJ 45 to DB 25 crossover adapter 2 Ethernet cables 6 RJ 45 to DB 9 crossover adapter 3 Service processor to ethernet 7 Terminal device 4 NET MGT to network optional ...

Page 69: ...hangeme After a brief delay the SP prompt is displayed At this point there are many commands you can perform using the Integrated Lights Out Manager interface Additional SP information such as how to change the password and how to set up the SP network parameters is available in the online documentation set 7 Power on the server and redirect the host output to display on the serial terminal device...

Page 70: ...ding to your network environment Host Name Enter the host name for the server IP Address Enter the IP address for this Ethernet interface Subnet Select Yes or No according to your network environment Subnet Netmask If subnet was Yes Enter the netmask for the subnet for your network environment IPv6 Specify whether or not to use IPv6 If you are not sure select No to configure the Ethernet interface...

Page 71: ... Enabling the Service Processor Network Management Port on page 49 Solaris OS documentation SPARC Enterprise T5120 and T5220 Servers Administration Guide Enabling the Service Processor Network Management Port The service processor network management port is not operational unless your network employs DHCP in which case the configuration in automatic If you network uses DHCP you can run this comman...

Page 72: ...gement Port on page 52 3 Commit the changes to the service processor parameters See Step 3 in To Configure the Service Processor Network Management Port on page 52 You can now use the network management port at any time to access the service processor See To Log Into the Service Processor Using the Network Management Port on page 55 Related Information Logging Into the Service Processor on page 51...

Page 73: ... Management Port After the service processor boots access the ILOM CLI to configure and manage the system The ILOM CLI prompt is displayed at the first time the service processor is booted The default configuration provides an ILOM CLI root user account The default root password is changeme Change the password using the service processor ILOM CLI password command 1 If this is the first time the sy...

Page 74: ...re the Service Processor Network Management Port Note If your network allows the use of DHCP this configuration is performed automatically the first time you boot the system Use this procedure only when You are unable to use DHCP on your network Warning password is set to factory default set SP users root password Enter new password Enter new password again hostname login root Password password no...

Page 75: ...DHCP or static IP address assignment SP network commitpending Commits the service processor to use the pending settings Configure these parameters with the set command The usage is as follows set target property value where SP network is the target and pendingipaddress xxx xxx xxx xxx for example is the property value 1 Configure the service processor using information from your network administra...

Page 76: ...t a service processor from a DHCP configuration to a static configuration set SP network pendingipaddress service processor IPaddr Set pendingipaddress to service processor IPaddr set SP network pendingipgateway gateway IPaddr Set pendingipgateway to gateway IPaddr set SP network pendingipnetmask 255 255 255 0 Set pendingipnetmask to 255 255 255 0 show SP network SP network Targets Properties comm...

Page 77: ...t on page 55 SPARC Enterprise T5120 and T5220 Servers Administration Guide To Log Into the Service Processor Using the Network Management Port Note You must configure the service processor parameters shown in To Configure the Service Processor Network Management Port on page 52 before you can use the network management port Open an SSH session and connect to the service processor by specifying its...

Page 78: ...ystem Initialization on page 58 To Power On the System 1 Perform the following steps to verify that there are no faults a Set the virtual keyswitch to diag mode so that POST will run in Service mode b To initiate the power on sequence type the start SYS command An ILOM CLI alert message appears on the system console This message indicates that the system has reset Copyright 2007 Sun Microsystems I...

Page 79: ...oot 4 Use the set SYS keyswitch_state normal command to return the virtual keyswitch to Normal mode default so that the system can power on and start the boot process start SP console Are you sure you want to start SP console y n y Serial console started To stop type 2007 12 14 16 34 53 385 0 1 0 INFO 2007 12 14 16 34 53 391 0 1 0 POST Passed all devices 2007 12 14 16 34 53 399 0 1 0 POST Return t...

Page 80: ... users can be connected to the console but only one can be attached Note For more information about POST output refer to the SPARC Enterprise T5120 and T5220 Servers Service Manual Related Information To Perform a Normal System Initialization on page 58 SPARC Enterprise T5120 and T5220 Servers Service Manual To Perform a Normal System Initialization 1 Type the start SYS command start SP console Ar...

Page 81: ...Devices in the OpenBoot Device Tree on page 60 Integrated Lights Out Manager ILOM 2 0 Supplement for SPARC Enterprise T5120 and T5220 Servers start SP console Are you sure you want to start SP console y n y Serial console started To stop type 0 1 0 0 1 0 SPARC Enterprise TM T5120 T5220 POST 4 27 x 2007 12 11 18 55 0 1 0 Network Interface Unit Tests Done 0 1 0 Functional CPU Tests Done 0 1 0 Extend...

Page 82: ...llers in stalled Physical Device Name Slot 0 c1t0d0 devices pci 0 pci 0 pci 2 scsi 0 sd 0 0 Slot 1 c1t1d0 devices pci 0 pci 0 pci 2 scsi 0 sd 1 0 Slot 2 c1t2d0 devices pci 0 pci 0 pci 2 scsi 0 sd 2 0 Slot 3 c1t3d0 devices pci 0 pci 0 pci 2 scsi 0 sd 3 0 TABLE Device Identifiers and Devices Device Identifiers Devices SYS MB CMPcpu_number Pstrand_number CPU strand Number 0 63 SYS MB RISERriser_numbe...

Page 83: ...ating System at Startup on page 63 SPARC Enterprise T5120 and T5220 Servers Administration Guide To Boot the Solaris Operating System 1 At the ok prompt boot from the disk that contains the Solaris OS If you know which disk to boot from skip this step and perform Step 2 If you need to determine which disk to boot from type the show disks command at the ok prompt to see the path to the configured d...

Page 84: ...i 8 scsi 2 disk 0 0 File and args Notice Unimplemented procedure encode unit in pci 7c0 pci 0 pci 2 pci 0 LSILogic sas 4 Loading ufs file system package 1 4 04 Aug 1995 13 02 54 FCode UFS Reader 1 12 00 07 17 15 48 16 Loading platform SUNW T5120 ufsboot Loading platform sun4v ufsboot Hostname hostname The system is coming up Please wait NIS domain name is x x x x starting rpc services rpcbind keys...

Page 85: ...T5220 Servers Administration Guide To Reset the System 1 If it is necessary to reset the system use the shutdown g0 i6 y command 2 It is not necessary to power the system off and on to simply reset the system Related Information To Power Cycle the System on page 63 SPARC Enterprise T5120 and T5220 Servers Administration Guide To Power Cycle the System If a simple reset does not clear a system prob...

Page 86: ...ediate and ungraceful shutdown use the stop force script SYS or stop script SYS commands These commands stop everything immediately so ensure that all data is saved before entering these commands 4 Type the start SYS command Note To force a power on sequence use the start script SYS command shutdown g0 i0 y svc startd The system is coming down Please wait svc startd 91 system services are now bein...

Page 87: ...ise T5120 and T5220 Servers Administration Guide Verifying System Functionality After powering on the system for the first time you can use the Sun Validation Test Suite Sun VTS software to verify the functionality and performance of any installed components as well as its network connections Related Information SunVTS documentation start SP console Are you sure you want to start SP console y n y ...

Page 88: ...66 SPARC Enterprise T5120 and T5220 Servers Installation Guide July 2009 ...

Page 89: ...Update the Firmware on page 68 flashupdate command The flashupdate command updates both the service processor firmware and the server firmware The flash image consists of the following components Service processor firmware OpenBoot PROM POST Reset config Sequencer Partition description Related Information To Update the Firmware on page 68 ...

Page 90: ... type the stop SYS command 4 Verify that the keyswitch_state parameter is set to normal 5 Type the load command The load command updates the service processor flash image and the host firmware The load command requires the following information IP address of a TFTP server on the network that can access the flash image ssh root xx xxx xx x Are you sure you want to continue connecting yes no yes Pas...

Page 91: ...to be reset It is recommended that a clean shutdown of the server be done prior to the upgrade procedure An upgrade takes about 6 minutes to complete ILOM will enter a special mode to load new firmware No other tasks can be performed in ILOM until the firmware upgrade is complete and ILOM is reset Are you sure you want to load the specified file y n y Do you want to preserve the configuration y n ...

Page 92: ...10HDX Listening on LPF eth0 00 14 4f 3f 8c af Sending on LPF eth0 00 14 4f 3f 8c af Sending on Socket fallback DHCPDISCOVER on eth0 to 255 255 255 255 port 67 interval 6 eth0 link up 100 Mbps Full Duplex auto negotiation complete DHCPDISCOVER on eth0 to 255 255 255 255 port 67 interval 15 Hostname hostname Starting portmap daemon portmap Initializing random number generator done INIT Entering runl...

Page 93: ...pts to boot from the system hard drive and if that fails from the on board NET0 Gigabit Ethernet interface This procedure assumes that you are familiar with the OpenBoot firmware and that you know how to enter the OpenBoot environment For more information see the SPARC Enterprise T5120 and T5220 Servers Administration Guide Note The serial management port on the ILOM card is preconfigured as the d...

Page 94: ... choose a nondefault boot device variable the Solaris OS specifies the full device path of the boot device Note You can specify the name of the program to be booted as well as the way the boot program operates For more information refer to the OpenBoot 4 x Command Reference Manual for your specific Solaris OS release This document is available at http www sun com documentation If you want to speci...

Page 95: ...ver installation proceed to Powering On the System on page 43 for first time power on Note The procedures in this section are the same for both the 1U and 2U servers The illustrations show a 2U server only as an example This chapter contains the following sections Slide Rail Assembly Notes for the Express Rail Rackmounting Kit on page 74 Installing the Servers in a Rack With Express Rails on page ...

Page 96: ...Each slide rail assembly consists of a three section slide rail and a removable mounting bracket FIGURE Sections of the Express Rail Slide Rail Assembly The front middle and rear sections form the slide rail The middle and rear sections have holes for mounting and adjust to fit rack depths from 24 in 61 cm to 36 5 in 93 cm The front section can be extended to allow movement of the server out of th...

Page 97: ...ket at this point it slides an additional 14 5 in 37 cm before separating from the slide rail You can then mount the mounting bracket to the right or left side of the server chassis Note that there are six locks in a slide rail assembly Four are on the mounting bracket Two locks are on the slide rail FIGURE Locating the Locks on the Slide Rail Assembly for the SPARC Enterprise T5220 Server ...

Page 98: ...lide rail assemblies which can be installed on either the right or left side of the rack A slide rail assembly consists of two parts a slide rail and a removable mounting bracket The slide rail attaches to the rack posts The mounting bracket attaches to the server chassis Related Information To Install the Slide Rail Assemblies on page 76 To Install the Slide Rail Assemblies 1 Pull both mounting b...

Page 99: ...il Rackmounting Kit 77 FIGURE Unlocking the Express Rail Slide Rail Assembly b Pull the mounting bracket out until it stops c Slide the mounting bracket release button to the left then slide the mounting bracket completely out of the slide rail ...

Page 100: ...g Bracket Release Button 2 Attach a mounting bracket to the right side of the server chassis a Position the mounting bracket against the chassis Ensure that the slide rail lock is at the front and the keyed openings on the mounting bracket are aligned with the locating pins on the side of the chassis ...

Page 101: ...cket Slide the mounting bracket toward the front of the chassis until the bracket locks into place with an audible click c Verify that all four locating pins are trapped in the keyed openings and that the third locating pin from the front has engaged the mounting bracket lock 3 Attach the second mounting bracket to the left side of the server chassis 4 Orient slide rails ensuring that the ball bea...

Page 102: ...tallation Guide July 2009 FIGURE Express Rail Slide Rails Orientation for Installation 5 Extend the slide rails outer section to fit the rack and attach the slide rails to the rack You hear an audible click when the rails securely attach to the rack ...

Page 103: ...Insert and Lock the Server in the Rack on page 81 To Insert and Lock the Server in the Rack 1 Deploy the antitilt feature if the rack is so equipped Caution The weight of the servers on extended slide rails can be enough to overturn an equipment rack Caution The 2U server weighs approximately 55 lb 25 kg Two people are required to lift and mount the server into a rack enclosure when using the proc...

Page 104: ...the ends of the mounting brackets into the sliding rails 3 Slide the server approximately halfway into the chassis FIGURE Inserting Express Rail Mounting Brackets Into the Slide Rails 4 Slide the green release tab 5 Push the server all the way into the rack until it locks into place ...

Page 105: ...rails are locked in the mounting brackets Related Information SPARC Enterprise T5120 and T5220 Servers Getting Started Guide SPARC Enterprise T5120 and T5220 Servers Getting Started Guide DC Installing the Cable Management Arm The rackmounting kit for each server comes with the same cable management arm CMA assembly The CMA installation procedures are the same for both servers See Installing the C...

Page 106: ...aging Cables With the CMA on page 39 Dismounting the Server Caution To prevent damage to your server do not move the rack while the server is mounted To install or replace internal parts in the server you must first remove the server from the rack For the removal procedure refer to the SPARC Enterprise T5120 and T5220 Servers Service Manual Related Information SPARC Enterprise T5120 and T5220 Serv...

Page 107: ... assembling the DC power cables for the SPARC Enterprise T5220 server Related Information Assembling and Installing the DC Input Power Cables on page 101 Requirements for Servers With DC Input Power The following restrictions apply to the SPARC Enterprise T5120 server with DC input power The DC version of the server must be installed in a restricted access location According to the intent of the N...

Page 108: ...connector for proper connection to the DC connectors supplied with the server Wago Type 721 Branch circuit cable insulation color Per applicable National Electrical Codes Grounding cable insulation color Green Yellow DC power source must meet TNV 2 requirements as defined by UL 60950 1 and IEC 60950 1 Note Depending on the DC power source the 48V or 60V negative terminal might be marked with a min...

Page 109: ...r Use one 20 A fast trip double pole DC rated circuit breaker for each power supply unit Note Overcurrent protection devices must meet applicable national and local electrical safety codes and be approved for the intended application Related Information Assembling and Installing the DC Input Power Cables on page 87 Assembling and Installing the DC Input Power Cables The following procedure describ...

Page 110: ...rom the DC power source through the circuit breakers 2 Identify the parts that you will use to assemble the DC input power cables For each cable you need the three parts shown in the figure below These items are provided in the shipping kit that came with your server TABLE Prerequisites Not Covered by the DC Cable Installation Procedure Prerequisite Condition Responsible Party Install a DC power s...

Page 111: ...d in the connection to your unit 48V or 60V negative terminal Chassis ground 48V or 60V Return positive terminal Note Depending on the DC power source the 48V or 60V negative terminal might be marked with a minus symbol and the 48V or 60V Return positive terminal might be marked with a positive symbol Figure Legend 1 Strain relief housing 2 DC input plug 3 Cage clamp operating lever ...

Page 112: ... From the Wire 5 Open the cage clamp for this section of the DC input plug by taking one of the following actions Insert the tip of the cage clamp operating lever into the rectangular hole directly above the hole in the DC input plug where you want to insert the first wire Press down on the cage clamp operating lever Insert a small slotted screwdriver into the rectangular hole directly above the h...

Page 113: ...Assembling and Installing DC Power Cables for the SPARC Enterprise T5120 Server 91 FIGURE Opening the DC Input Plug Cage Clamp Using the Cage Clamp Operating Lever Figure Legend 1 Top of input plug ...

Page 114: ...Clamp Using a Screwdriver 6 Feed the exposed section of the appropriate wire into the round hole in the DC input plug FIGURE Connector Wiring Assignments Figure Legend 1 Top of input plug Figure Legend 1 Top of connector 3 From chassis ground green yellow 2 From 48V or 60V return 4 From 48V or 60V ...

Page 115: ...connector 8 Repeat Step 5 and Step 7 for the other two wires to complete the assembly of the DC input power cable 9 Repeat this procedure to create as many DC input power cables as you need for your unit To Install the Strain Relief Housings 1 Insert the bottom portion of the strain relief housing into the notch on the DC input plug until it snaps into place Ensure that the strain relief housing s...

Page 116: ...he Strain Relief Housing 2 Route the three wires coming from the DC power source through the opening at the end of the bottom portion of the strain relief housing FIGURE Routing the Wires out of the Bottom Portion of the Strain Relief Housing 3 Insert a tie wrap into the bottom portion of the strain relief housing ...

Page 117: ...e wires and back out of the strain relief housing and tightening the tie wrap to secure the wires to the strain relief housing 5 Lower the top portion of the strain relief housing so that the three prongs on the top portion insert into the openings in the DC input plug Push the top and bottom portions of the strain relief housing together until they snap into place ...

Page 118: ... Cords to the Server on page 96 Connecting the DC Input Power Cords to the Server 1 Ensure that the circuit breaker to your power source is turned off Caution Do not proceed with these instructions until you have turned off the power from the DC power source through the circuit breakers 2 Route the power cables in the rack and secure the cables with nylon tie wraps ...

Page 119: ...or 60V return to the 48 v or 60V wires to the circuit breaker 5 Connect the power wiring to the server by plugging each power cable into the server power supply units 6 When you are ready to power up the server close the circuit breaker and following booting procedure described in Powering On the System for the First Time on page 43 Related Information Assembling and Installing the DC Input Power ...

Page 120: ...98 SPARC Enterprise T5120 and T5220 Servers Installation Guide July 2009 ...

Page 121: ...the DC Input Power Cables on page 87 Requirements for Servers With DC Input Power The following restrictions apply to the SPARC Enterprise T5220 server with DC input power The DC version of the server must be installed in a restricted access location According to the intent of the National Electrical Code a restricted access location is an area intended for qualified or trained personnel only and ...

Page 122: ...y UL 60950 1 and IEC 60950 1 Note Depending on the DC power source the 48V or 60V negative terminal might be marked with a minus symbol and the 48V or 60V Return positive terminal might be marked with a positive symbol When attaching DC cables keep the following caution in mind Caution You must restrict the connection of the server to the DC power source to minimize the possibility that transient ...

Page 123: ...o not proceed with these instructions until you have turned off the power from the DC power source through the circuit breakers 2 Identify the parts that you will use to assemble the DC input power cables For each cable you need the three parts shown in the figure below These items are provided in the shipping kit that came with your server DC models only TABLE Prerequisites Not Covered by the DC ...

Page 124: ...ing on the DC power source the 48V or 60V negative terminal might be marked with a minus symbol and the 48V or 60V Return positive terminal might be marked with a positive symbol 4 Strip 1 2 inches 13 mm of insulation from each of the wires coming from the DC power source Do not strip more than 1 2 inches 13 mm from each wire Doing so leaves uninsulated wire exposed from the DC connector after the...

Page 125: ...p tool or small screwdriver into the rectangular hole directly above the hole in the DC input plug where you want to insert the first wire and push in to open the cage clamp FIGURE Opening the Cage Clamp Using the Cage Clamp Tool 6 Feed the exposed section of the appropriate wire into the round plug hole in the DC input plug Figure Legend 1 Strip the insulation 1 2 in or 13 mm ...

Page 126: ...n Pull the wire from the DC input plug 7 Remove the cage clamp tool to secure the wire 8 Repeat Step 5 and Step 6 for the other two wires to complete the assembly of the DC input power cable 9 Repeat this procedure to create as many DC input power cables as you need for your unit To Connect the DC Input Power Cords 1 Ensure that the circuit breaker to your power source is turned off Figure Legend ...

Page 127: ...th nylon tie wraps 3 Connect the chassis ground wire to the facility earth ground and ensure that this connection has proper bonding 4 Connect the 48V or 60V return to the 48V or 60V wires to the circuit breaker 5 Connect the power wiring to the server by plugging each power cable into the server power supply units 6 When you are ready to power up the server close the circuit breaker and following...

Page 128: ...106 SPARC Enterprise T5120 and T5220 Servers Installation Guide July 2009 ...

Page 129: ... ILOM 51 configuration information needed 8 configuring the network management port 49 connecting to the system console 58 console command 65 D DB 9 TTY connector 11 DC input plug 89 102 DC input power 85 99 DC input power cable assembling 87 101 DC input power connecting 96 104 definitions See terms 19 deinstallation of server 40 84 diagnostics when run 47 E enabling the network management port 4...

Page 130: ...l terminal no 45 password command 51 path names 60 pins mounting bracket locating 76 ports slots and LEDs illustrated 12 power cycling the system 63 powering on the system for the first time 43 poweroff command 64 poweron command 56 59 R removing server from rack 40 84 reset resetting the system with uadmin 63 restricted access location DC models 85 right and left sides defined 19 right side defin...

Page 131: ...lief housing 89 93 system console escape sequence 64 T terms left and right sides 19 slide rail assembly 15 74 topic guidelines 1 19 43 71 73 85 99 TTYA serial port 11 U uadmin command 63 64 unlocking mounting bracket 76 ...

Page 132: ...110 SPARC Enterprise T5120 and T5220 Servers Installation Guide July 2009 ...

Page 133: ......

Page 134: ......

Reviews: