Using PM Setup
3-23
3. Buttons that you can tap to perform various functions are hidden below the program bar. To see the
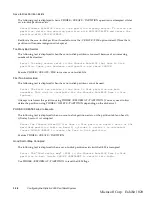
buttons, position the cursor just below the program bar. The buttons appear as shown here.
From left to right, these buttons perform the following functions and commands.
• Suspend to RAM
Tap on this button to suspend system operation using Suspend-to-RAM mode.
• Suspend to Disk
Tap on this button to suspend system operation using Suspend-to-Disk mode. (Your system must
be configured with a save-to-disk file or partition before this feature can be used. See “PHDISK
Hard Disk Preparation Utility” on page 3-31 for more information.)
• AC Mode Settings
Tap on this button to display the AC Power Savings window. This window allows you to define
the power management profile used when an external power source is connected to the system.
Note that PM Setup must be running (program bar displayed) for this profile to be used.
• Low Battery Mode Settings
Tap on this button to display the Low Battery Power Savings window. This window allows you to
define the power management profile used when the system is running on battery power (no
external power is connected) and the battery charge is below 10%. Note that PM Setup must be
running (program bar displayed) for this profile to be used.
• Normal Battery Mode Settings
Tap on this button to display the Normal Battery Power Savings window. This window allows
you to define the power management profile used when the system is running on battery power
(no external power is connected) and the battery charge is 10% or higher. This window also
allows you to configure other power management system settings including: suspend mode,
automatic resume features, idle CPU speed, and the PM Setup auto hide feature. Note that this
profile is used when the system is running on sufficient battery power even if PM Setup is not
running.
• Help
Opens the PM Setup Help window.
4. Tap on the appropriate PM Setup button to perform the desired function.
For more details on how to use these functions and commands, see the appropriate topic in the PM Setup
Help window or tap the Help button in the PM Setup window that is currently displayed.
Configuring PM Setup Buttons
You can configure PM Setup to display the buttons below the battery gauge icon at all times after they are
initially activated by moving the cursor over the battery gauge icon. To do so, edit the initialization file
PMSETUP.INI
and change the entry
Button=1
to
Button=0
.
Help
Normal Battery Mode Settings
Low Battery Mode Settings
AC Mode Settings
Suspend to Disk
Suspend to RAM
Microsoft Corp. Exhibit 1020
Summary of Contents for Stylistic 2300
Page 1: ...Microsoft Corp Exhibit 1020 ...
Page 8: ...viii Microsoft Corp Exhibit 1020 ...
Page 10: ...x Microsoft Corp Exhibit 1020 ...
Page 18: ...1 4 Pen Tablet Features Microsoft Corp Exhibit 1020 ...
Page 42: ...Microsoft Corp Exhibit 1020 ...
Page 60: ...3 40 Configuring the Stylistic 2300 Pen Tablet System Microsoft Corp Exhibit 1020 ...
Page 61: ...Microsoft Corp Exhibit 1020 ...
Page 63: ...Microsoft Corp Exhibit 1020 ...
Page 74: ...5 10 Hardware Specifications Microsoft Corp Exhibit 1020 ...
Page 76: ...Microsoft Corp Exhibit 1020 ...
Page 77: ...Microsoft Corp Exhibit 1020 ...
Page 78: ...Microsoft Corp Exhibit 1020 ...
Page 81: ...Microsoft Corp Exhibit 1020 ...
Page 91: ...Microsoft Corp Exhibit 1020 ...
Page 114: ...9 4 Programmable Hotpad Libraries for 16 bit Windows Applications Microsoft Corp Exhibit 1020 ...
Page 120: ...Microsoft Corp Exhibit 1020 ...
Page 124: ...C 2 Enabling ACPI Microsoft Corp Exhibit 1020 ...
Page 138: ...Index 6 Microsoft Corp Exhibit 1020 ...
Page 139: ...Microsoft Corp Exhibit 1020 ...
Page 140: ...4 99 58 0584 00C Microsoft Corp Exhibit 1020 ...


