2.
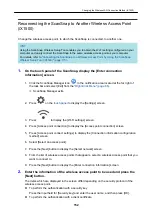
Turns on the ScanSnap.
"Turning the ScanSnap On" (page 91)
.
a
After blinking blue, the Wi-Fi indicator lights up in blue or orange.
3.
Press the WPS button of the wireless access point.
4.
Press and hold (3 seconds or longer) the WPS button on the back of the
ScanSnap within 2 minutes after pressing the WPS button of the wireless
access point.
iX500
WPS Button
iX100
WPS Button
a
The ScanSnap is connected to the wireless access point and the Wi-Fi indicator lights up in
blue.
If connection cannot be established, the Wi-Fi indicator blinks or lights up in orange.
ATTENTION
If you cannot connect the ScanSnap to a wireless access point, refer to "Troubleshooting" in the
ScanSnap Manager Help.
HINT
For details about the Wi-Fi indicator status, refer to the following:
l
iX500
"Parts and Functions of iX500" (page 70)
Reconnecting to a Wireless Access Point Using the ScanSnap WPS Button (iX500/iX100)
142
Summary of Contents for SV600
Page 1: ...P3PC 6912 01ENZ2 Basic Operation Guide Windows ...
Page 54: ...What You Can Do with the ScanSnap 54 ...
Page 66: ...What You Can Do with the ScanSnap 66 ...
Page 87: ...Example When SV600 and iX1500 are connected to a computer Right Click Menu 87 ...
Page 89: ...ScanSnap Setup Window 89 ...
Page 245: ...For details refer to the Advanced Operation Guide Scanning Documents with iX100 245 ...
Page 320: ...For details refer to the Advanced Operation Guide Scanning Documents with S1100i 320 ...


