HINT
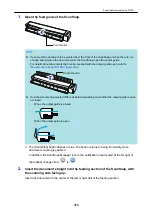
Note that the front side of the Carrier Sheet has a black and white pattern at the top and a
thick vertical line in the upper right-hand corner.
6.
Insert the part with the black and white pattern straight into the feeding
section of the ScanSnap, with the front side of the Carrier Sheet facing up.
a
The Carrier Sheet is pulled in until it is set inside the ScanSnap.
HINT
If you perform a scan using the Carrier Sheet with the output guide open, a paper jam may occur
and damage the documents. Make sure to close the output guide when you perform a scan using
the Carrier Sheet.
Output Guide
7.
Press the [Scan/Stop] button on the ScanSnap to start scanning.
a
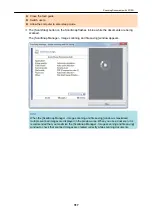
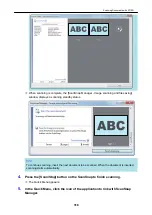
Scanning starts and the [ScanSnap Manager - Image scanning and file saving] window
appears. When the front side of the Carrier Sheet is scanned, the scanned image is
displayed in the preview area.
Scanning Documents with S1100i
327
Summary of Contents for SV600
Page 1: ...P3PC 6912 01ENZ2 Basic Operation Guide Windows ...
Page 54: ...What You Can Do with the ScanSnap 54 ...
Page 66: ...What You Can Do with the ScanSnap 66 ...
Page 87: ...Example When SV600 and iX1500 are connected to a computer Right Click Menu 87 ...
Page 89: ...ScanSnap Setup Window 89 ...
Page 245: ...For details refer to the Advanced Operation Guide Scanning Documents with iX100 245 ...
Page 320: ...For details refer to the Advanced Operation Guide Scanning Documents with S1100i 320 ...

