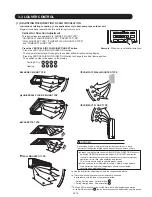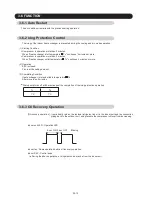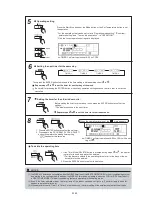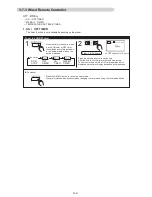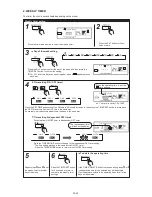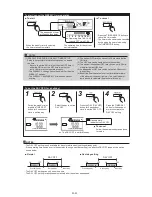
3-3 LOUVER CONTROL
03-10
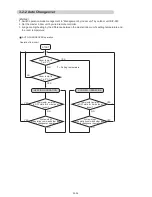
Instructions relating to heating ( ) are applicable only to heat pump type outdoor unit.
Begin air conditioner operation before performing this procedure.
Vertical Air Direction Adjustment
This instructions are applicable to "LARGE CEILING TYPE",
"UNIVERSAL FLOOR/CEILING TYPE", "CASSETTE TYPE",
"WALL MOUNTED TYPE", "COMPACT WALL MOUNTED TYPE"
and "COMPACT FLOOR TYPE" .
Press the VERTICAL AIR FLOW DIRECTION SET button.
LARGE CEILING TYPE
UNIVERSAL FLOOR/CEILING TYPE
Example
: When set to vertical air direction.
DANGER!
(1) ADJUSTING THE DIRECTION OF AIR CIRCULATION
WALL MOUNTED TYPE
1
2
3
4
1
2
3
4
1
2
3
4
3
4
2
1
Never place fingers or foreign objects inside the outlet ports, since
the internal fan opertes at high speed and could cause personal injury.
Always use the remote control umit's AIR FLOW DIRECTION button to
adjust the UP/DOWN air direction flaps or RIGHT/LEFT air direction
louvers. At tempting to move them manually could result in improper
operation; in this case, stop operation and restart.
The louvers should begin to operate properly again.
When used in a room with infants, children, elderly or sick persons,
the air direction and room temperature should be considered
carefully when making settings.
COMPACT WALL MOUNTED TYPE
COMPACT FLOOR TYPE
CASSETTE TYPE
1
3
4
2
1
2
3
4
Press the VERTICAL AIRFLOW DIRECTION button.
The temperature display will change to the vertical airflow direction setting display.
Use the air direction adjustments within the ranges shown above.
The vertical airflow direction is set automatically as shown,
in accordance with the type of operation selected.
During Cooling mode : Horizontal flow
During Heating mode : Downward flow
During AUTO mode operation, for the first minute after beginning operation,
airflow will be horizontal , the air direction cannot be adjusted during this period.
1
4
1
Cooling & Dry : 1 , 2 , 3 , 4
Heating : 1 , 2 , 3 , 4
Press the VERTICAL AIRFLOW DIRECTION button to change the vertical louvre position.
The position number will appear on the display.
1
2
3
4
Summary of Contents for UTP-VX30A
Page 1: ...SERVICE MANUAL ...
Page 5: ...1 TEST RUN ...
Page 27: ...2 OUTDOOR UNIT OPERATION CONTROL ...
Page 40: ...3 INDOOR UNIT OPERATION ...
Page 70: ...4 TROUBLE SHOOTING ...
Page 205: ...5 APPENDING DATA ...
Page 210: ...05 04 1 MODELS AUXK018 024 030 034 036 045 054GLAH AUXM018 024 030GLAH CASSETTE TYPE ...
Page 214: ...05 07 LOW STATIC PRESSURE DUCT TYPE MODEL ARXB24GALH ARXB30GALH ARXB36GALH MODEL ARXB45GALH ...
Page 217: ...05 10 MODEL ARXC36GBTH MODELS ARXC72GBTH ARXC90GBTH ...
Page 218: ...05 10 1 MODELS ARXK04 07 09 12 14 18 24GCLH COMPACT SLIM DUCT TYPE ...
Page 219: ...FLOOR CEILING TYPE MODELS AB A12GATH AB A14GATH AB A18GATH AB A24GATH 05 11 ...
Page 220: ...CEILING TYPE MODELS AB A30GATH AB A36GATH AB A45GATH AB A54GATH 05 12 ...
Page 222: ...05 14 WALL MOUNTED TYPE MODELS AS A04GACH AS A07GA H AS A09GA H AS A12GA H AS A14GA H ...
Page 223: ...05 15 MODELS AS A18GA H AS A24GA H AS A30GA H ...
Page 224: ...05 15 1 MODELS ASYA004 007 009GTAH ASHA004 007 009GTAH COMPACT WALL MOUNTED TYPE EEV internal ...
Page 225: ...05 15 2 MODELS ASYE004 007 009GTAH ASHE004 007 009GTAH COMPACT WALL MOUNTED TYPE EEV external ...
Page 227: ...05 15 4 MODELS ASYA030 034GTAH ASHA030 034GTAH ...
Page 230: ...05 16 MODEL ARXH054GTAH OUTDOOR AIR UNIT MODEL ARXH072GTAH ...
Page 231: ...05 17 MODEL ARXH096GTAH ...
Page 232: ...MODELS AJ 072LELAH AJ 090LELAH UNITS 5 2 2 Outdoor Unit 05 18 ...
Page 233: ...MODEL AJ 108LELAH OUTDOOR 05 19 ...
Page 240: ...6 DISASSEMBLY PROCESS ...


