En-3
(3)
(2)
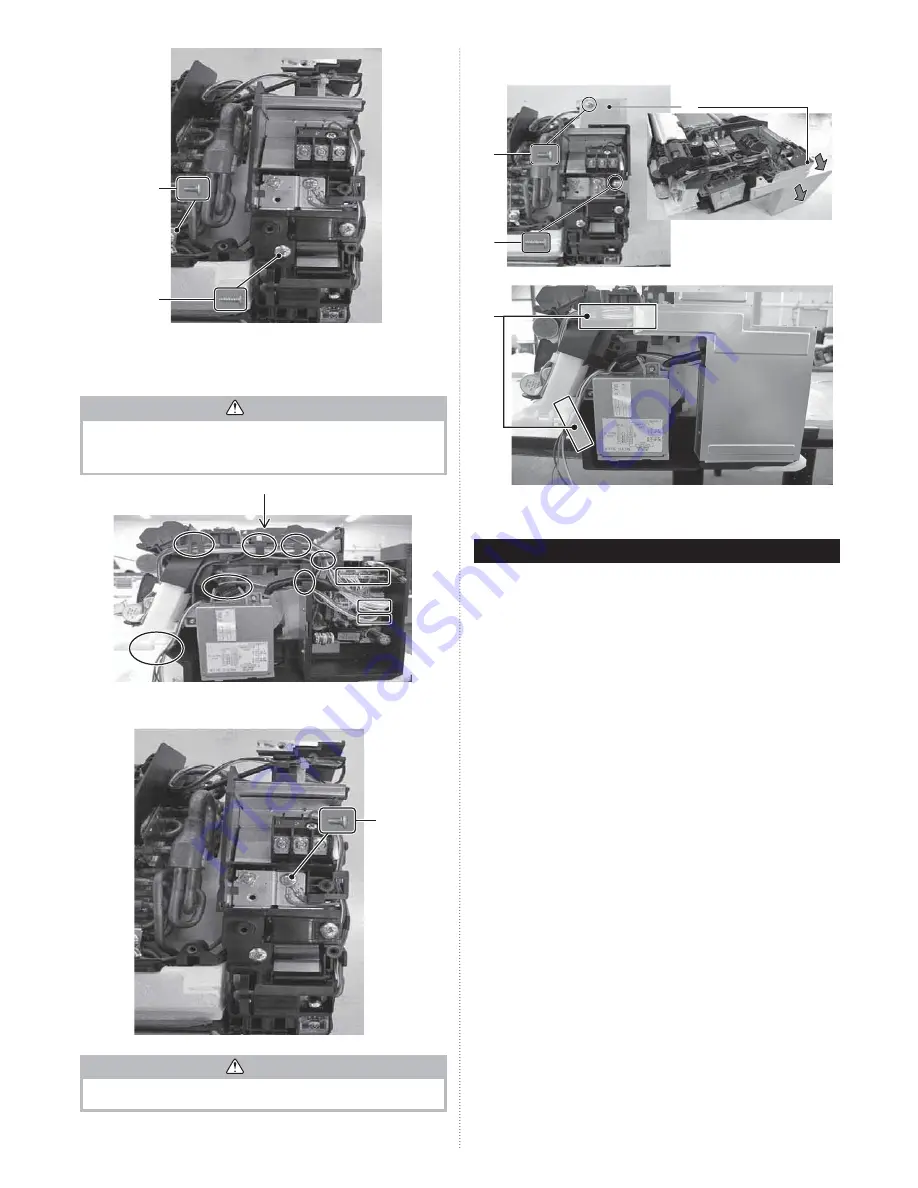
(3) Fasten the earth wires of the heat exchanger together as shown in the left figure
above. (Use a short screw here.)
(4) Hitch the wires onto the fixtures as shown in the oval circles below. Then connect
the connectors in the squares to the terminals respectively.
(Each terminal should form a pair with a connector.)
CAUTION
• Ensure that the connector is properly inserted.
Otherwise, it may result in erroneous operation.
• Be careful not to damage the parts on the board.Otherwise, it will cause malfunc-
tion.
(4)
(5) Fasten the earth wire (green) in the communication box together with the earth
wire (green) on the board of the control box as shown below and in the bottommost
figure of the previous page.
(5)
(6) Install the cover of the control box onto the inner side of the rib as shown below.
CAUTION
• Do not cut or tuck the wires with the electrical component box cover.
An electric shock may occur if the wires are damaged.
(7) Tighten with screws to prevent the cover of the control box from falling off.
(When installing, reuse the screws that was removed in
Removing control box.)
(7)
(7)
(6)
(8) Paste protect seals (2 locations) to prevent the wires from sticking out.
(8)
9333005041_IM.indb 10
11/6/2013 10:33:08 AM


