background image

10

Getting started

1.

3.

4.

2.

Front / Display

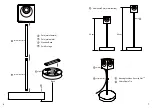
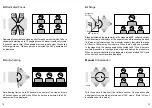
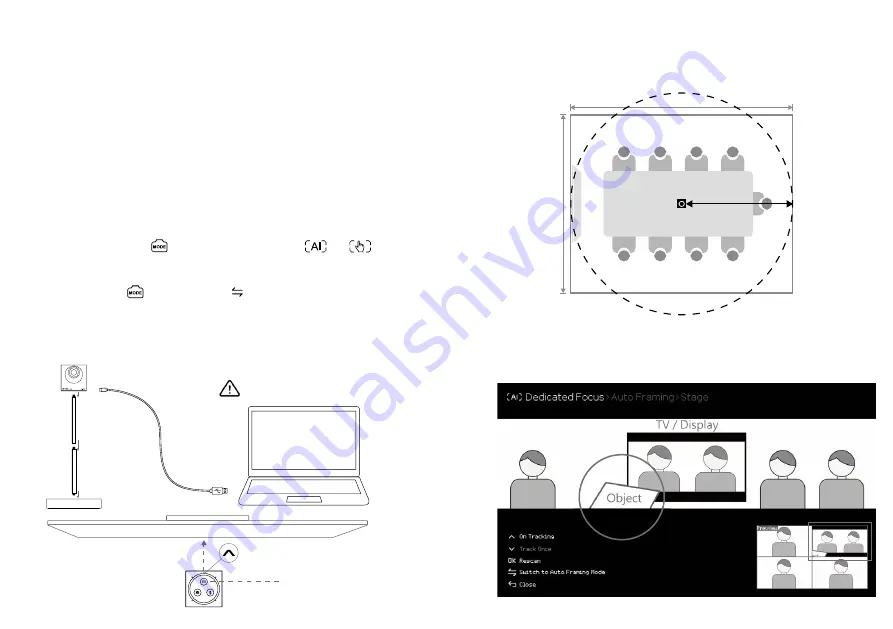
1. Assemble Innex Cube with 2 or 3 poles.

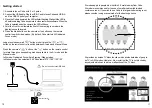
2. Connect the USB cable. Plug the USB-C end to Innex Cube and USB-A 

     end to a USB3.0 port of your computer. 

3.


Once the Cube is powered, the LED will start flashing. Wait until the LED is 


off before selecting Cube as camera in video conference software. When the 


Cube is selected as active camera, the LED will be on.

4. Point the Front Arrow toward the front of the meeting room where the 

    display is usually located.

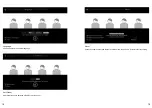
5. Press the Mode button on the camera or the buttons on the remote

    control to switch video modes. (By default, Cube starts in AI Dedicated 

    Focus mode.) 

Long press the camera's "       " button or short press the 


or 


button on the remote control to switch between AI mode and Manual Mode. 

Press the camera's "      " button or the "    "


button on the remote control 

to rotate through corresponding modes available in the AI mode and the 

Manual mode. 

In AI mode: Dedicated Focus/ Auto-Framing/ Stage modes.

In Manual mode: Conversation/ 360° Panorama/ 270°/ 180°/ 120°/ 90°.

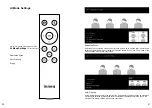
AI modes apply to people who is within 2.5 meters away from Cube, 

AI mode is recommended for the use of small-sized to middle-sized 

conference room. If you wish to use Cube in a large-sized meeting room, 

please consider using manual mode for the best experience.

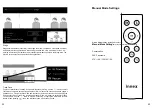
AI provides an unique TV block function which avoids detection of people 

on TV in All AI modes. However, it is crucial that the TV is not blocked by 

any objects which can lead to a malfunction of the TV block.

 Do not connect via USB hub.

11

4m

Middle-sized Conference Room

5m

2.5 m

Summary of Contents for Innex Cube

Page 1: ...Quick Start Guide AI 360 4K Conference Cam...

Page 2: ...real time stitching algorithm technology stitches four high resolution sensors together to produce an ultra clear and undistorted video With built in on screen display menu and a handy remote control...

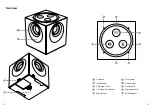
Page 3: ...5 4 Overview 1 7 9 8 2 5 5 6 10 4 3 Cameras 1 IR Receivers 2 USB Type C Port 3 1 4 Tripod Screw Hole 4 Microphones 5 Front Arrow 6 Mode Switch 7 Camera Off 8 Microphone Off 9 LED Indicator 10...

Page 4: ...11 12 13 Pole male female 11 15 16 17 Additional Pole male female 15 Pole male male 12 Wooden Base 13 Kensington Nano Security SlotTM 16 Pole Storage 14 Velcro Cable Tie 17 14 Back 30 cm 42 cm 7 6...

Page 5: ...f view Okay Confirm AI mode Get into AI mode or AI setting Manual mode Get into manual mode or manual setting Toggle Switch modes Setting Get into general setting Close Close the setting Remote Contro...

Page 6: ...press the or button on the remote control to switch between AI mode and Manual Mode Press the camera s button or the button on the remote control to rotate through corresponding modes available in th...

Page 7: ...s in the stage area 180 centered on front arrow direction and displays at the upper screen while showing the back 180 side at the lower screen The presenter needs to stay within the range of 70cm to 1...

Page 8: ...angles from 270 to 90 and use to move the frame in the desired direction Note AI is not available under this mode 120 Manual 360 Panorama 360 Panorama shows a full 360 degree view Note AI is not avail...

Page 9: ...us mode Innex Cube will not detect the participants who sit in that area of the room Auto Framing When the ignore zone is set under Auto Framing mode Innex Cube will keep that area out of the frame St...

Page 10: ...ker Switch the frequency between 50 60 Hz to avoid flicker Language Switch and select the desired language About Check the serial number and firmware version of the Innex Cube Or restore factory setti...

Page 11: ...king is selected by default and the AI constantly auto tracks people in the scene The preview of the output is shown at the button right corner Auto Framing Auto Framing frames people in the center of...

Page 12: ...nstantly moving use the arrow to select Track Once to disable auto tracking and press to rescan the scene and update people s positions once This will lock the Cube and prevent any person s movement f...

Page 13: ...tput is shown at the button right corner 270 180 120 90 Customize the view angles from 270 180 120 90 Press to rotate through the view angles and use up down left right arrow key to adjust the center...

Page 14: ...e Inspect the power supply regularly for cable plug and casing damage Improperly replaced batteries may present a risk of leak or explosion and personal injury Mistreated rechargeable batteries may pr...

Page 15: ...experienced radio TV technician for help Warning Where shielded interface cables or accessories have been provided with the product or specified additional components or accessories elsewhere defined...

Page 16: ...touch the product during a lighting storm to avoid electric shock Install or place components that supply high enough voltage to cause personal injury out of the reach of children WARNING Do not touc...

Page 17: ...Visit FTI website https funtechinnovation com...

Reviews: