1-6-6
T6700EA
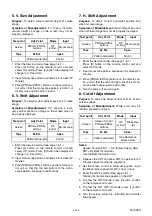
10. Sub-Brightness Adjustment
Purpose:
To get proper brightness.
Symptom of Misadjustment:
If Sub-Brightness is
incorrect, proper brightness cannot be obtained by
adjusting the Brightness Control.
Note:
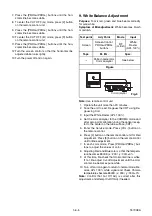
Bar (A) in Fig. 7 --- 0 IRE
1. Enter the service mode. (See page 1-6-1.)
Then input SYMPTE signal from RF (or Ext.) input
and leave it for at least 20 minutes.
2. Press [MENU] button. (Each time [MENU] button is
pressed, display will change BRT, CNT, COL, TNT,
and SHP in that order.) Select BRT and press
[PROG+/PROG-] buttons so that the bar (A) in Fig.
6 is just visible.
3. Turn the power off and on again.
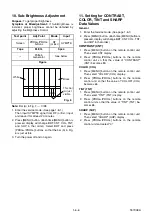
11. Setting for CONTRAST,
COLOR, TINT and SHARP
Data Values
General
1. Enter the Service mode. (See page 1-6-1)
2. Press [MENU] button. (Each time [MENU] button is
pressed, display will change BRT, CNT, COL, TNT,
and SHP in that order.)
CONTRAST (CNT)
1. Press [MENU] button on the remote control unit.
Then select CNT display.
2. Press [PROG+/PROG-] buttons on the remote
control unit so that the value of "CONTRAST"
(CNT) becomes 83.
COLOR (COL)
1. Press [MENU] button on the remote control unit.
Then select "COLOR" (COL) display.
2. Press [PROG+/PROG-] buttons on the remote
control unit so that the value of "COLOR" (COL)
becomes 65.
TINT (TNT)
1. Press [MENU] button on the remote control unit.
Then select "TINT" (TNT) display.
2. Press [PROG+/PROG-] buttons on the remote
control unit so that the value of "TINT" (TNT) be-
comes 68.
SHARP (SHP)
1. Press [MENU] button on the remote control unit.
Then select "SHARP" (SHP) display.
2. Press [PROG+/PROG-] buttons on the remote
control unit and select "0."
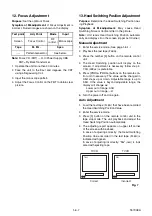
Test point
Adj. Point
Mode
Input
Screen
PROG+/PROG-
buttons
RF
(or Ext.)
SYMPTE
Tape
M. EQ.
Spec.
---
Pattern
Generator
See below
Figure
Black
White
This bar
(A) just
visible
A B C
Fig. 6
Summary of Contents for TVCR-2104
Page 17: ...1 5 4 T6700DC Fig 4 S 11 S 11 S 11 S 11 Anode Cap 11 CRT CRT CBA...
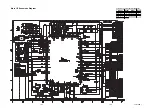
Page 37: ...Main 2 5 Schematic Diagram 1 8 5 1 8 6 T6700SCM2...
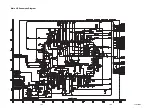
Page 42: ...1 8 15 1 8 16 H V Power Supply 2 2 Schematic Diagram T6700SCP2...
Page 43: ...1 8 17 1 8 18 T6700SCCRT CRT Schematic Diagram...
Page 86: ...2 4 9 Z13PDA Fig DM16 43 41 42 L 13 Fig DM17 44 45 Slide P 9...

