background image

3

EN

Int
rod
uct

ion

Connect

ions

Basi

c Se

tu
p /
 

TV
Vie
w

Op
eration

P

lay
b

a

ck

E

d

it

in

g

O

th

e

rs

Fu
nct

ion
 S
e

tup

Rec

or
di

ng

VCR Fun

cti
ons

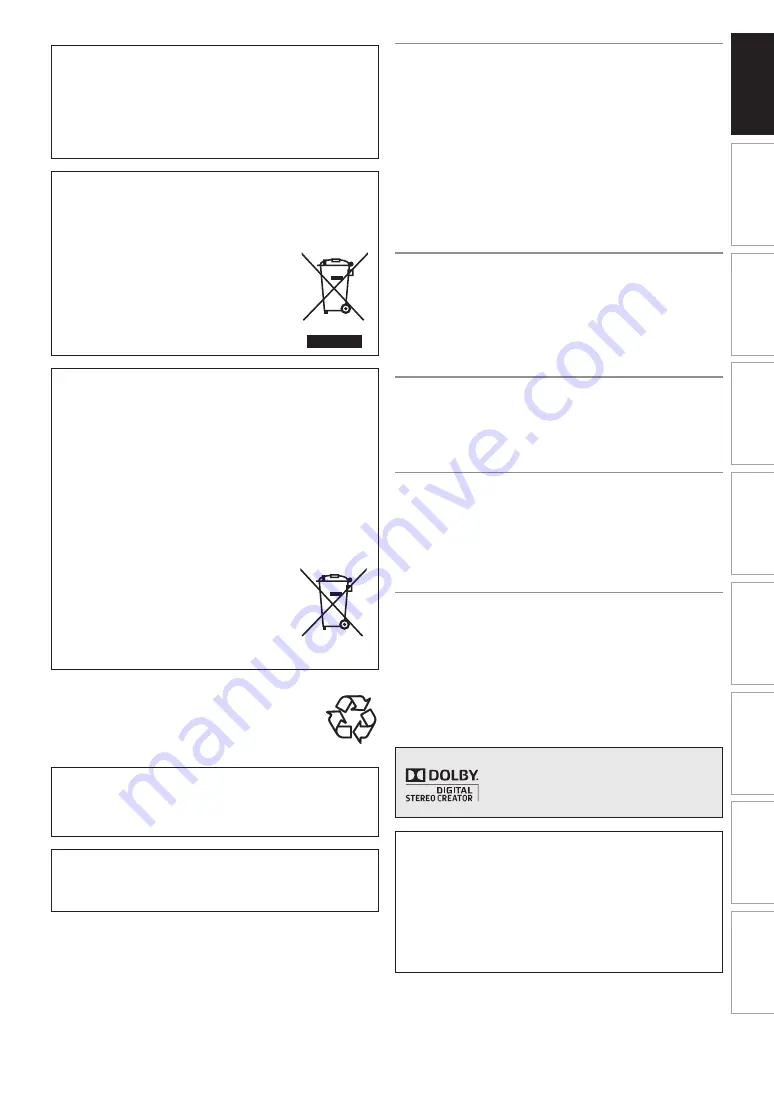
Make your contribution to the environment!!!

• Exhausted batteries do not belong in the 

dustbin.

• You can dispose of them at a collection point for 

exhausted batteries or special waste.

• Contact your council for details.

Installation Location

For safety and optimum performance of this unit:
• Install the unit in a horizontal and stable position.
• Keep the unit away from electronic equipment such as an 

amplifier, TV, etc. to prevent warping, damage, fire and 
malfunction.

• Do not place anything directly on top of the unit.
• Shield the unit from direct sunlight and keep away from 

sources of intense heat. Avoid dusty or humid locations. 
Avoid locations with insufficient ventilation for suitable heat 
dissipation. Do not block the ventilation holes on the sides of 
the unit. Avoid locations subject to strong vibration or strong 
magnetic fields.

Avoid the Hazards of Electrical Shock and Fire

• Do not handle the mains cable with wet hands.
• Do not pull on the mains cable to disconnect it from the AC 

outlet. Grasp it by the plug.

• If, by accident, water is spilled on the unit, unplug the mains 

cable immediately and take the unit to an authorised service 
centre for servicing.

Moisture Condensation Warning

Moisture condensation may occur inside the unit when it is 
moved from a cold place to a warm place, after heating a cold 
room, or under conditions of high humidity. Do not use the unit 
for at least 2 hours to allow the inside to dry.

About Copyright

Unauthorised copying, broadcasting, public performance and

lending of discs are prohibited. This item incorporates copy

protection technology that is protected by U.S. patents and

other intellectual property rights of Rovi Corporation. Reverse
engineering and disassembly are prohibited.

Notice for the Progressive Scan Outputs

Consumers should note that not all high definition television 
sets are fully compatible with this product and may cause 
artifacts to be displayed in the picture. In case of picture 
problems with 480 or 576 progressive scan output, it is 
recommended that the user switch the connection to the 
‘standard definition’ output. If there are questions regarding 
your TV set compatibility with this 480p or 576p product, 
please contact our customer service centre.

A NOTE ABOUT RECYCLING

This product’s packaging materials are recyclable and can 
be reused. Please dispose of any materials in accordance 
with your local recycling regulations.

This product consists of materials which can be recycled 
and reused if disassembled by a specialised company.

Following information is only for EU-member states:

The use of the symbol indicates that this product may not 
be treated as household waste. By ensuring this product is 
disposed of correctly, you will help prevent potential 
negative consequences for the environment and human 
health, which could otherwise be caused by 
inappropriate waste handling of this 
product. For more detailed information 
about recycling of this product, please 
contact your local city office, your 
household waste disposal service or the 
shop where you purchased the product.

Following information is only valid EU-member States:

Disposal of batteries and/or accumulators

The crossed out wheeled dust bin symbol indicates that 
batteries and/or accumulators must be collected and 
disposed of separately from household waste. If the battery 
or accumulator contains more than the specified values of 
lead (Pb), mercury (Hg), and/or cadmium (Cd) defined in 
the Battery Directive (2006/66/EC), then the chemical 
symbols for lead (Pb), mercury (Hg) and/or cadmium (Cd) 
will appear below the crossed out wheeled dust bin 
symbol. By participating in separate collection of batteries, 
you will help to assure the proper disposal of products and 
batteries and thus help to prevent potential negative 
consequences for the environment and 
human health. For more detailed 
information about the collection and 
recycling programmes available in your 
country, please contact your local city office 
or the shop where you purchased the 
product. 

Do not place the unit on the furniture that is capable of 
being tilted by a child and an adult leaning, pulling, 
standing or climbing on it. A falling unit can cause serious 
injury or even death.

Never use a gas duster on this unit.

The gas trapped inside of this unit may cause ignition and 

explosion.

Pb, Hg, Cd

Manufactured under license from Dolby 
Laboratories. Dolby and the double-D 
symbol are trademarks of Dolby 
Laboratories.

“Dolby

®

 Digital Recording enables consumers to record 

high-quality video with stereo sound on recordable DVD 
discs. The technology, when utilised instead of PCM 
recording, also saves recordable disc space, allowing for 
higher video resolution or extended recording time on 
each DVD. DVDs created using Dolby Digital Recording 
will play back on all DVD-Video players.” 
Note: This is true when the players are compatible with 

actual recordable DVD discs.

Summary of Contents for WD6D-M101

Page 1: ...hers Function Setup Recording VCR Functions Basic Setup TV View Operation For Customer Use Carefully read the Model No and Serial No located at the back of the unit and enter the information below Retain this information for future reference Model No __________________________ Serial No __________________________ ...

Page 2: ... a Power Saving Mode ECO for standby 10 Do not place any combustible objects on the device candles etc 11 Before moving the unit be sure to remove any discs and unplug the mains cable from the AC outlet 12 Disconnect the mains plug to switch off when the unit becomes faulty or not in use 13 The mains plug shall remain readily operable 14 Read the manual instructions to ensure correct and safe inst...

Page 3: ...terials are recyclable and can be reused Please dispose of any materials in accordance with your local recycling regulations This product consists of materials which can be recycled and reused if disassembled by a specialised company Following information is only for EU member states The use of the symbol indicates that this product may not be treated as household waste By ensuring this product is...

Page 4: ...t solve the problem please consult your dealer or an authorised service centre Note Remember to read the instructions along with the video head cleaner before use Clean video heads only when problems occur The terms HDMI and HDMI High Definition Multimedia Interface and the HDMI Logo are trademarks or registered trademarks of HDMI Licensing LLC in the United States and other countries DivX DivX Ce...

Page 5: ...a USB device E Page 43 Chasing playback during recording and simultaneous playback and recording E Page 49 Playing back MP3 JPEG DivX KODAK Picture CD files E Page 42 46 Quick search E Page 72 Adding or deleting chapter marks manually E Page 56 57 Creating titles to a Playlist VR mode DVD RW discs only E Page 58 Deleting titles E Page 55 Deleting a scene of a title VR mode DVD RW discs only E Page...

Page 6: ...ing OTR 32 Timer Recording 33 Timer Recording EPG 36 Satellite Link 36 Settings for External Equipment 37 Information on DV Dubbing 38 DVC to DVD Dubbing 39 Dubbing Mode 40 Setting a Disc to Protect 41 Finalising Discs 41 Playback 42 Basic Playback 42 USB Playback 43 Special Playback 47 Search 50 Repeat Random Programme Playback Slide Show 51 Selecting the Format of Audio and Video 52 Editing 54 G...

Page 7: ...s in video mode Available to DVD RW discs in VR mode Available to DVD R discs in video mode Available to audio CDs Available to CD RW R discs and USB device with MP3 files Available to CD RW R discs and USB device with JPEG files Available to DVD RW R CD RW R discs and USB device with DivX files DivX files in USB device are not guaranteed Available to VHS tapes Use only cassettes marked VHS Symbol...

Page 8: ...cessary Title menu will be created Playable only on VR mode compatible unit Finalisation recommended Playable on most DVD players Finalisation necessary Title menu will be created Available Features Recording Features Record TV Programmes Reuse by Deleting the Current Contents Record 16 9 Size Pictures Record Copy once Programmes Create Chapters at Fixed Intervals auto chapter Editing Features Pla...

Page 9: ... the sound on the CD layer can be heard The sound on the high density super audio CD layer cannot be heard This unit uses the PAL system However it is also possible to play back DVDs using other colour systems such as NTSC This unit has been designed to play DVD with region 2 If these region symbols do not appear on your DVD you cannot play back the DVD in this unit The number inside the globe ref...

Page 10: ... REW E button 2 VCR 20 STOP EJECT C A button VCR 21 STANDBY ON Q button 3 1 Mains cable 2 HDMI OUT jack 3 DIGITAL AUDIO OUT COAXIAL jack 4 AUDIO OUT L R jacks 5 COMPONENT VIDEO OUT jacks 6 AV2 DECODER socket 7 AV1 TV socket 8 ANTENNA IN 9 ANTENNA OUT Note Do not touch the inner pins of the jacks on the rear panel Electrostatic discharge may cause permanent damage to the unit After turning off the ...

Page 11: ...T button DVD 23 C button 24 CLEAR button 25 GUIDE button 26 SUBTITLE button 27 MENU LIST button DVD 28 ENTER OK button 29 RETURN BACK button 30 FWD D button 31 STOP C button 32 SKIP G button DVD 33 DVD button 34 CM SKIP button DVD 35 REC SPEED button 36 REC button 37 1 3x 0 8x PLAY button DVD 38 TIMER PROG button Note If you turn off this unit OPEN CLOSE EJECT A on the remote control is not availa...

Page 12: ... sensor on the unit Use within the operating range and angle as shown The maximum operable range as follows Remote control operation may become unreliable if the remote control sensor of the unit is being exposed by the strong sunlight or fluorescent light Remote controls for different devices can interfere with each other Be careful when using remote controls for other equipment located close to ...

Page 13: ...us 8 Indicates the component in use DVD USB device Note For some descriptions on this manual only one disc type is indicated as an example Press DISPLAY repeatedly while the display menu is displayed to display the following information 1 Indicates the resolution of the HDMI output image 2 Indicates the HDMI video format 3 Indicates the HDMI audio format will be displayed when it does not have any...

Page 14: ...e information 1 Audio language 2 Channel number 3 Channel name 4 Current time and day 5 Next programme information 6 Current programme information The window will automatically exit after 4 seconds or press RETURN BACK to exit While the window appears press C again to display more information Press RETURN BACK to exit VCR 0 00 00 STEREO AV2 STEREO 12 00 SP 7 1 1 2 2 3 3 4 4 5 5 7 6 6 This is an ex...

Page 15: ...disc only E Page 58 Audio CD 1 Random Play E Page 51 2 Programme Play E Page 51 CD RW R with MP3 JPEG KODAK Picture CD files 3 Music MP3 files E Page 51 4 Photo JPEG files E Pages 51 52 5 Slide Show JPEG KODAK Picture CD files E Page 52 1 Music MP3 files E Page 51 2 Photo JPEG files E Pages 51 52 Main Menu A General Setting DVB Setting 1 2 3 4 5 A B C D E 6 F Setup Timer Programming Title List DVD...

Page 16: ...video resolution 1080i is selected Appears when HDMI video resolution 1080p is selected DB DTV DVD VCR 4 3 2 1 Appears when the channel is in digital mode Title track number Chapter number F Appears when playback is paused Appears during step by step playback B Appears when playing back a disc F B Appears during slow forward reverse playback Appears when the timer programming or One touch Timer Re...

Page 17: ...Out setting should be set to Component Progressive or Component Interlace Refer to B Video Out Default SCART RGB on page 67 Component connection provides the better quality picture Connect the COMPONENT VIDEO OUT jacks of this unit to the component video input jacks of your TV Connect the AUDIO OUT L R jacks of this unit to the analogue audio input jacks of your TV After you have made the connecti...

Page 18: ...sible that some devices with an HDMI input may not operate properly with this unit When using an HDCP incompatible display device the image will not be viewed properly Among the devices that support HDMI some devices can control other devices via the HDMI connector however this unit cannot be controlled by another device via the HDMI connector The audio signals from the HDMI connector including th...

Page 19: ...ities of your receiver the receiver will produce a strong distorted sound or no sound at all Connecting multi channel Dolby Digital decoder allows you to enjoy the Multi channel Dolby Digital surround system as well as DTS decoder Multi channel surround system After connecting to a Dolby Digital decoder set Dolby Digital to Stream in Audio Out menu See pages 64 65 After connecting to a DTS decoder...

Page 20: ...NTER OK and follow to A Clock Setting on page 68 7 After finishing Clock Setting a confirmation message for Advanced Setting will appear If you wish to proceed with Advanced Setting select Yes using K L then press ENTER OK If you wish to skip this setting select No using K L then press ENTER OK to exit 8 Select your desired option using K L then press ENTER OK Caution The default setting of Antenn...

Page 21: ...ppear 2 Select Channel using K L then press ENTER OK 3 Select Auto Tuning DVB ANALOG using K L then press ENTER OK The unit will start storing channels available in your area Wait for several minutes to finish channel storing 4 Press SETUP to exit You can select only the channels memorised in this unit by using PROG G H To cancel auto tuning Press SETUP during scanning Note The number of TV channe...

Page 22: ...unit can receive the Hyper and Oscar frequency bands If you want to decode scrambled signals select Decoder using K L then press 1 Select ON using K L then press 0 If Skip is set to ON select Skip using K L then press 1 Select OFF using K L then press 0 To store another channel repeat steps 5 to 10 11 Press SETUP to exit You can set the unit to skip channels You can no longer receive or watch when...

Page 23: ...When Auto is selected the unit will search for the channels which have not been stored in channels memory 4 Press SETUP to activate the setting You can set the function which searches and stores newly available digital channels automatically at 1 10 and 8 00 every day 1 In stop mode press SETUP Select General Setting using K L then press ENTER OK 2 Select Channel using K L then press ENTER OK 3 Se...

Page 24: ... all the memorised DVB channels If the favourite group does not have any channels the group will be skipped 3 Select the DVB channel using K L then press ENTER OK 4 Press RETURN BACK to exit With Edit Channels menu you can sort all the memorised DVB channels into the group lists Quick Select or set the viewer limitation Adult Lock etc 1 In stop mode press SETUP Select General Setting using K L the...

Page 25: ... BACK to exit Once you turn off the unit Pincode will be required to view the locked channels To set the Pincode refer to A Adult Lock Default OFF on page 69 Note You need to set the Pincode first to activate the Adult Lock in DVB Setting After you set a Pincode you have to turn off the power and then turn it on again to activate the setting You can delete the DVB channels from the memorised DVB c...

Page 26: ...splay will appear 3 Press RETURN BACK to exit Signal Information is not available for analogue channel and external input AV1 AV2 DV AV3 Signal Information is also not available while the Pincode input field for locked DVB channel is displayed If a broadcaster provides a DVB Teletext service you can enjoy it The DVB Teletext service includes news weather forecast and subtitles 1 Press TEXT to disp...

Page 27: ...EPG while viewing DVB analogue channel or external input AV1 AV2 DV AV3 press GUIDE You can also call up EPG by following steps 1 In stop mode press SETUP Select Timer Programming using K L then press ENTER OK 2 Select EPG using K L then press ENTER OK Select the channel and TV programme using K L 0 1 Press ENTER OK or BLUE to go to Timer Programming menu after you select the TV programme using K ...

Page 28: ...Media CPRM When recording a TV broadcast or an external input you can display copy control information on the screen CPRM is a scrambling copy protection system for the protection of copy once broadcast programmes This unit is CPRM compatible which means that you can record copy once broadcast programmes but you cannot then make a copy of those recordings CPRM recordings can only be played back on...

Page 29: ...R mode DVD 99 titles per each Playlist and Original 999 chapters per each Playlist and Original Video mode DVD 99 titles per disc 99 chapters per title Making Discs Playable in Other DVD Players Finalise Disc Type DVD R DVD RW Video Mode VR Mode After finalising Automatic Title menu making Undo finalising See page 41 Additional recording or editing See page 41 undo finalise undo finalise Available...

Page 30: ... a chapter mark periodically every 10 minutes by default during recording Using the Auto Chapter menu you can set this function off or change the time period 1 In stop mode press SETUP Select General Setting using K L then press ENTER OK 2 Select Recording using K L then press ENTER OK 3 Select Auto Chapter using K L then press ENTER OK 4 If you want to set Auto Chapter off select OFF using K L th...

Page 31: ...etting Bilingual Recording Audio on page 31 for more detail You can select either Main or Sub audio to record a bilingual broadcast in video mode This setting is only for recording analogue channel 1 In stop mode press SETUP Select General Setting using K L then press ENTER OK 2 Select Recording using K L then press ENTER OK 3 Select Bilingual Recording Audio using K L then press ENTER OK 4 Select...

Page 32: ...rding If the clock is not set the date and time of title names will be 01 01 13 and 00 00 You cannot change the recording speed in the REC or REC pause mode Even if the broadcasting you are recording is in the SECAM system this unit automatically converts it to the PAL system when recording Up to 99 titles can be recorded on the DVD RW R discs You can play back a title on one component while makin...

Page 33: ... When analogue channel is selected VPS PDC will be displayed instead of STTL Select VPS PDC to ON or OFF using K L Refer to VPS Video Programme System PDC Programme Delivery Control on page 34 When DVB channel is selected STTL will be displayed instead of VPS PDC VPS PDC system is not available for Daily and M F timer programme 10 Press ENTER OK when all information required is entered Your progra...

Page 34: ...day If the starting time of the VPS PDC timer recording is between 4 00 and 23 59 on a given day the VPS PDC function will operate from 0 00 on the given day to 4 00 on the next day This means that if the relevant programme is broadcasted within this period it is recorded correctly If the timer is not programmed correctly the incorrect timer setting stays in effect unless you cancel it To cancel a...

Page 35: ... to priority if the timer programmes overlap If the starting time is same The timer programming set first PROG 1 has priority When the starting time and the ending time for each programmes are different A programme that has earlier start time has priority If the recording time is partially overlapped The timer programming with the earlier start time PROG 2 has priority PROG 1 will start after PROG...

Page 36: ...ng Preparation of the external tuner The external tuner should be equipped with some kind of timer function Using timer function of the tuner set it to be turned on when it comes to the time you want to start recording and off when it comes to the time you want to finish recording Refer to the tuner s manual on how to set the timer Make sure to turn off the external tuner when you finish setting P...

Page 37: ...n error message appears on the screen and recording will be paused Recording will be resumed when a PAL or SECAM signal is detected Before recording from external equipment see page 19 for connection instructions 1 Turn on the TV and be sure to select the input to which the unit is connected Press DVD Press OPEN CLOSE EJECT A to open the disc tray then place the disc to record on Press OPEN CLOSE ...

Page 38: ... 1 Connect your DVC to the DV IN jack on the front panel using a DV cable Use the DV cable that has 4 pin input jack and is compliance with the IEEE 1394 standards 2 Press INPUT SELECT repeatedly to select the external input channel then press PROG G H repeatedly to select DV AV3 3 Press DISPLAY to display the DVC information on the screen When the DVC is in video mode When the DVC is in camera mo...

Page 39: ...C Other DV device such as cable satellite box or D VHS recorder cannot be recognised If no video signal is detected from the DVC during DVC to DVD dubbing the recording will be paused and I will flash on the TV screen The recording will resume when the unit detects the video signal again When the DVC is in camera mode refer to Guide to DV and On Screen Display on page 38 Date time and cassette mem...

Page 40: ...ONO If you set External Input Audio to Stereo the sound is recorded in Stereo video mode and VR mode While in video mode if you set External Input Audio to Bilingual the audio set in Bilingual Recording Audio mode is recorded While in VR mode if you set External Input Audio to Bilingual bilingual audio is recorded The main and sub audio will be simultaneously recorded VR mode You can select audio ...

Page 41: ...ress ENTER OK Finalising will start To cancel finalising DVD RW disc only At step 4 press STOP C Select Yes using K L then press ENTER OK Finalising is cancelled and the unit switches to stop mode If appears when STOP C is pressed you cannot cancel finalising because the finalising has already reached at a critical point in its process If No is selected and ENTER OK or RETURN BACK is pressed final...

Page 42: ...ls You can also start playback by pressing PLAY B instead of ENTER OK at steps 7 and 8 Some discs may start playback automatically 1 Follow steps 1 to 5 in Playing Back a DVD RW DVD R Disc on page 42 2 Press PLAY B to start playback Playback will start If you play back a DVD video a disc menu may appear See page 46 for details 3 Press STOP C to stop playback Note Some discs may start playback auto...

Page 43: ... than mp3 MP3 or jpg jpeg JPEG will not be listed in the File List Some folders or tracks listed in the File List may be unplayable due to their recording status The File List displays only up to 8 folders and file names Notes on JPEG After file is displayed for 5 seconds or 10 seconds set in the Slide Show on page 52 the display moves to the next file During JPEG playback press 1 or 0 to rotate a...

Page 44: ...ake some time until all menu items are displayed on the menu screen 2 Press K L 0 1 to select a desired track to be played back then press PLAY B or ENTER OK An image will be played back from the selected track and go to the next one in turn 3 Press STOP C to stop playback Note After a track is displayed for 5 seconds or 10 seconds set in the Slide Show on page 52 the display moves to the next fil...

Page 45: ...me you get the new file from the DivX VOD services Refer to DivX VOD on page 45 Some DivX VOD files are restricted with the limited playable times you cannot play them back beyond the limit If your DivX VOD file has such limit the playback confirmation screen will appear Use 0 1 to select Yes if you want to play back the file or to select No if you do not want to play it back Then press ENTER OK t...

Page 46: ... If the feature is not available may appear on the TV screen The displayed disc menu which will vary among discs and may be same with the Title menu 2 Select an item using K L 0 1 then press ENTER OK Repeat this step until all the features you want are set up or to start playing back the disc from the menu The following operation is available the Number buttons Selects a numbered menu option avail...

Page 47: ...P Each time you press CM SKIP the start point will move another 30 seconds forward and playback resume automatically You can press CM SKIP up to 6 times 180 seconds 1 During playback press PAUSE F Playback will pause with the sound muted 2 Press PLAY B to resume playback Rapid Playback function is available only during playback Available only on discs recorded in the Dolby Digital format Rapid Pla...

Page 48: ...If selecting a smaller factor than that currently selected the zoom area is not displayed You cannot slide the zoomed picture on some JPEG files You can assign a specific point on a disc to return later 1 During playback press DISPLAY to bring up the display menu If the display menu is already shown skip to step 2 2 Select the icon using 0 1 to display the marker list e g DVD video 3 Select the de...

Page 49: ...r change recording time for the OTR Wait for a moment will be displayed on the screen if you press PLAY B before 1 minute of recording This function is available only when you are recording on a DVD RW disc in VR mode with the recording speed 4H 6H or 8H Use DVD RW disc capable of 2x or 4x speed recording You can also play back a recorded title during current recording or the Timer Recording on th...

Page 50: ...enu If the display menu is already shown skip to step 2 2 Select the icon using 0 1 then press ENTER OK for the track number is highlighted 3 Enter the desired track number to search for using K L or the Number buttons then press ENTER OK Track search will start Note During Random playback or Programme playback you cannot search the desired track You can search the desired track directly Using the...

Page 51: ...ndom playback of MP3 and JPEG files Chapter Track repeat will be cancelled whenever a Chapter Track is skipped forward or backward For some DivX files A B Repeat playback may not function You can use this function to play back a disc randomly instead of in the recorded order 1 In stop mode press SETUP 2 Select DISC Playback Mode or USB Playback Mode using K L then press ENTER OK DISC Playback Mode...

Page 52: ...menu Or press SUBTITLE during playback and follow from step 3 2 Select the icon using 0 1 to display the selection menu 3 Select the desired subtitle language using K L then press ENTER OK Subtitles are displayed in the selected language If you select OFF subtitles will disappear Note With some discs it is only possible to change the subtitle language from the disc menu Press TOP MENU or MENU LIST...

Page 53: ...tting will be kept OFF when the unit is turned off Some DVD videos feature scenes shot from two or more angles The disc case is usually marked with an angle icon if the disc has multi angle scenes 1 During playback press DISPLAY to bring up the display menu The angle icon appears when a switching camera angle is available Available only when the angle icon appears in bottom right on the TV screen ...

Page 54: ...le name 6 Title information which displays recorded time length of the title date month year recorded CH and the recording speed 7 Submenu Submenus for the selected menu are displayed here 8 Title name editable If you do not name the title the recorded date time channel and the recording speed are displayed here 9 Progress bar Indicating the progress of the playback 10 Preview window Preview of th...

Page 55: ...ountries and may subject you to civil and criminal liability Note A Playlist is not available for DVD R or video mode DVD RW discs It is not possible to edit a disc recorded in another video system other than PAL such as NTSC After finalising a DVD RW R disc you cannot edit any information that is on that disc You can delete titles you do not want to keep When an Original is deleted from VR mode D...

Page 56: ...ters Press 0 1 to move the cursor to the left or right You can enter up to 30 letters Unrecognisable characters will be replaced with asterisks If you delete them adjoining characters may change to asterisks or other You can add chapter marks to a title After a title is marked with chapters you can use the chapter search feature You can set a chapter mark anywhere you want Press DVD first 1 Follow...

Page 57: ...ed If you select OFF at step 3 all the chapter marks are erased 5 Press RETURN BACK repeatedly to exit Writing onto the disc starts It may take awhile to write the data on a disc Note You cannot select the chapter mark the title of which is less than 5 minutes You cannot select a chapter mark interval that exceeds the length of a title The length of chapters may slightly deviate from the one speci...

Page 58: ...OK 3 Select Yes using K L then press ENTER OK The title is added to Playlist 4 Press RETURN BACK to exit Writing onto the disc starts It may take awhile to write the data on a disc Note To delete a title from the Playlist refer to Deleting Titles on page 55 When the number of the Playlist reaches its maximum refer to page 29 or when the number of the total chapter marks of the Playlists reaches 99...

Page 59: ...etion is indicated in red You can check the preview by pressing ENTER OK Before and after 5 seconds of the deleted point will be playback for preview 4 Select Delete using K L then press ENTER OK 5 Select Yes using K L then press ENTER OK Are you sure will appear Select Yes using K L and then press ENTER OK The part of the title is deleted 6 Press RETURN BACK repeatedly to exit Writing onto the di...

Page 60: ... signals DTS OFF Set whether DTS signal is output or not MP3 Surround Stream Set the type of MP3 signal to output Disc Menu Language E Page 65 Bulgarian Czech French German Hungarian Italian Polish Romanian Russian Slovak Spanish Other Set the language for Disc Menu Audio Language E Page 65 English Bulgarian Czech French German Hungarian Italian Polish Romanian Russian Slovak Spanish Other Set the...

Page 61: ...Chapter E Page 30 OFF 5 minutes 15 minutes 30 minutes 60 minutes Insert chapter marks periodically Recording Audio Select 1H E Page 31 PCM Set the recording audio type Only when the recording speed is set to 1H Auto Finalise E Page 41 ON Set the unit to finalise the disc automatically Aspect Ratio Video mode E Page 30 4 3 16 9 Set a aspect ratio for video mode recording Dubbing Mode E Page 40 DVD ...

Page 62: ...his unit does not send TV signals to your TV DivX DivX VOD E Pages 45 68 This menu item provides you with the DivX VOD registration code The DivX registration code is required when downloading the DivX VOD files from the Internet To learn more about DivX VOD visit www divx com vod Deactivation Code This menu item provides you with the DivX VOD deactivation code The DivX deactivation code is requir...

Page 63: ...English Common Procedures 1 In stop mode press SETUP 2 Select General Setting using K L then press ENTER OK 3 Select a desired setup using K L then press ENTER OK 4 Select a desired item using K L then press ENTER OK e g Playback setup 5 Select a desired setting using K L then press ENTER OK e g Parental Lock item Your setting is activated 6 When you finish the setting press SETUP to exit To retur...

Page 64: ...tly If you forget your password or you want to clear all settings in Parental Lock enter 4 7 3 7 using the Number buttons at the option window Your password is cleared and parental levels are set to OFF Choose the appropriate audio setting for your external device It will only affect a disc playback Dynamic Range Control Default ON DVD only Set to ON to make the dynamic range narrower Dynamic Rang...

Page 65: ...lifier decoder is NOT compatible with 96 kHz PCM select 48kHz Sound recorded at 96 kHz is down sampled to 48 kHz 96kHz If your amplifier decoder is compatible with 96 kHz PCM select 96kHz Sound is sampled at 96 kHz PCM Converts the Dolby Digital into PCM 2 channel If your amplifier decoder is NOT compatible with Dolby Digital set to PCM Stream Outputs Dolby Digital signals If your amplifier decode...

Page 66: ...el display brightness Note The display will not light up when the unit is in standby mode This is a Power Saving mode ECO for standby F Angle Icon Default ON DVD only G Still Mode Default Auto DVD only Auto Automatically select the best resolution setting Frame or Field based on the data characteristics of the pictures Field Select Field when the pictures are still unstable even if Auto is selecte...

Page 67: ...omponent video cable 1 Select the desired setting using K L then press ENTER OK If your TV is compatible with progressive scanning 576p 480p connect the TV to the COMPONENT VIDEO OUT jacks of this unit and select Component Progressive and set your TV to the progressive scan mode If your TV is not compatible with progressive scan select Component Interlace for component connection or select SCART R...

Page 68: ...d then press ENTER OK at step 1 If Auto Clock Setting is OFF Timer Recording EPG may not be able to perform The clock may set itself automatically after you connect the antenna cable to the unit and plug in the mains cable In this case the current time will appear on the front panel display If there are only analogue channels memorised in this unit The channel assigned to analogue 1Ch must receive...

Page 69: ... Pincode again using the Number buttons then press ENTER OK Enter the Pincode using the Number buttons While entering the Pincode use 0 or CLEAR to clear the numbers once entered Note Once Adult Lock has been set to ON Pincode will be required in order to view the locked channels or make the timer recording of them and when you try to execute the Auto Tuning for DVB or Edit Channels If you forget ...

Page 70: ...ng to the factory default Clock setting Channel setting Parental lock setting DivX VOD code Timer programmes OSD language setting DVB setting Setup A General Setting A Channel A Antenna Out Select your desired setting using K L then press ENTER OK Caution The default setting of Antenna Out is OFF When Antenna Out is set to OFF and this unit is in standby mode this unit does not send out TV signals...

Page 71: ...cording OTR The desired channel is selected by pressing the Number buttons or PROG G H on the remote control There is a tape with a record tab in the unit 1 Insert a recordable videotape 2 Select the recording speed using REC SPEED The desired recording speed is selected in SP or LP mode by pressing REC SPEED 3 Select the desired channel to record using PROG G H or the Number buttons Press REC to ...

Page 72: ...Select the recording speed using REC SPEED See page 71 3 Stop or pause the DVC where you want to start dubbing 4 Play back the DVC 5 Press REC The dubbing will start Note Dubbing will start from where the tape is stopped Search 1 Press SEARCH so that the index search menu appears 2 Enter the number of recordings you want to skip using the Number buttons within 30 seconds 3 Press FWD D or REV E to ...

Page 73: ... or external devices To change the video colour system manually press SYSTEM Each time you press SYSTEM the colour system will change as follows Note If the playback picture on the TV screen is black and white change the video colour system manually When you change the video colour system manually be sure to change it before recording If you select the wrong video colour system for recording the c...

Page 74: ...is applied to this product The connected TV does not receive TV channels Chenck to see if the RF cable is connected from this unit s ANTENNA OUT to the TV s ANTENNA IN properly Set Antenna Out setting to ON See page 70 When you forget the password for parental lock Please cancel the password and the set level See page 64 DV signal cannot be input Before connection turn on the power supplies for bo...

Page 75: ...ces Check if the connections are made securely and correctly DVD Recording is impossible This unit cannot record programmes that contain copy protection signal This is not a malfunction The space of the recording media may be used up Try deleting unnecessary titles or exchange it with the recordable media The maximum number of titles or chapters has exceeded Delete the unnecessary titles to make e...

Page 76: ...s unit The disc may be dirty or flawed Clean the disc Check if all the connections are made correctly Check Parental Lock setting See page 64 Playback of DVD is prohibited from 2 minutes before the programmed start time of a timer recording when the recording media is DVD There is no sound or no subtitle Check if all the connections are made correctly Check if the Audio Out is set correctly See pa...

Page 77: ...device with supported file format If this does not solve the problem use other type of compatible USB device Region Error Please eject the disc Playback is not authorized in your region Playback is not authorised in the region of the DVD video that you inserted in the unit Insert a DVD video with region codes 2 or ALL Parental Lock On The current selected parental level prohibits playback The curr...

Page 78: ...annot record on this disc as Control Information is full This disc has no space to write Control Information when recording or deleting contents When editing has been repeatedly performed the control information area may become full even though the recording area has enough space Delete unnecessary original titles See page 55 Recording Error You cannot record on this disc as Power Calibration Area...

Page 79: ...669 Kannada 5760 Kashmiri 5765 Kazakh 5757 Kinyarwanda 6469 Kirghiz 5771 Kirundi 6460 Korean 5761 Kurdish 5767 Laothian 5861 Latin 5847 Latvian Lettish 5868 Lingala 5860 Language Code Lithuanian 5866 Macedonian 5957 Malagasy 5953 Malay 5965 Malayalam 5958 Maltese 5966 Maori 5955 Marathi 5964 Moldavian 5961 Mongolian 5960 Nauru 6047 Nepali 6051 Norwegian 6061 Occitan 6149 Oriya 6164 Oromo Afan 6159...

Page 80: ...rding format Sampling frequency Compression format 48 kHz Dolby Digital Tuner Analogue channels L SECAM L BG PAL B G F1 E69 E2 E69 DVB T channels VHF UHF F5 F10 E21 E69 Available source coding method MPEG 2 Input Output Front Panel DV input DV 4 pin jack IEEE 1394 USB input TYPE A USB 2 0 Bus power current MAX 500 mA Rear Panel VHF UHF antenna input output terminal 75 Ω Audio input output Input ou...

Page 81: ......

Page 82: ......

Page 83: ......

Page 84: ...3 3 2 5 9 Declaration of Conformity This product complies with the requirement of the related directives is in compliance with the related regulations We FUNAI ELECTRIC EUROPE Sp z o o ul Inżynierska 1 67 100 Nowa Sól Poland declare that the following product DVD Video Cassette recorder Model WD6D M101 Trade Name Funai ...

Reviews: