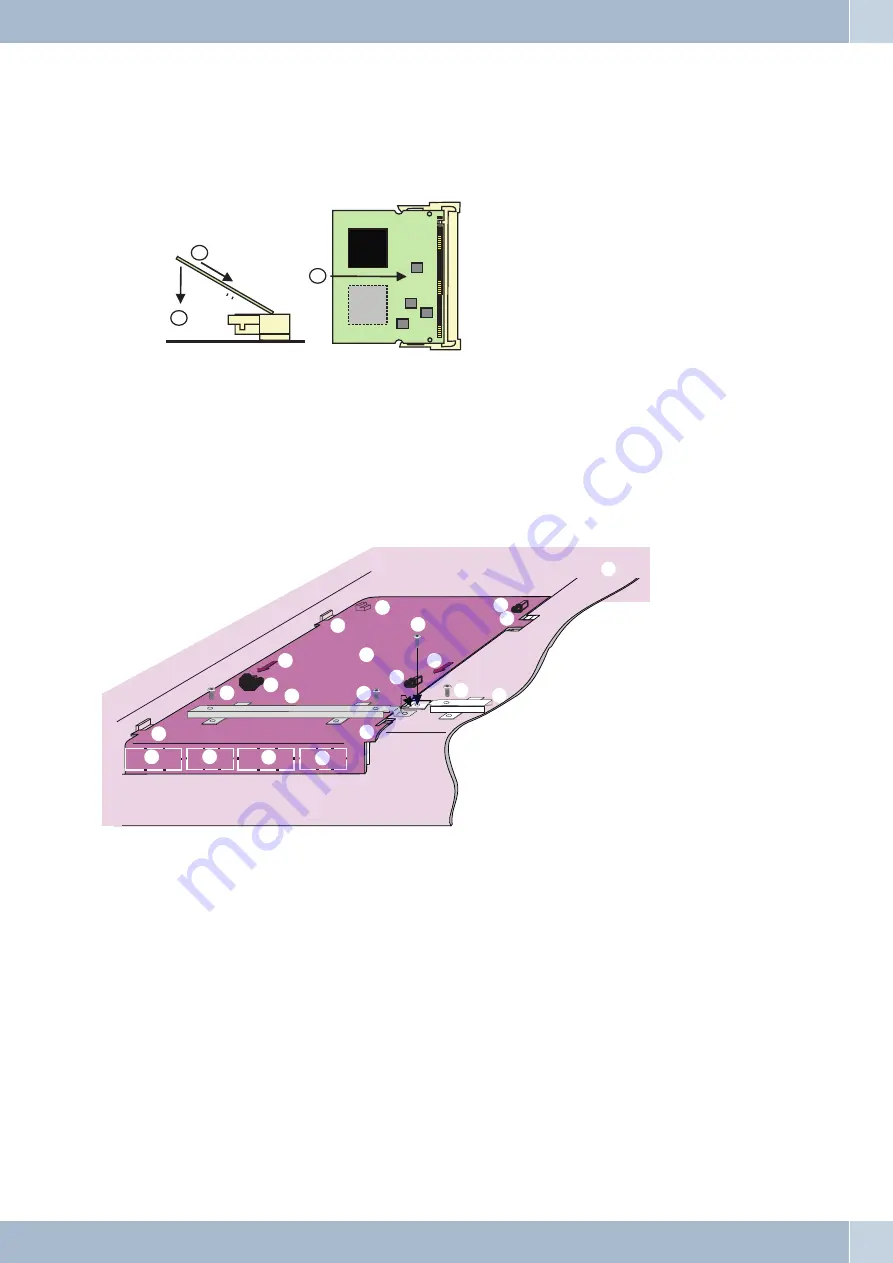
Mount modules for module slots 11 and 12
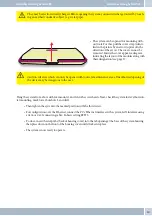
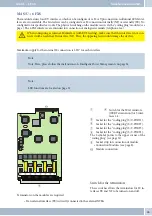
As pictured, the module is inserted into the plug base at an angle of ca. 45 degrees (A), then pushed down (B) until the
plug snap tabs lock into the module. To remove the module, simultaneously press both tabs toward the outside; the
module snaps into the position shown at bottom of the image. It may then be extracted in the opposite direction (A).
1
Plug base for module.
2
Plug base snap tab.
3
Module.
4
Insertion direction for module mounting.
Open module slot 1
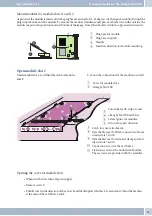
Under module slot 2, you’ll find the slots for modules
9-12 and the connections for the modules on slots 7
and 8.
1
Cover for module slot 1.
2
elmeg hybird 300.
3
Functional earth strip of cover.
4
elmeg hybird 300 earth bar.
5
Lateral guide for modules.
6
Arrows for open direction.
7
Catch for cover attachment.
8
Detachable cover for RJ45 connectors of mod-
ules in slots 7 and 8.
9
Detachable cover for terminal clamps of mod-
ules in slots 7 and 8.
0
Connection screw for the earth bars.
?
Fixation screws for the Connection Module.
These screws are provided with the modules.
Opening the cover for module slot 1
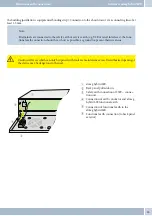
• When switched on, turn off power supply.
• Remove screw 0
• Pull off cover in the direction of the arrow 6 and lift off upward. In this, be careful not to bend the brackets
at the ends of the earth bars 3 and 4.
Open module slot 1
Mounting modules in the elmeg hybird 300
12
1
2
3
4
A
B
A
5
4
5
2
ß
8
9
8
9
1
6
ß
7
7
6
5
5
7
7
3
ß
0


