background image

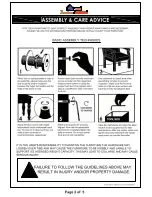
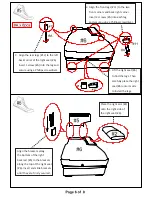
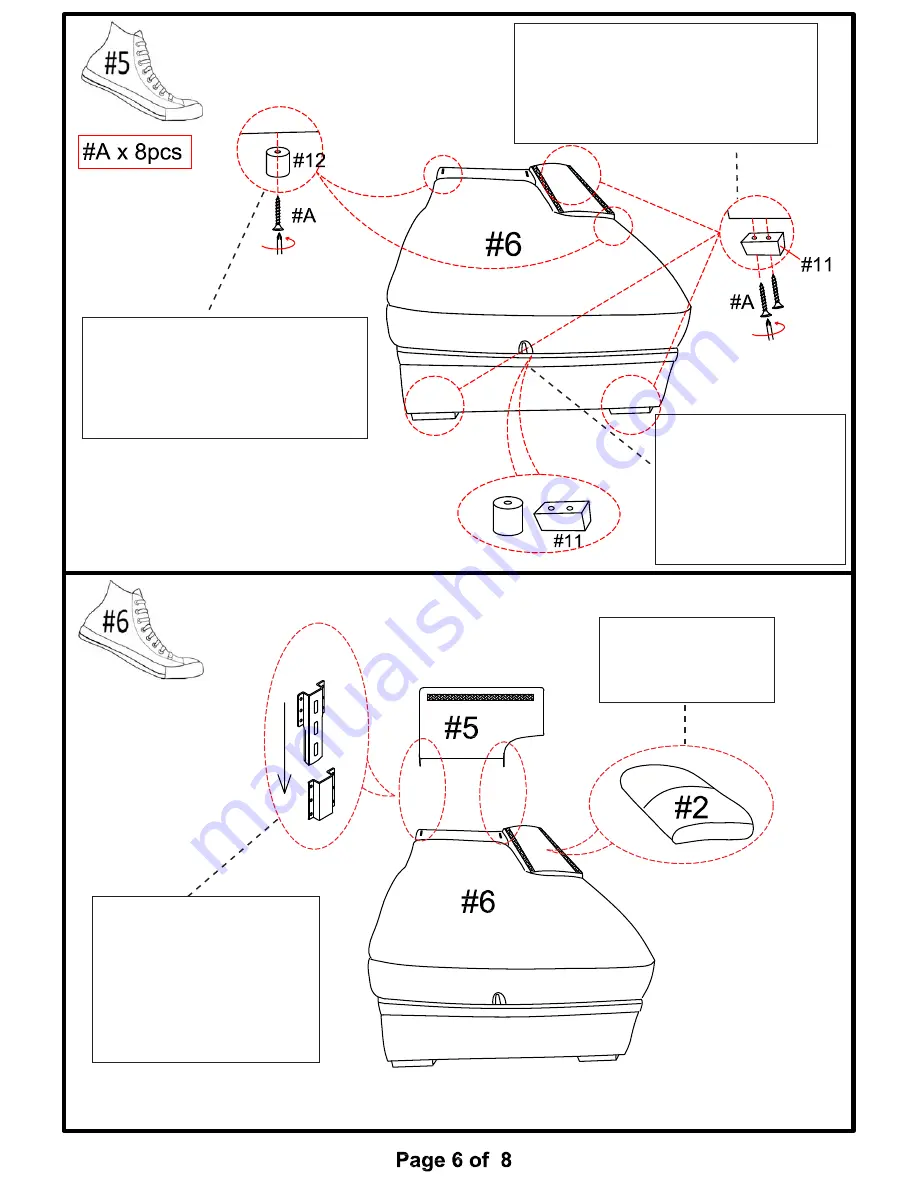
1.  Lift the right seat (#6)  

     to find the legs. Then 

     carefully place the right 

     seat (#6) onto its side 

     to install the legs.

2.  Align the front legs (#11) to the two 

     front corners and back right corner. 

     Insert 2 screws (#A) into each leg 

     and secure using a Phillips screwdriver.

3.  Align the rear legs (#12) to the left 

     back corner of the right seat (#6). 

     Insert 1 screw (#A) into the leg and 

     secure using a Phillips screwdriver.

Align the brackets along  

the bottom of the right  

backrest (#5) to the brackets  

along the top of the right seat 

(#6). Insert and slide brackets  

until they are firmly secured.

Place the right arm (#2) 

onto the right side of 

the right seat (#6).

#12

Summary of Contents for CM6908

Page 1: ...Rev 16 06 25 ...

Page 2: ......

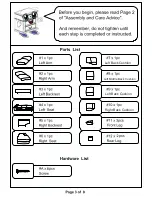
Page 3: ...Left Back Cushion Left Back Cushion Right Back Cushion Left Middle Back Cushion ...

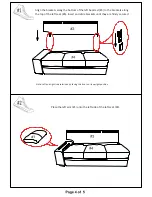
Page 4: ...ide of the left seat 4 Note Left and right is determined by facing the front on its upright position Align the brackets along the bottom of the left backrest 3 to the brackets along the top of the left seat 4 Insert and slide brackets until they are firmly secured Note Left and right is determined by facing the front on its upright position Place the left arm 1 onto the left side of the left seat ...

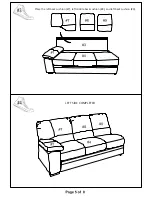
Page 5: ...Place the left back cushion 7 left middle back cushion 8 and left back cushion 9 LEFT SIDE COMPLETED Place the left back cushion 7 left middle back cushion 8 and left back cushion 9 LEFT SIDE COMPLETED ...

Page 6: ... leg and secure using a Phillips screwdriver 3 Align the rear legs 12 to the left back corner of the right seat 6 Insert 1 screw A into the leg and secure using a Phillips screwdriver Align the brackets along the bottom of the right backrest 5 to the brackets along the top of the right seat 6 Insert and slide brackets until they are firmly secured Place the right arm 2 onto the right side of the r...

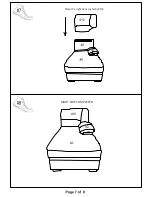
Page 7: ...Place the right back cushion 10 RIGHT SIDE COMPLETED Place the right back cushion 10 RIGHT SIDE COMPLETED ...

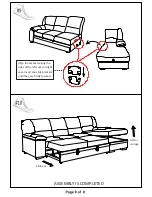
Page 8: ...t seat Insert and slide brackets until they are firmly secured Lift for storage Slide out ASSEMBLY IS COMPLETED Align the brackets along the sides of the left seat and right seat Insert and slide brackets until they are firmly secured Lift for storage Slide out ...

Reviews: