6
Installation
English
Installation Precautions
Location
• Do not install your refrigerator in a
location where the unit may not be
fully loaded.
• Do not install your refrigerator in
direct sunlight or expose it to the
heat from stove, heater, radiator or
other appliances.
What’s in the box
Check all the items included in the
carton box. If anything damaged or
missing, contact your dealer.
• Refrigerator x 1
• Instruction Manual x 1
• Warranty Card x 1
NOTE
: The trim kits and screws for this
fridge are packed in another box,Please
contact your dealer if any of these
damaged or missing.
• Trim Kit Case x 1
−
Trim Kit x 4
−
Trim strip x 2
−
Screws 1set x 15
(M5x10 x 8 and ST4.8x25 x 7)
Installing Your Refrigerator
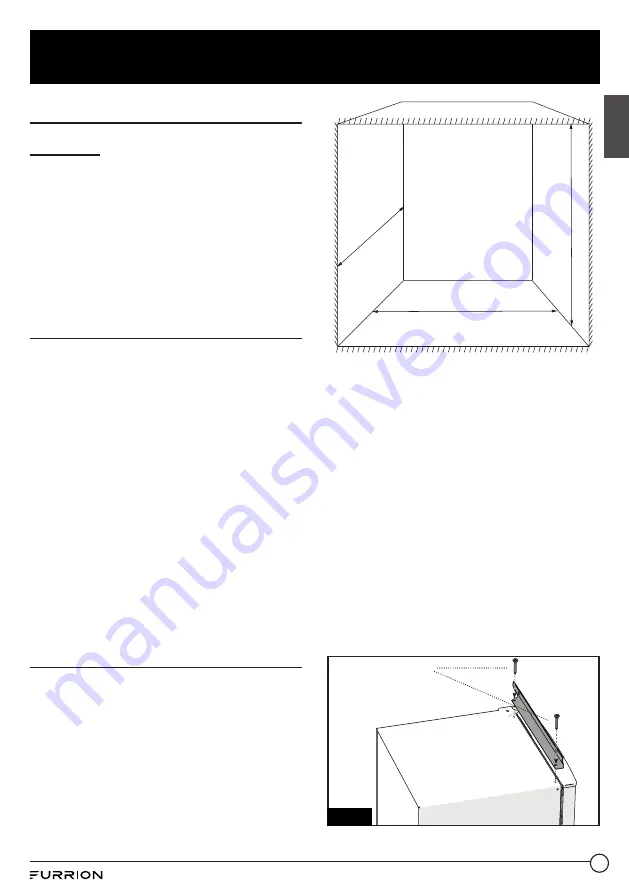
Install the refrigerator in a convenient
location away from extreme heat and
cold.
Select a solid surface with the floor
supporting a weight of 200Kg.
Connect the refrigerator with power
supply correctly.
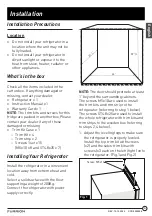
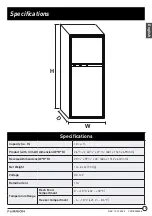
59
7
/
8
”
24”
24
1
/
8
”
NOTE:
The door should protrude at least
1” beyond the surrounding cabinets.
The screws M5x10 are used to install
the trim kits and trim strip to the
refrigerator (referring to step 1 below).
The screws ST4.8x25 are used to install
the whole refrigerator with trim kits and
trim strips to the wooden box (referring
to steps 2, 4 below).
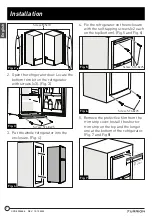
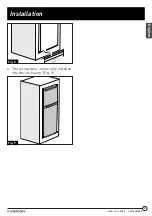
1. Adjust the leveling legs to make sure
the refrigerator is properly leveled.
Install the top trim kit with screws
(x2) and the sides trim kits with
screws (x3 each on the left/right) onto
the refrigerator. (Fig.1 and Fig.2)
Screw: M5x10
Fig. 1
REV: 10.12.2022
CCD-0005596
Summary of Contents for FCR10DCBTA-BL
Page 47: ...46 REV 10 12 2022 CCD 0005596...

