background image

24

Change Settings

English

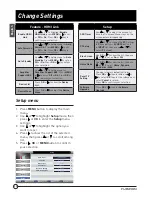
Feature - HDMI Link

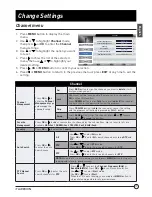
Enable HDMI 

Link

Use   or   to highlight 

Enable


HDMI Link

,


press

 MENU 

or


 to set 

as 

Off

 or 

On

. Press 

OK

 or   key to 

confirm your selection.

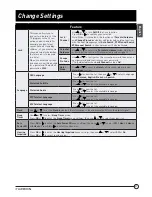
Auto PowerOn

Use   or   to Setup menu for 

Auto 

PowerOn

. Press

 MENU 

or


 to set 

as 

Off

 or 

On

. Press 

OK

 or   key to 

confirm your selection.

Auto Standby

Use   or   to Setup menu for 

Auto 

Standby

. Press

 MENU 

or


 to set as 

Off

 or 

On

. Press 

OK

 or   to confirm 

your selection.

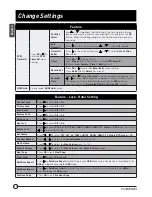
Amplifier 

Support ARC

Use   or   to Setup menu for 

Amplifier Support ARC

. Press

 MENU 

or


 to set as 

Off

 or 

On

. Press 

OK

 or 

 to confirm your selection.

Device List

Press 

OK

 or   to show the 

Device 

List.

Device Menu

Press 

OK

 or   to adjust the 

Device 

Menu.

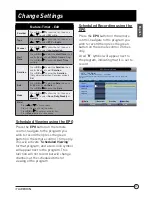
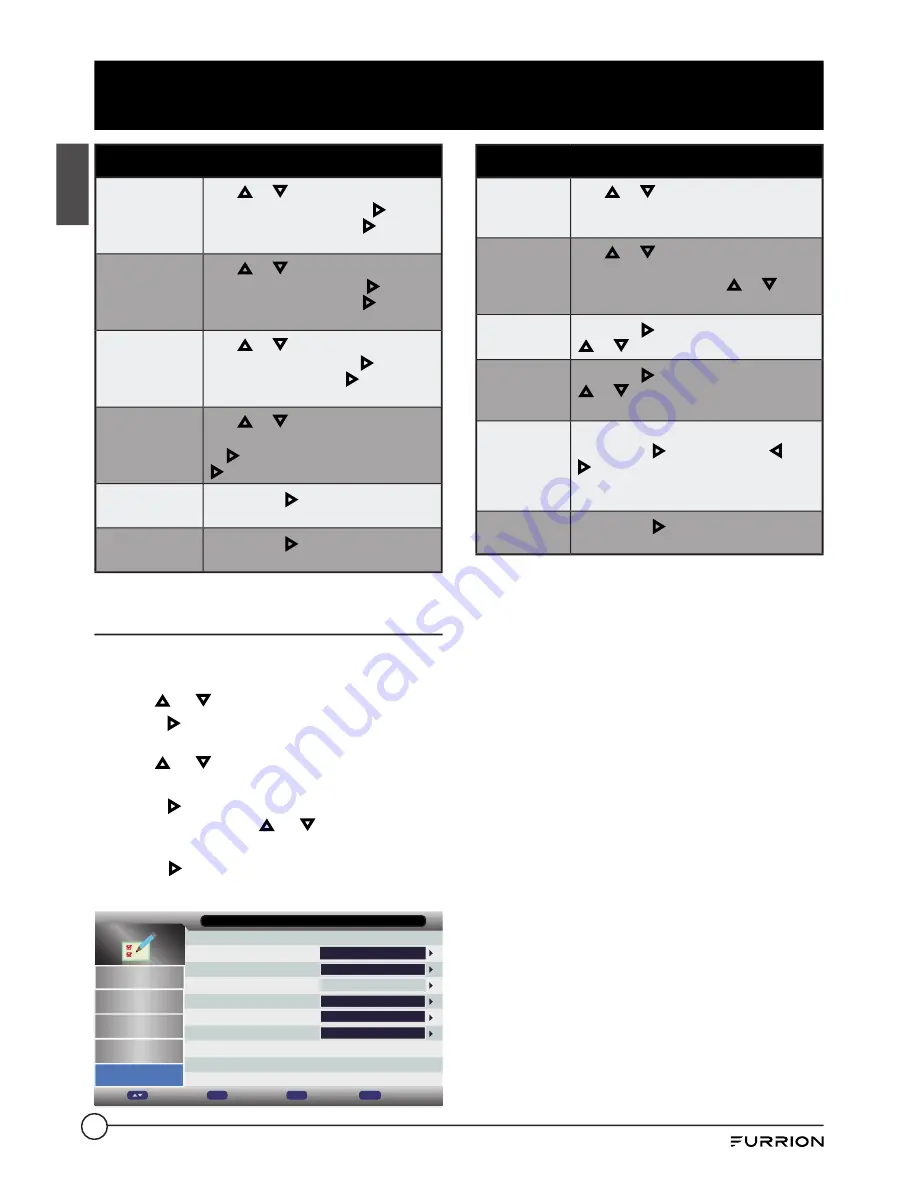
Setup menu

1.  Press 

MENU

 button to display the main 

menu.

2.  Use   or   to highlight 

Setup

 mode, then 

press   or 

OK

 to enter the 

Setup

 menu 

settings.

3.  Use   or   to highlight the option you 

want to reset. 

4.  Press


 to show the list of the selected 

menu, then press   or   to scroll among 

list. 

5.  Press  , 

OK

 or 

MENU

 button to confirm 

your selection.

Blue Screen

Home Mode

Reset TV Setting

Software Upgrade

Sound

Channel

Feature

Setup

OSD Timer

PC Setup

15 Seconds

Home

On

ENTER

ENTER

ENTER

Setup

Picture

Enter

Move

Ok

Exit

Exit

Menu

Return

Setup

OSD Timer

Use   or   to adjust the amount of 

time the On Screen Menu stays on the 

screen before disappearing.

PC Setup

Use   or   to change the 

PC

 Settings 

in 

PC

 mode(Press 

SOURCE

 button to 

in 

INPUT

 list, then press   or   to 

select 

PC

 mode).

Blue Screen

Use 

OK

 or   to show the list, then use 

 or   to set as 

On

 or 

Off.

Home Mode

Use 

OK

 or   to show the list, then use 

 or   to select 

Home, Dynamic, 

Standard 

or

 Mild

.

Reset TV 

Setting

Change to factory default settings.

Press 

OK

 or   to enter and use   or 

 to select 

OK

 to enter the submenu or 

select 

Cancel

 to return. 

Press 

OK

 to confirm your selection.

Software 

Upgrade

Press 

OK

 or   to enter 

Software 

Upgrade

.

Summary of Contents for FEHD24S3D

Page 1: ...Model FEHD24S3D LED HD TV DVD Combo 12V Instruction Manual Product picture is for reference only...

Page 2: ...ction manual contains information for installation maintenance of the product and safe use Please keep this instruction manual in a safe place for future reference Be sure to pass on this manual to an...

Page 3: ...er Source 13 Before Operation 14 What s in the Box 14 Preparation of your Remote Control 14 Getting Started 15 Settings 17 Picture menu 17 Sound menu 18 Channel menu 19 Feature menu 20 Setup menu 24 U...

Page 4: ...pparatus including amplifiers that produce heat 9 Do not defeat the safety purpose of the polarized or grounding type plug A polarized plug has two blades with one wider than the other A grounding typ...

Page 5: ...ATIONAL ELECTRICAL CODE ANTENNA LEAD IN WIRE GROUNDING CONDUCTORS NEC SECTION 810 21 ELECTRIC SERVICE EQUIPMENT 20 When replacement parts are required be sure the service technician uses replacement p...

Page 6: ...anel on for long periods of time while it is displaying the following formats or images Fixed images such as stock tickers video game patterns TV station logos and websites Special formats that do not...

Page 7: ...m that to which the receiver is connected Consult the dealer or an experienced radio TV technician for help CAUTION Changes or modifications not expressly approved by the party responsible for complia...

Page 8: ...4S3D 100 100 BM4 8mm 4 Notice for TV Cabinet If the unit is to be mounted on a cabinet smaller than the length of the unit it could result in an unstable location The unit may tumble over making a ris...

Page 9: ...or pause the playback 3 Increase the volume 4 Decrease the volume 5 CH Skip to the next channel 6 CH Skip to the previous channel 7 M Enter the main menu 8 Select the input source 9 Switch the TV on o...

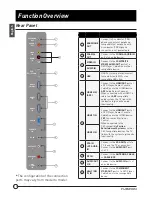
Page 10: ...C compatible audio system the TV links with the device to give extra audio functionality 6 HDMI 1 IN Connect to the HDMI OUT port of a DVD Player Games Console Cable Box or other HDMI device CEC Consu...

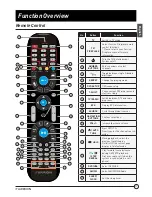
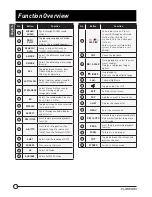
Page 11: ...D Directly enter the channel search mode 14 HOLD During playback select the previous track chapter Hold On Off the current page display in Teletext mode 15 STEP REVEAL Play forward frame by frame duri...

Page 12: ...peat function playback loop of a segment of track Turn the Teletext On Off 32 SUBT Select subtitle language DVD 33 FREEZE Freeze current picture 34 AV Select AV Mode 35 AUX ARC Select AUX ARC Mode No...

Page 13: ...yer satellite receiver or other audio video component can be connected to this unit Power Source NOTE Please make sure to insert the cord securely at both the LED TV and the wall outlet WARNING DO NOT...

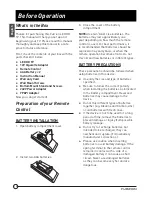
Page 14: ...d on a yearly basis or when the remote operation becomes erratic Do not mix old and new batteries or different types BATTERY PRECAUTIONS These precautions should be followed when using batteries in th...

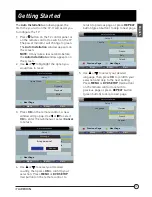
Page 15: ...or select Cancel to return Auto Installation Setup 1 Home Mode Standard Dynamic Mild Home Next Page Move Enter OK Exit Exit Message OK Cancel Are you sure 4 Use or to select your desired country then...

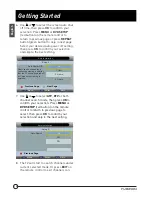
Page 16: ...revious Page Move Enter OK Exit Exit Next Page Hours can be chosen for a continuous viewing and after that the TV will be powered off off means the viewing is timeless 7 Use or to select ATV DTV or bo...

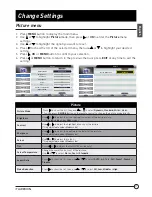
Page 17: ...cture Enter Ok Exit Exit Menu Return Move Picture Picture Mode Press to show the list then use or to select Dynamic Standard Mild or User You can press P MODE button on the remote control to change th...

Page 18: ...of the lower pitched sounds Only adjustable under User mode Treble Press or to increase or decrease high pitched sounds Only adjustable under User mode Balance Press OK or to enter the setting page an...

Page 19: ...nnel press or to move Press OK or to swap the position Favorite Management Press OK or to add or remove favorite channels by the color buttons Up to 4 favorite lists are available RED Fav1 GREEN Fav2...

Page 20: ...Auto PAL or SECAM Sound System Press to show the list then use or to select BG DK or I NOTE When the TV is auto running you could press MENU button to stop auto tunning and return to previous menu Fea...

Page 21: ...irm your new password Only adjustable when Lock Channel mode is On Hotel Mode Use or to enter the Hotel setting menu please review Hotel Mode section Language OSD Language Press to show the list then...

Page 22: ...g Directly by Using EPG section HDMI Link Please review HDMI Link section Feature Lock Hotel Setting Channel Lock Press to select Off or On Picture Lock Press to select Off or On Sound Lock Press to s...

Page 23: ...to save menu Scheduled Viewing using the EPG Press the EPG button on the remote control navigate to the program you wish to record then press the green button on the remote control 1 time only This w...

Page 24: ...3 Use or to highlight the option you want to reset 4 Press to show the list of the selected menu then press or to scroll among list 5 Press OK or MENU button to confirm your selection Blue Screen Hom...

Page 25: ...e main USB menu 001 001 Photo disk 1 Page Move CH Enter OK Exit Exit 4 Use or to highlight folder in flash drive Press OK or to enter the file list and press to return to the previous menu Press EXIT...

Page 26: ...ct the option on the table and press OK to enter the previous menu Press EXIT at any time to return to the main USB menu 001 001 Music disk 1 Page Move CH Enter OK Exit Exit 4 Use or to highlight fold...

Page 27: ...OK Exit Exit Play the movie Movie Play Pause the movie playing Stop and exit the movie playing Fast backward Fast forward Movie Play the movie in slow mode Play the movie in step mode Set the A B repe...

Page 28: ...uld press OK to display the option table when it disappears Page Page Exit Exit Enter Enter e Book 1 3 8 121 have 35 match es for robin hobb in listfile MAJECKI_MAIN Type majeckibiglist to obtain the...

Page 29: ...memorizes when playback is stopped and recalls when the disc is next played Press or to set the Last Memory On or Off Sound Setup Downmix Set the Audio Downmix mode Press or to select Stereo LT RT Pr...

Page 30: ...ction 1 AUTO TUNE Eject DVD CD 2 HOLD Select the previous track chapter during playback 3 Start pause or restart the playback 4 STEP REVEAL Play the previous file directly 5 APS SIZE Play the next fil...

Page 31: ...ack When playing a DVD VCD SVCD CD Press to eject the disc Press to Start Pause or restart the playback Press to stop the playback Press or during playback to skip to the previous or next chapter trac...

Page 32: ...ck 5 MP3 Artist Track 6 MP3 Album Artist MP3 playback screen When playing Video Audio files from a disc Press to eject the disc Press to start pause or restart the playback Press to stop the playback...

Page 33: ...on Ensure the antenna amplifier is turned on for Antenna TV Adjust the antenna position to a stronger signal receiving angle Check the Antenna connection is tight to the TV Check there is power suppli...

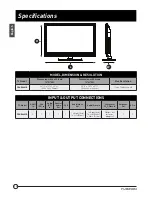
Page 34: ...5 x 363 x 55mm 221 4 x 157 8 x 53 4 565 x 403 x 146mm 1366 x 768 60Hz HD INPUT OUTPUT CONNECTIONS TV Model HDMI in VGA PC in Audio PC in Coaxial Audio Out USB Audio Video Out Audio Video in Component...

Page 35: ...RANTY ALL SUCH WARRANTIES INCLUDING WARRANTIES OF MERCHANTABILITY AND FITNESS FOR A PARTICULAR PURPOSE ARE LIMITED IN DURATION TO THE DURATION OF THIS WARRANTY No Furrion reseller agent or employee is...

Page 36: ...of Technology 52567 Independence Ct Elkhart IN 46514 USA Toll free 1 888 354 5792 Email support furrion com 2007 2019 Furrion Ltd Furrion and the Furrion logo are trademarks licensed for use by Furri...

Reviews: