


11
About Your LED HD TV
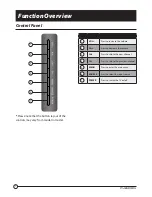
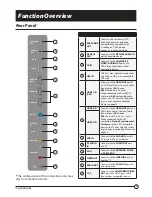
Features
Integrated Digital Tuner
- You can view digital broadcasts without using a Digital TV Set-Top Box.
Closed Caption Decoder With Full Text Mode
- Displays text captions or full screen text on the
screen for hearing impaired viewers.
Picture Adjustments Using The Remote Control
- The On-Screen display allows precise remote
control adjustment of BRIGHTNESS, CONTRAST, COLOR, TINT and SHARPNESS.
Programmable TV Sleep Timer
- Operable from the remote control, the TV can be programmed for
up to 240 minutes to turn o
ff
automatically.
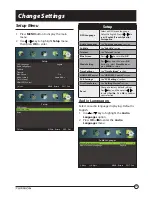
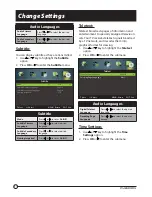
On-Screen 3 Language Display
- You can select one of 3 languages, English, Spanish or French for
on-screen programming.
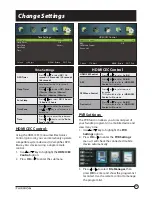
HDMI/Component Video Jacks
- A VCR, DVD player, satellite receiver or other audio/video
component can be connected to this unit.
Power Source
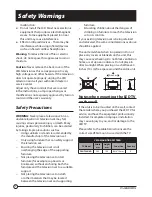
NOTE:
●
Please make sure to insert the cord securely at both the LED TV and the wall outlet.
WARNING:
●
DO NOT CONNECT THIS UNIT TO THE POWER USING ANY DEVICE OTHER THAN THE SUPPLIED 12V
CIGARETTE ADAPTER. THIS COULD CAUSE FIRE, ELECTRICAL SHOCK, OR DAMAGE.
●
DO NOT USE WITH A VOLTAGE OTHER THAN THE POWER VOLTAGE SPECIFIED. THIS COULD CAUSE
FIRE, ELECTRICAL SHOCK, OR DAMAGE.
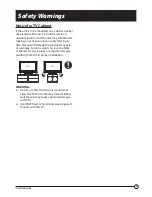
CAUTION:
●
WHEN THIS UNIT IS NOT USED FOR A LONG TIME, (E.G., AWAY ON A TRIP) IN THE INTEREST OF
SAFETY, BE SURE TO UNPLUG IT FROM THE AC OUTLET.
●
DO NOT PLUG/UNPLUG THE 12V CIGARETTE ADAPTER (INCLUDED) OR AC/DC POWER ADAPTER
(EXCLUDED) WHEN YOUR HANDS ARE WET. THIS MAY CAUSE ELECTRICAL SHOCK.
●
IF YOU NEED TO REPLACE THE SUPPLIED 12V CIGARETTE ADAPTER OR AC/DC POWER ADAPTER
(EXCLUDED), THE SPECIFIED ONE IS RECOMMENDED. CONTACT THE DEALER THAT YOU
PURCHASED THE UNIT FROM.


