background image

12

Before Operation

What’s in the Box

Thanks for purchasing this Furrion LED HD 
TV. This manual will help you set up and 
begin using your TV. Please read this manual 
thoroughly and keep this manual in a safe place 
for future reference.

First, check the contents of your box with the 
parts checklist below:


LED HD TV


12V Cigarette Adapter


Base Stand


Unimote


AAA Battery 

×

 2


Instruction Manual


Warranty Card


Wall-mount Screws


240V Power Adapter


AV Adapter


YP

b

P

r

 Adapter

Now you can get started! 

Preparation of your Remote 
Control

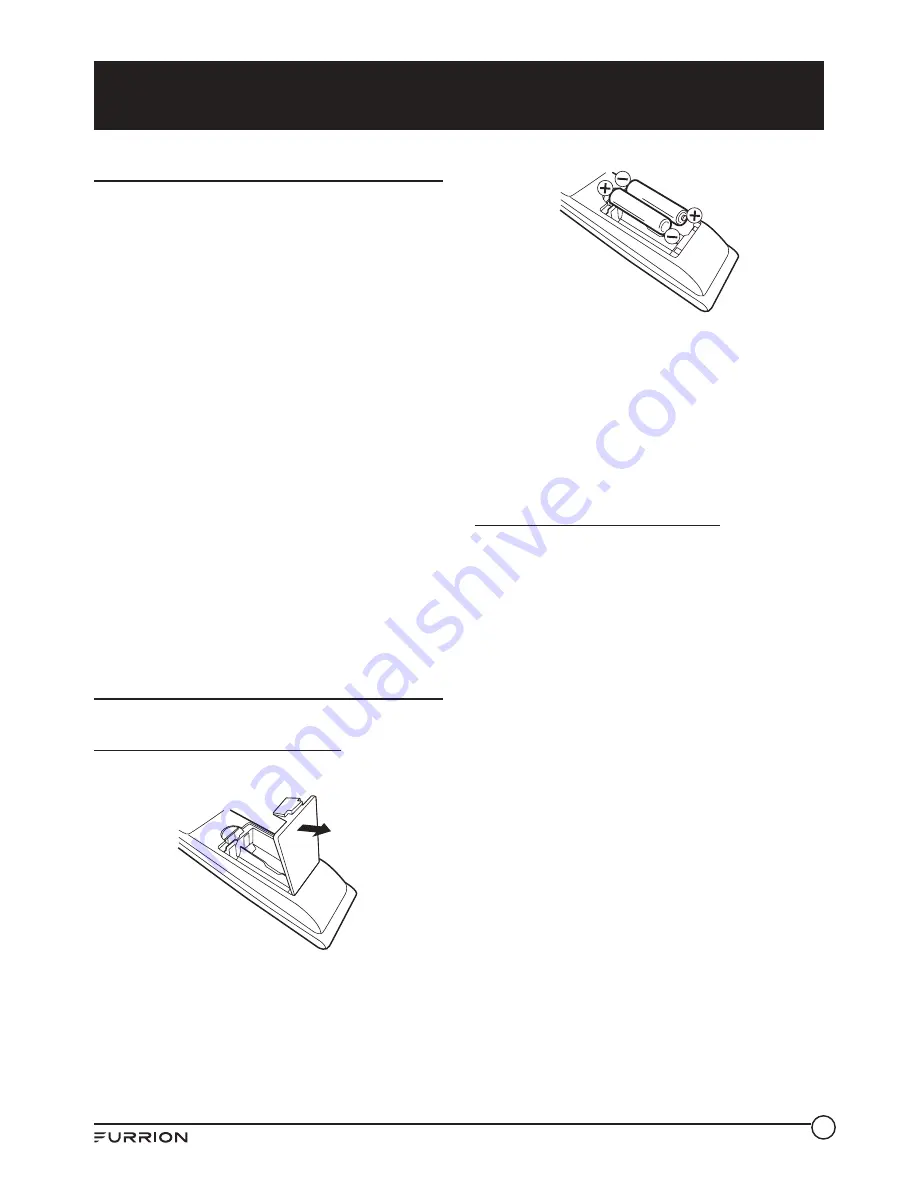
BATTERY INSTALLATION

1.  Open battery compartment cover.

2.  Install two AAA batteries. 

3.  Close the cover of the battery compartment.

NOTE:

 Use two “AAA” size batteries. The batteries 

may last approximately one year depending on 
how much the remote control is used. For best 
performance, it is recommended that batteries 
should be replaced on a yearly basis, or when 
the remote operation becomes erratic. Do not 
mix old and new batteries or di

erent types.

BATTERY PRECAUTIONS

These precautions should be followed when 
using batteries in this device:


Use only the size and type of batteries 
specified.


Be sure to follow the correct polarity when 
installing the batteries as indicated in the 
battery compartment. Reversed batteries 
may cause damage to the device.


Do not mix di

erent types of batteries 

together (e.g. Alkaline and Carbon-zinc) or 
old batteries with fresh ones.


If the device is not to be used for a long 
period of time, remove the batteries to 
prevent damage or injury from possible 
battery leakage.


Do not try to recharge batteries not 
intended to be recharged; they can overheat 
and rupture. (Follow battery manufacturer’s 
directions.)


Please use caution when inserting batteries 
to avoid battery damage. If the spring 
terminal in the remote control remains in 
contact with a side of a damaged battery 
it can cause a short circuit. Never use 
damaged batteries as they can become very 
hot and are dangerous.

Summary of Contents for FEHT32N8D

Page 1: ...LED HD TV Owner s Manual Model FEHT32N8D ...

Page 2: ...allation and maintenance of the appliance Please keep this instruction manual in a safe place for future reference This will ensure safe use and reduce the risk of injury to persons Pass it onto possible new owners of the appliance The manufacturer does not accept responsibility for any damages that may arise due to non observation of these instructions If you have any further questions regarding ...

Page 3: ...emote Control 9 About Your LED HD TV 11 Features 11 Power Source 11 Before Operation 12 What s in the Box 12 Preparation of your Remote Control 12 Getting Started 13 Change Settings 14 Picture Menu 14 Sound Menu 15 Channel Menu 16 Lock System Menu 19 Setup Menu 20 USB Operation 25 Photo 25 Music 25 Movie 26 Text 26 Trouble Shooting 27 Specifications 28 ...

Page 4: ... receptacles and the point where they exit from the apparatus 10 Only use attachments accessories specified by the manufacturer 11 Use only with a cart stand tripod bracket or table specified by the manufacturer or sold with the apparatus When a cart is used use caution when moving the cart apparatus combination to avoid injury from tip over 12 Unplug this apparatus during lightning storms or when...

Page 5: ...r about an hour before switching it on or make sure that the room temperature rises gradually Condensation may also form during the summer if the unit is exposed to the breeze from an air conditioner In such cases change the location of the unit HOW TO HANDLE THE LCD PANEL Do not press hard or jolt the LCD panel It may cause the LCD panel glass to break and injury may occur If the LCD panel is bro...

Page 6: ...the television set is not overhanging the edge of the supporting furniture Not placing the television set on tall furniture for example cupboards or bookcases without anchoring both the furniture and the television set to a suitable support Not placing the television set on cloth or other materials that may be located between the television set and supporting furniture Educating children about the...

Page 7: ...lso this would damage the product seriously Accordingly Furrion accepts no responsibility or liability for any injuries or property damage resulting from the improper installation YES NO Wire Clamp Screw Wire 4 inches Wire WARNING Do not use this TV with wall mounts that allow the TV to tilt vertically Vertical tilting wall mounts may cause structural damage to the TV Use ONLY fixed or horizontal ...

Page 8: ... volume 3 CH Press to skip to the next channel 4 CH Press to skip to the previous channel 5 MENU Press to enter the main menu 6 SOURCE Press to select the input source 7 POWER Press to switch the TV on off 1 2 3 4 5 6 7 Please note that the button layout of the controls may vary from model to model ...

Page 9: ...evice to give extra audio functionality Please see page13 6 HDMI 2 IN Connects to the HDMI OUT port of a DVD Player Games Console Cable Box or other HDMI device CEC Consumer Electronics Control When connected to the CEC compatible Furrion Entertainment Systems or other CEC Compatible devices the TV links with the system to give extra functionality Please see page13 HDMI 3 IN 7 VGA IN Connects to t...

Page 10: ...UNE Ejects DVD CD Press to directly enter the channel search mode 14 HOLD During playback press to select the previous track chapter Press to hold On Off the current page display in Teletext mode 15 STEP REVEAL Press to forward frame by frame during DVD VCD playback Dial or accept a call when the system is connected to a cell phone 16 DVD USB Selects DVD USB 17 AM FM Selects AM FM WB Radio 18 SLEEP...

Page 11: ... segment of track Press to turn the Teletext On Off 32 SUBT Select subtitle language DVD 33 FREEZE To freeze current picture 34 AV Selects AV Mode 35 AUX ARC Selects AUX ARC Mode No Button Function 36 APS SIZE Press to scan radio stations A brief press searches through each stored station Press hold to scan and store the 6 strongest stations End or reject a call when the system is connected to a ce...

Page 12: ... satellite receiver or other audio video component can be connected to this unit Power Source NOTE Please make sure to insert the cord securely at both the LED TV and the wall outlet WARNING DO NOT CONNECT THIS UNIT TO THE POWER USING ANY DEVICE OTHER THAN THE SUPPLIED 12V CIGARETTE ADAPTER THIS COULD CAUSE FIRE ELECTRICAL SHOCK OR DAMAGE DO NOT USE WITH A VOLTAGE OTHER THAN THE POWER VOLTAGE SPEC...

Page 13: ...arly basis or when the remote operation becomes erratic Do not mix old and new batteries or different types BATTERY PRECAUTIONS These precautions should be followed when using batteries in this device Use only the size and type of batteries specified Be sure to follow the correct polarity when installing the batteries as indicated in the battery compartment Reversed batteries may cause damage to th...

Page 14: ...Mode Settig Home Mode Country Australia Auto Scan DTV ATV LCN On Auto Channel Update Off Start Move Adjust MENU Return EXIT Exit First Time Setup OSD Language Use or key to select English French Spanish Portuguese Mode Setting Press or key and then press OK button to select Store Mode or press MENU to return Country Use or key to select the desired country Auto Scan Use or key to select DTV ATV DTV...

Page 15: ...e remote control to change the picture mode directly Brightness Press or to adjust the visual perception output of the entire picture Contrast Press or to adjust the highlight intensity of the picture Sharpness Press or to adjust the peaking in the detail of the picture Saturation Press or to adjust the saturation of the color based on your own like Hue Use in compensating color changed with the t...

Page 16: ... settings 3 Press MENU to return to the previous menu or press EXIT at any time to exit the setting Sound Sound Mode Press or to select Standard Music Movie Personal You can press S MODE button on the remote control to change the sound mode directly Treble Press or to increase or decrease high pitched sounds Bass Press or to increase or decrease lower pitched sounds Balance Press or to adjust the ...

Page 17: ... On Off Volume Press or to adjust to desired level Only available after setting Mode as On Channel Menu 1 Press MENU button to display the main menu 2 Use or key to highlight Channel menu then press OK to enter Channel Auto Scan Off Manual Scan Auto Channel Update Channel Edit Favorite Manager Signal Information Move MENU Return EXIT Exit Channel Auto Scan See Auto Scan section Manual Scan See Manua...

Page 18: ...turn EXIT Exit Auto Scan Country Austrilia DTV ATV Mode Start Move Adjust MENU Return EXIT Exit Manual Scan Digital Manual Scan Analog Manual Scan Move OK Select MENU Return EXIT Exit Manual Scan Digital Manual Scan See Digital Manual Scan section Analog Manual Scan See Analog Manual Scan section Digital Manual Scan 1 Use or key to highlight the Digital Manual Scan 2 Press OK or to enter the Digit...

Page 19: ... to set the channel as moving state Use or key to move it to the position you want to put then press Blue button again to finish the moving operation Signal Information Network Name 177 50 MHz DVB T 0 0 0 CH6 Seven Network Channel Frequency Modulation Strength Quality MENU Return EXIT Exit Analog Manual Scan AnalogScan 44 25MHz Auto CH001 Auto Channel to Save Color System Sound System Off AFC backw...

Page 20: ...it Hotel Mode Active Hotel Mode Off 100 30 ___ Off Max Vol Default Vol Source Lock Default source Default Dtv program Adjust Lock System Enter Password Press 0 9 number keys to enter the password The default password is 0000 If you forgot the password use 8888 to enter any locked menu Enable Press or to set as On Off Channel Locks Press OK or to enter the submenu use or key to select the channel you ...

Page 21: ...o select English French Spanish Portuguese Audio Languages See Audio Languages section Subtitle See Subtitle section Teletext See Teletext section Blue Screen Press or to set as On Off Mode Setting Press key and then press OK button to select Store Mode or press MENU to return Time Settings See Time Settings section HDMI CEC Control See HDMI CEC Control section PVR Settings See PVR Settings section...

Page 22: ...ge Press or to select desired language Hearing Impaired Press or to set as On Off Teletext Teletext broadcasts pages of information and entertainment to specially equipped television sets Your TV receives Teletext signals broadcast by a TV network and decodes them into graphical format for viewing 1 Use or key to highlight the Teletext option 2 Press OK or to enter the submenu HDMI CEC Control Time...

Page 23: ...ht the HDMI CEC Control option 2 Press OK or to enter the submenu HDMI CEC Control First Time Setup Mode Setting Home Mode Country Australia Auto Scan DTV ATV LCN On Auto Channel Update Off Start Move Adjust MENU Return EXIT Exit HDMI CEC Control ARC Move Adjust MENU Return EXIT Exit On Off CEC Menu Control Device List CEC Menu Control Home menu Option Content HDMI CEC Control Press Reset To Update ...

Page 24: ... Directly by Using EPG 1 Tune to the channel you wish to record 2 Press EPG button on the remote control use button to navigate to the program that you wish to record 3 Press REC AUTO button on the remote control The above Scheduled Record menu will appear Use or to select the frequency to record then navigate to Save and press OK button on the remote control Programs selected in this way will be ...

Page 25: ...sired program then press the BLUE button on the remote the REMINDER menu will appear select the reminder frequency then select SAVE Programs selected in this way will be marked with a Red Dot in the EPG Adjust Reminder Setting Status Setting Is In Use Adjust Frequency Once Channel Start Time 2004 7 28 1 4 1 5 7 Digital 3 Save NOTE Press EPG button on the remote control to view the program s to be ...

Page 26: ...nd press OK button to return to the previous menu Press EXIT at any time to return to the main USB menu Music 1 Use or key to select Music Press OK to enter 2 Use or key to navigate the files or folders saved in the flash drive press OK to enter NOTE When a file is selected the file information will appear on the right 3 Use or key to select the option on the table and press OK button to return to...

Page 27: ...kward Press to play faster Press to stop and back to the previous folder Text 1 Use or key to select Text Press OK to enter 2 Use or key to navigate the files or folders saved in the flash drive press OK to enter NOTE When a file is selected the file information will appear on the right 3 Use or key to select the option on the table and press OK button to return to the previous menu Press EXIT at ...

Page 28: ...ence Check picture control adjustments Poor TV reception Ensure the antenna amplifier is turned on for Antenna TV Adjust the antenna position to a stronger signal receiving angle Check the Antenna connection is tight to the TV Check there is power supplied to the Antenna distribution box Confirm your incoming cable is connected to the correct cable antenna wall connection inside the RV Ensure the ...

Page 29: ...7 2 x 443 5 x 83mm 29 x 18 x 7 738 x 479 x 190mm 1366 x 768 60Hz HD INPUT OUTPUT CONNECTIONS TV Model HDMI in VGA PC in Audio PC in Coaxial Audio Out Optical Audio Out USB Audio Video Out Audio Video in Component YPb Pr Video In Earphones RF in FEHT32N8D 3 x Right Red x Left White x Video Yellow mm use inclusive adapter mm use inclusive adapter W H L ...

Page 30: ...29 ...

Page 31: ...30 ...

Page 32: ...ogy 52567 Independence Ct Elkhart IN 46514 USA Toll free 1 888 354 5792 Email support furrion com 2007 2017 Furrion Ltd Furrion is trademark licensed for use by Furrion Ltd and registered in the U S and other countries FURRION COM IM 32 C TVAU V1 1 ...

Reviews: