1. OPERATIONAL OVERVIEW
1-3
1.3
Basic Operating Procedure
1.3.1
Turning on the power
1. Press the POWER switch on the control unit to turn on the power.
2. Turn on the monitor (user supply).
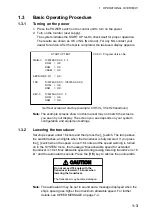
The system initiates the START UP test to check itself for proper operation.
The results are shown as OK or NG (No Good). For any NG, contact your
dealer for advice. After the test is completed, the last-used display appears.
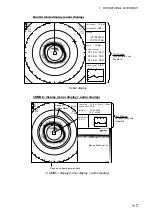
MAIN-0
1050729-XX.XX F F
ROM
= OK
RAM
= OK
VRAM
= OK
EEPROM (P.W)
= OK
TRX
1050742-XX.XX 1050733-XX.XX
ROM
= OK
RAM
= OK
KEY-0
1050730-XX.XX F
ROM
= OK
RAM
= OK
XX.XX = Program Version No.
START UP TEST
Self test screen at start up (example: CSH-5L, 55 kHz transducer)
Note:
The example screens shown in this manual may not match the screens
you see on your display. The screen you see depends on your system
configuration and equipment settings.
1.3.2
Lowering the transducer
Set ship’s speed under 16 knots and then press the [
↓
] switch. The lamp above
the switch flashes, and lights when the transducer is fully lowered. If you press
the [
↓
] switch when the speed is over 16 knots and the speed warning is turned
on in the SYSTEM menu, the message “Max allowable speed for extended
transducer is 16 kt. Max allowable speed during raising lowering transducer is 16
kt.” and the audio alarm sounds. Press the [R/B] key to silence the audio alarm.
CAUTION
Do not exceed 18 knots with the
transducer lowered; 16 knots when
lowering the transducer.
The transducer may become damaged.
Note:
The audio alarm may be set to sound and a message displayed when the
ship’s speed goes higher than maximum allowable speed. For further
details, see SPEED MESSAGE on page 7-4.


