


3-4
8. Check that LEDs on the panel of the raise/lower control box light as follows:
a) UP, MD and DN LEDs light when corresponding limit switch is kicked.
b) UP and DOWN LEDs light while UP and DOWN switches are pressed and
extinguish when switches are released.
9. Set the TEST/NORMAL switch to NORMAL.
10. At the control unit for the display unit, press the
(mid position) switch.
Confirm that the lamp above the switch blinks while the transducer is being
lowered, a short beep sounds when the mid limit switch kicks, and the lamp
lights when the transducer is fully lowered.
11. Press the
switch. Confirm that the lamp above the switch blinks while
the transducer is being lowered, a short beep sounds when the mid limit
switch is kicked, and the lamp lights when the transducer is fully lowered.
12. Press the
switch. Confirm that the lamp above the switch blinks while
the transducer is being raised, a short beep sounds when the mid limit switch
is kicked, and the lamp lights when the transducer is fully raised.
13. Press the OFF switch. Confirm that the transducer is completely retracted
and then the power is turned off.
14. With the transducer lowered, confirm that the transducer is raised when
or OFF is pressed.
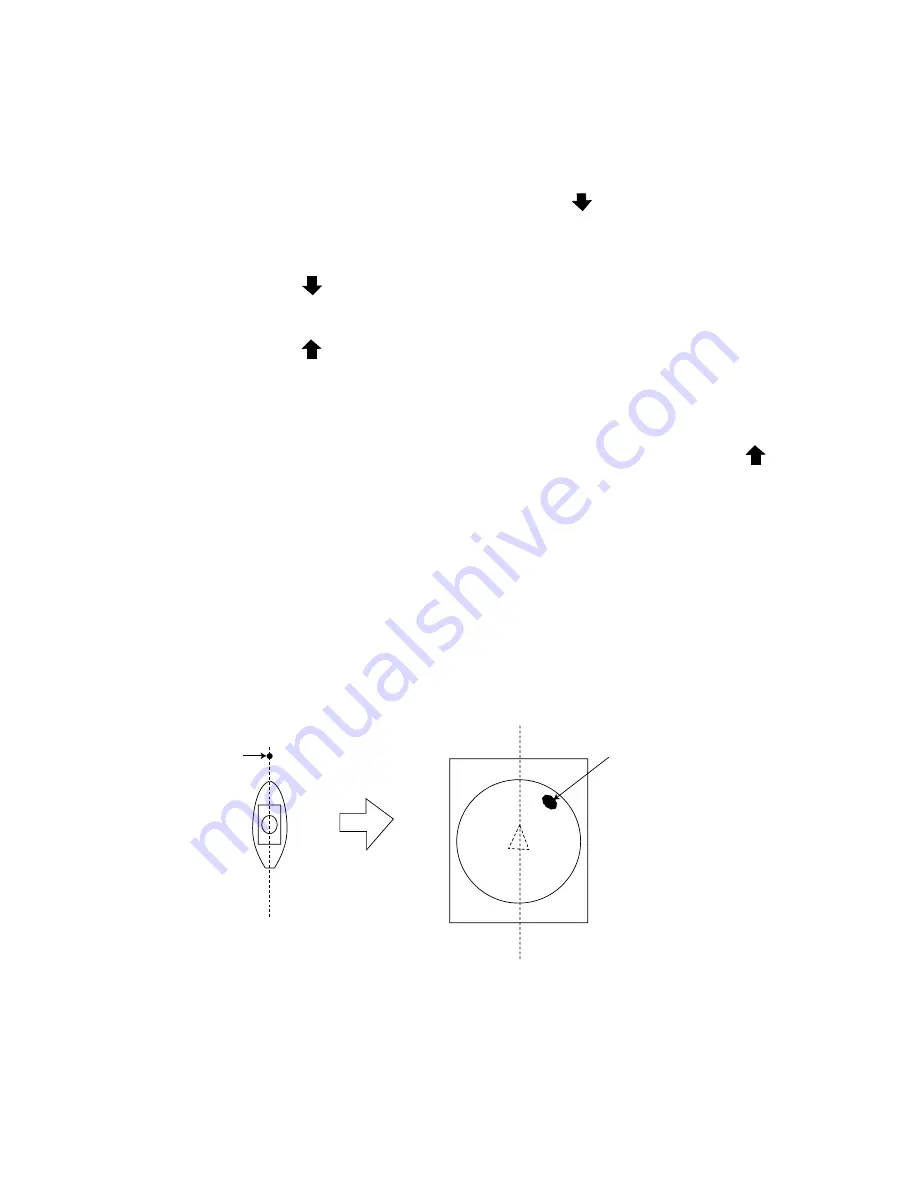
3.2 Heading
Adjustment
When the BOW mark on the flange of the hull unit cannot be directed toward
ship’s bow adjust the heading so an echo which is dead ahead appears dead
ahead on the display.
1. Referring to the previous section, set the TX (transmission) to ON.
2. Locate a target in the bow direction (buoy, for example) and display it on a
near range. If the target appears at 12 o’clock the heading alignment is
correct. If it does not, measure the error and go to step 2.
Buoy
If target's on-screen
position is right of ship's
bow for example, hull unit
heading is skewed left.
Heading adjustment
3. After turning off the power, turn it again on the power while pressing and
holding down the [MENU] key. Release the figure from the [MENU] key after
the self- test screen appears. And then after picture appears, press the
[MENU] key three times to open the SYSTEM menu.
Summary of Contents for FSV-24
Page 8: ...This page is intentionally left blank ...
Page 62: ...This page is intentionally left blank ...
Page 71: ......
Page 72: ......
Page 73: ......
Page 74: ......
Page 75: ......
Page 76: ......
Page 77: ......
Page 78: ......
Page 79: ......
Page 80: ......
Page 81: ......
Page 82: ......
Page 83: ......
Page 84: ......
Page 85: ......
Page 86: ......
Page 87: ......
Page 88: ......
Page 89: ......
Page 90: ......
Page 91: ......
Page 92: ......
Page 93: ......
Page 94: ......
Page 95: ......
Page 96: ......
Page 97: ......
Page 98: ......
Page 99: ......
Page 100: ......
Page 101: ......
Page 102: ......
Page 103: ......
Page 104: ......
Page 105: ......
Page 106: ......
Page 107: ......
Page 108: ......
Page 109: ......
Page 110: ......


