2. SLANT MODE
2-26
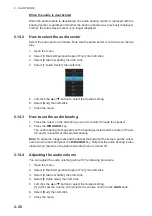
When the audio is deactivated
When the audio feature is deactivated, the audio bearing marker is replaced with the
bearing marker, regardless of whether the bearing marker was previously displayed.
Further, the auto sweep marker is no longer displayed.
2.14.2
How to select the audio sector
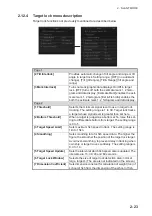
Select the audio sector as follows. Note that the audio sector is not drawn on the dis-
play.
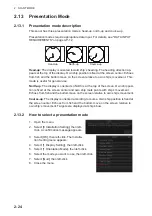
1. Open the menu.
2. Select [0 Mark & Operation Support Tool], then left-click.
3. Select [9 Alarm & Audio], then left-click.
4. Select [7 Audio Sector], then left-click.
5. Left-click the
S
or
T
button to select the desired setting.
6. Select [Quit], then left-click.
7. Close the menu.
2.14.3
How to set the audio bearing
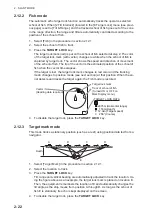
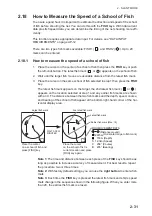
1. Place the cursor on the direction you want to monitor through the speaker.
2. Press the
R/B AUDIO
key.
The audio bearing mark appears on the bearing selected and the center of the au-
dio sector is located at the selected bearing.
Note:
To erase the range mark and the data at the bottom of the screen, put the cursor
near own ship mark and press the
R/B AUDIO
key. Note that the audio bearing is also
erased when [Audio] on the [Alarm & Audio] menu is turned off.
2.14.4
Adjusting the audio volume
You can adjust the audio volume (gain) with the following procedure.
1. Open the menu.
2. Select [0 Mark & Operation Support Tool], then left-click.
3. Select [9 Alarm & Audio], then left-click.
4. Select [6 Audio Gain], then left-click.
5. Left-click the
S
or
T
button to select the desired setting.
[1] to [10] set the volume, [0] connects the volume control to the
GAIN
knob.
6. Select [Quit], then left-click.
7. Close the menu.
Summary of Contents for FSV-75
Page 1: ...OPERATOR S MANUAL www furuno com HALF CIRCLE COLOR SCANNING SONAR Model FSV 75 FSV 75 3D ...
Page 78: ...2 SLANT MODE 2 44 This page is intentionally left blank ...
Page 110: ...4 FISH FINDER MODE 4 12 This page is intentionally left blank ...
Page 144: ...5 3D MODE 5 34 This page is intentionally left blank ...
Page 148: ...6 NUMERIC GRAPHIC DATA DISPLAY 6 4 This page is intentionally left blank ...
Page 158: ...7 HOW TO CUSTOMIZE THE SONAR 7 10 This page is intentionally left blank ...
Page 216: ...10 MAINTENANCE 10 28 This page is intentionally left blank ...
Page 234: ...INDEX IN 3 W Warning messages 10 5 X XSECT ON OFF button 5 6 Z Zoom in out 5 4 ...
Page 235: ......

