
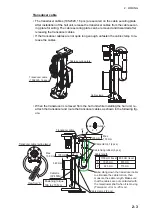


2. WIRING
2-16
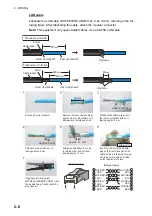
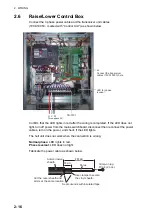
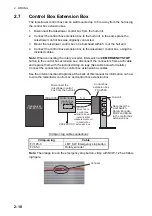
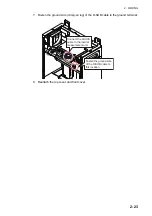
2.6
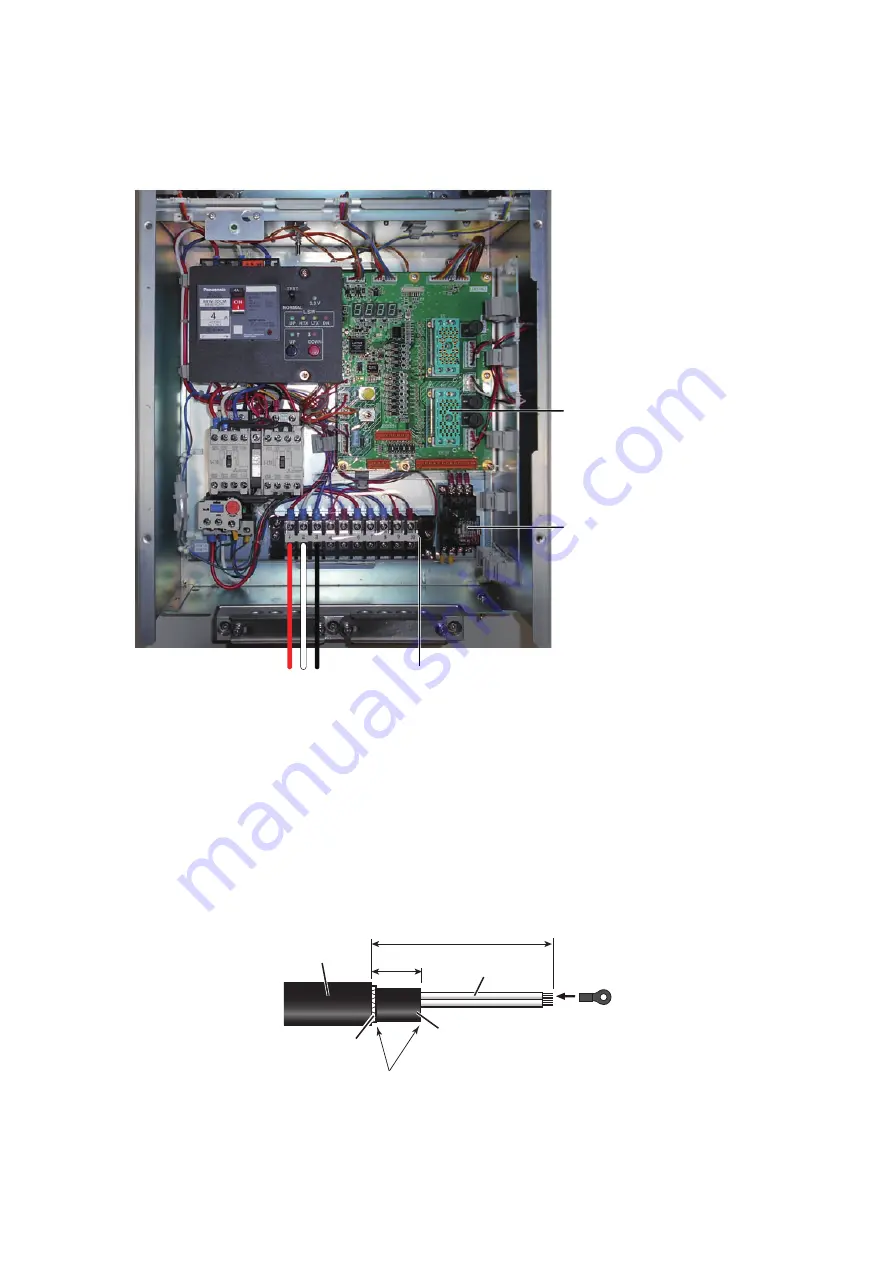
Raise/Lower Control Box
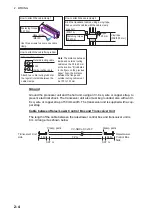
Connect the 3 phase power cable and the transceiver unit cables
(10CA10053 - marked with “Control Unit”) as shown below.
Confirm that the LED lights in red after the wiring is completed. If the LED does not
light, turn off power from the mains switchboard, disconnect then reconnect the power
cables, turn on the power, and check if the LED lights.
The hull unit does not work when the connection is wrong.
Normal phase
: LED lights in red.
Phase reversal
: LED does not light.
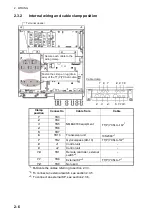
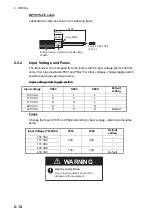
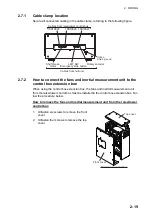
Fabricate the power cable as shown below.
U V W
Three phase AC
TB-C101
J2
Connect the transceiver
cables (10CA10053) here.
LED for phase
revesal
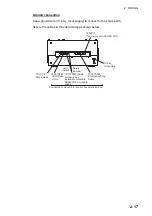
200 mm
200 mm
30 mm
30 mm
Anti-corrosive
sheath
Cores
Crimp-on lug
FV2-4 (2 pcs.)
Seal cut ends with insulated tape.
Use clamps to secure
the vinyl sheath.
Cut the outer sheath and
armor at the same location.
Summary of Contents for FSV-85-MARK-2
Page 34: ...1 HOW TO INSTALL THE SYSTEM 1 26 This page is intentionally left blank ...
Page 58: ...2 WIRING 2 24 This page is intentionally left blank ...
Page 86: ...D 1 7 Jul 2021 H MAKI ...
Page 87: ...D 2 7 Jul 2021 H MAKI ...
Page 88: ...D 3 7 Jul 2021 H MAKI ...
Page 89: ...D 4 7 Jul 2021 H MAKI ...
Page 90: ...D 5 7 Jul 2021 H MAKI ...
Page 91: ...D 6 7 Jul 2021 H MAKI ...
Page 92: ...22 Apr 2014 H MAKI D 7 ...
Page 93: ...D 8 24 Jun 2021 H MAKI ...
Page 94: ...D 9 24 Mar 2021 H MAKI ...
Page 95: ...D 10 24 Jun 2021 H MAKI ...
Page 96: ...D 11 24 Jun 2021 H MAKI ...
Page 98: ...D 13 17 Feb 2021 H MAKI ...
Page 99: ...28 Apr 2018 H MAKI D 14 ...
Page 100: ...D 15 13 Sep 2011 Y NISHIYAMA ...
Page 101: ...D 16 13 Sep 2011 Y NISHIYAMA ...
Page 102: ...D 17 13 Sep 2011 Y NISHIYAMA ...


