V
FUTABA 9Z
THE UNOFFICIAL WORKSHOP MANUAL
WARNING:
THE INFORMATION IN THIS MANUAL IS FOR INFORMATION PURPOSES ONLY AND MAY BE INCORRECT, CAUSE DAMAGE
TO YOUR RADIO OR INJURY TO YOURSELF AND OTHERS. IF YOU USE THIS MANUAL YOU DO SO SOLEY AT YOUR OWN RISK.
www.jamesandtracy.co.uk
Copyright 2012 jamesandtracy.co.uk
Page 34 of 84
3.9. Replacing the LCD Screen
Note: I have not directly tested this procedure. Also note that this procedure requires the
removal of the LCD’s PCB assembly. Make sure you are earthed and protect your tools
so you don’t damage ribbon cables etc., again see Section 2.3.
Whilst it is possible to replace a cracked or damaged 9Z LCD screen, the cost is usually
prohibitive as Futaba charge $100’s for the replacement part. This usually means that it
is cheaper to buy a replacement transmitter or live with the damage. However, after
market replacements from a generic component supplier like Farnell, RS Online or
Digikey are likely to be much, much cheaper. You can either try to source a generic
replacement from these companies or purchase a second hand 9Z and swap the LCD.
Futaba supply the complete assembly so there is no need to do more than disconnect
the ribbon cables (see APPENDIX C for part numbers), although it may be possible to
purchase the individual components from them. The procedure detailed below is for
replacement of the component LCD panel
alone
(i.e. without replacement of the original
PCB boards). This can reduce the cost to a fraction of the Futaba “full assembly” price.
Though please be warned – replacing an LCD is probably the most difficult procedure in
this manual. However, if you want to replace your screen follow the procedure below:
1.
Follow the procedure in Section 3.8 to remove the LCD Assembly
2.
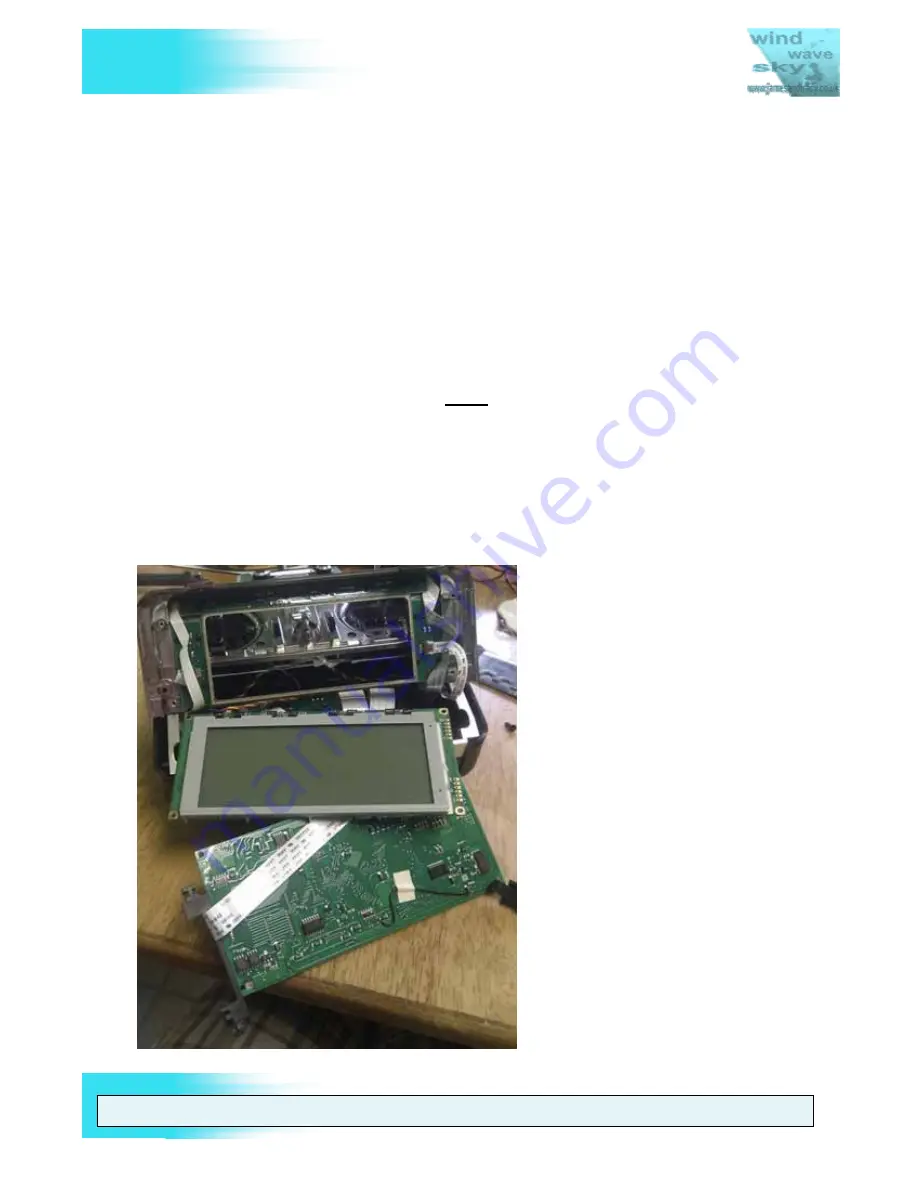
Remove the corner screws of the LCD Assembly and partially disassemble it (see
Figure 28). Be careful not to damage the ribbon cables linking the assembly to the
9Z – if in doubt remove any that get in the way.
Figure 28 LCD Assembly removed and partially disassembled


