V
FUTABA 9Z
THE UNOFFICIAL WORKSHOP MANUAL
WARNING:
THE INFORMATION IN THIS MANUAL IS FOR INFORMATION PURPOSES ONLY AND MAY BE INCORRECT, CAUSE DAMAGE
TO YOUR RADIO OR INJURY TO YOURSELF AND OTHERS. IF YOU USE THIS MANUAL YOU DO SO SOLEY AT YOUR OWN RISK.
www.jamesandtracy.co.uk
Copyright 2012 jamesandtracy.co.uk
Page 75 of 84
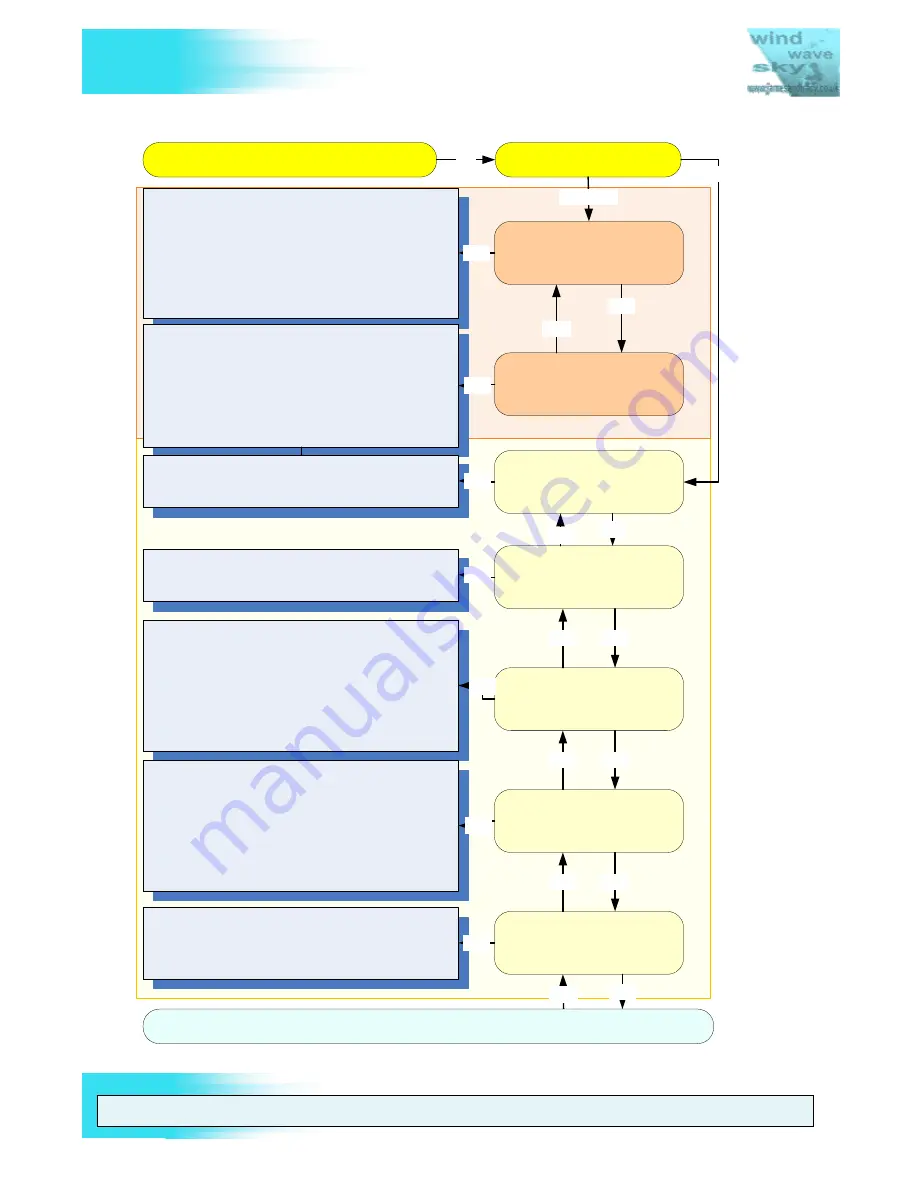
6.3. Service Menus (Calibration and Upgrade)
Switch Rev
(Switch Calibration)
System Overview
Switch Settings
Main Menu
Press ‘A’
NXT
Press ‘B’
This is a system information screen and information cannot be
changed at this menu item. There are 4 groups of figures are
displayed e.g. 0000 0000 0000 0000. Reading from right to left
across the screen these groups relate to:
ID number (Note: this is the 'user password', if you see no
user password here then the password is 4x blanks e.g. " " )
internal firmware version
external ROM firmware version
Total usage time (Hours x100 : Hours : Minutes)
SET
This menu item allows you to modify the types of switches on the
9z. To change/modify a switch's type:
First physically replace the switch on the 9Z case.
Now select the switch that you replaced on the menu (e.g.
"SA" on the menu is "Switch A" on the 9Z case).
Finally, choose the new type you replaced it with. (e.g. "2" is
2-position switch, "3" is 3-position switch and "M" is
momentary switch).
SET
PRE
Neutral Rev
(Joystick Calibration)
Wide Rev
(Joystick Calibration)
Narrow Rev
(Joystick Calibration)
Voltage Calibration
NXT
NXT
NXT
NXT
NXT
PRE
PRE
PRE
PRE
PRE
Calibration process for toggle switches (e.g. “SA” is switch A etc.).
Do not calibrate the middle position of Switch A if you have a 3
position switch or you will need to hard reset the 9Z transmitter.
Neutral calibration process for joysticks (e.g. J1 is Joystick 1 etc.).
Set all sticks to their neutral/centre position before pressing “SET”.
All four boxes will become black to indicate a successful
calibration.
Wide/Extreme throw calibration process for joysticks, dials and
sliders (e.g. J1 is Joystick 1, RD is Right Dial, LS is Left Slider on
the side of the case etc.).
Set all Dials fully clockwise.
Set both Sliders fully down.
Hold both Joysticks fully right and fully down.
Now press “SET” to calibrate. Any control you do not wish to
calibrate should be set to its neutral/centre position before
pressing “SET”. Boxes will become black to indicate a successful
calibration of the associated control.
Narrow/Zero throw calibration process for joysticks, dials and
sliders (e.g. J1 is Joystick 1, RD is Right Dial, LS is Left Slider on
the side of the case etc.).
Set all Dials fully anticlockwise.
Set both Sliders fully up.
Hold both Joysticks fully left and fully up.
Now press “SET” to calibrate. Any control you do not wish to
calibrate should be set to its neutral/centre position before
pressing “SET”. Boxes will become black to indicate a successful
calibration of the associated control.
This is the Voltage Calibration process (Note: default values are
usually fairly accurate before calibration
):
Set the main battery voltage to 8.5v (+/- 0.2v)
Set DSC DIN Connector pin 6 to 5v (+/- 0.2v)
Press “SET” to calibrate.
SET
SET
SET
SET
SET
TO TEST MENUS
U
P
G
R
AD
E M
E
N
U
S
C
A
L
IBR
A
T
IO
N
M
E
N
U
S
START
Turn off the transmitter and connect the Service Menu Enabler
ON
Figure 76 Futaba 9Z Service Menus Flowchart


