ACCURACY CONTROL
Monitor horizontal levelling
1. Choose a room ±10 m long
2. Place the instrument next to wall no. 1.
3. Switch on the instrument and let it self-level.
4. Mark the horizontal line in the middle of the cross on wall
no 1.
5. Turn the instrument through 180° and mark the laser beam in
the middle of the cross on wall no. 2.
6. Move the instrument as close as possible to wall no. 2.
7. Adjust the height of the laser so that the middle of the laser
cross is on the wall no. 2 marker.
8. Then turn the instrument through 180° and note the differ-
ence between the middle of the laser cross and the marker
on wall no. 1.
9. This difference should not exceed 2 mm.
10. NB: The tolerance depends on the distance of the walls
between which the inspection has been carried out. This dis-
tance should be multiplied by 2. Hence, if the instrument has
an accuracy of 2 mm / 10 m, then in our example the calcula-
tion is: 10 m distance x 2 = 20 m. Tolerance is 4 mm / 20 m.
Vertical laser line
Place the instrument approximately 5 m from a wall.
Place a 2 m long plumb-line against the wall.
Switch on the instrument and let it self-level.
Place the vertical laser line on the plumb-line.
This should be 1 mm in our example.
NB: If your instrument does not reach the required tolerance, it
should be returned to your service centre or to your reseller for
service. Repairs carried out by unauthorised personnel will auto-
matically invalidate the guarantee.
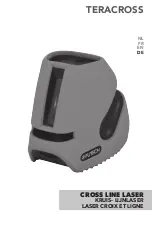
Summary of Contents for 013.02
Page 1: ...TERACROSS CROSS LINE LASER KRUIS LIJNLASER LASER CROIX ET LIGNE NL FR EN DE...
Page 12: ......
Page 13: ...TERACROSS CROSS LINE LASER KRUIS LIJNLASER LASER CROIX ET LIGNE NL FR EN DE...
Page 24: ......
Page 25: ...TERACROSS CROSS LINE LASER KRUIS LIJNLASER LASER CROIX ET LIGNE NL FR EN DE...
Page 36: ......
Page 37: ...TERACROSS CROSS LINE LASER KRUIS LIJNLASER LASER CROIX ET LIGNE NL FR EN DE...
Page 48: ...Laseto NV www futech tools com...


