MANUAL
202.40R – 202.60G – 202.80R [EN]
V1.0 – 06.2022
3
§
Delay measurements
You can easily delay your measurement with 3 to 60 seconds. Hold the Reference point – Timer button [6]
for approx. 3 seconds. SEC will be shown on the display with the number of seconds of the delay.
To adjust the delay, press the Function – Back button [3] and/or the Addition/Subtraction – Next button
[5] that several times needed to reach the delay you prefer.
Press the Measure – ON button [2] to start the countdown. The device will measure when the countdown
reaches the 0.
§
Backlight
The backlight will turn ON/OFF automatically.
The backlight will be on for 15 seconds while operating. After 15 seconds with no operation, the
backlight will turn off automatically. It will light up again after pressing any button.
§
Sound ON/OFF
The device can produce beeping sounds. To turn them ON of OFF, press the Beep – Unit button [4].
§
Measurements
1.
Single Distance measurement
Press the Measure – ON button [2] to make a laser beam appear and activate the measure mode. Press
the Measure – ON button [2] again to see appear the measured length. You can see the measured results
displayed on the major display [f].
2.
Continuous measuring
Hold the Measure – ON button [2] and a continuous measuring mode will be activated. The minimum and
maximum measuring results will be shown [d, e] and the present result will be shown in the major display
[f]. Press the Measure – ON button [2] or on the Clear – OFF button [7] to quit the continuous measuring
mode.
3.
Area measurement
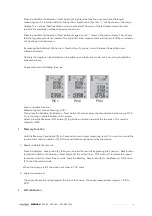
Press the Function – Back button [3] once, a square appears at the top of the screen. One of the sides of
the square/ rectangle is blinking on the screen. Then follow the subsequent instructions to calculate the
volume:
Press the Measure – ON button [2] once for the length.
Press the Measure – ON button [2] again for the width.
The device will show the result on the major display [f]. The current measuring result will appear in the
auxiliary display [g, h, i].
Press the Clear – OFF button [7] to remove and clear the previous measurement results. Press the same
button again to exit this mode.
4.
Volume measurement
Press the Function – Back button [3] twice to enter the volume measurement mode. A rectangular shape
will appear on the top of the screen. Then follow the subsequent instructions to calculate the volume:


