MANUAL
202.40R – 202.60G – 202.80R [EN]
V1.0 – 06.2022
5
2)
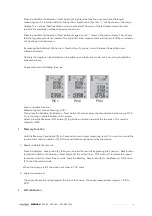
Calculate the hypotenuse by measuring the length of two legs.
Calculate the hypothenuse by measuring the length of two legs. Press the Function – Back button [3] 5x
till one leg of the triangle is blinking on the screen.
Press the Measure – ON button [2] to measure the length of one leg (a).
Press the Measure – ON button [2] again to measure the length of the other leg (b).
The device will calculate the length of hypothenuse (x).
3)
Press the Function – Back button [3] six times till one side of the triangle is blinking on
the screen.
Press the Function – Back button [3] 6x till one side of the triangle is blinking on the screen.
Press the Measure – ON button [2] to measure the length of one side (a).
Press the Measure – ON button [2] again to measure the length of the median line (b).
Press the Measure – ON button [2] a third time to measure the length of another side (c).
The device will calculate the length of the length of the leg (x).
4)
Press the Function – Back button [3] seven times till the hypotenuse of the triangle is
blinking on the screen.
Press the Function – Back button [3] 7x till the hypotenuse of the triangle is blinking on the screen.
Press the Measure – ON button [2] to measure the length of one hypothenuse (a).
Press the Measure – ON button [2] to measure the length of another hypothenuse (b).
Press the Measure – ON button [2] to measure the length of one leg (c).
The device will calculate the length of the leg (x).
The legs must be shorter than the hypothenuse otherwise an “err” will be shown on the screen. In order
to guarantee the accuracy, please make sure that all measurements are performed from the same starting
point.
7. Addition/ subtraction
The device can be used for length addition and subtraction.


