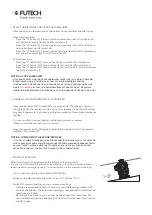
<5°
· Switch OFF manual levelling (= start automatic levelling)
· Hold the Receiver Button [B] for 5 seconds, until the Levelling Indicator [D]
starts flashing slower. The automatic levelling is now switched on.
NOTICE
·
when the manual levelling is switched on, “h” and “v” buttons
[f][g]
cannot be
operated
used to select the desired laser lines
.
SLOPE FUNCTION
In case you don’t want the automatic levelling (e.g. in case you need to show a
laser under an angle below 5°), you can switch off the automatic levelling and use
the built-in slope function.
· Turn on instrument with power button ON/OFF [A].
· Switch on the desired laser lines with “H” and “V” buttons
[F] [G]
.
· X-Axis Slope
· Hold the Receiver Button [B] for 5 seconds, until the Levelling Indicator [D]
starts flashing faster. The automatic levelling is now switched off.
· The slope function is enabled on the X-axis.
· Hold the
“H” button [F] or “V” button [G]
to adjust the slope over the X-axis.
· Y-Axis Slope
· Press the Receiver Button [B]. The levelling indicator [D] starts flashing slowly.
The slope mode is enabled on the Y-Axis.
· Hold the
“H” button [F] or “V” button [G]
to adjust the slope over the Y-axis.
· Hold the Receiver button [B] for 5 seconds, until the Levelling Indicator [D] starts
flashing at normal speed. You have quit the slope mode. The instrument will
start automatic levelling.
NOTICE
·
when the slope function is active, “h” and “v” buttons [f][g] cannot be operat-
ed used to select the desired laser lines.
BATTERY
Use only the battery (7.4V, 2600mAh - Art.nr.: H60028) and the charger (16.8V,
2.6A - Art.nr.: H60032) supplied with the Multicross 4D Electronic.
The remote control needs 4x AAA Alkaline batteries (LR03).
· Place or remove the battery
· Open the battery cover [6].
· Slide the battery inside the battery tray. The 2 metal contacts should go first
inside the housing of the laser.
· Close the battery cover [6].
· Charge the battery inside the instrument
· In case the power indicators [H] indicate the battery-power is low, you need
to recharge the batteries.
· Connect the included charger to the USB-C power connector [8]. Plug the
charger in a power plug.
The power indicators[H] start flashing upward.
· When the power indicators light constantly with all four lights on, the battery
is 100% loaded.
· Charge the battery directly
· You Can also charge the battery with USB-C connector on the battery. Re-
move the battery from the housing and connect the included charger to the
USB-C power connector on the battery. Plug the charger in a power plug


