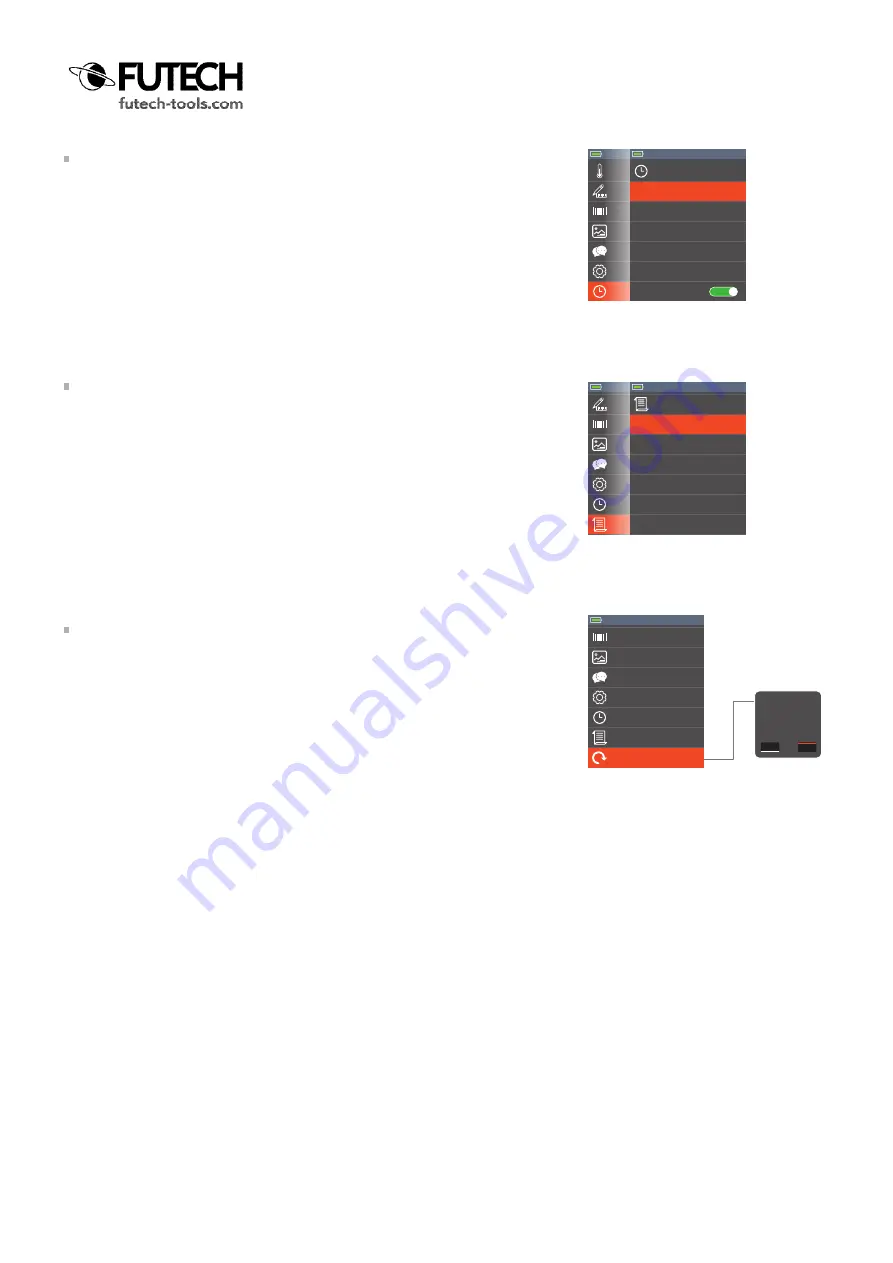
TIME/DATE
· Navigate to the option “Time/Date” in the settings menu and press the OK
button [2] to select.
· Use the Up [4] or Down [5] arrow to go to the part of the Time/Date you want to
adapt and confirm with the OK button [2].
· Use the Up [4] or Down [5] arrow to choose the correct value and confirm with
the OK button [2].
· Repeat the previous two steps to set Time/Date complete.
Set the 24Hr switch to ON to use 24Hr hour notation. Set this switch to OFF will
show time in 12Hr notation, mentions AM or PM.
INFORMATION
In this part of the menu you can see the software and handware version of this
Tempviewer 6400.
· Navigate to the option “Inormation” in the settings menu and press the OK
button [2] to select.
FACTORY SET
It is possible to set all settings back to the default factory settings.
· Navigate to the option “Factory Set” in the settings menu and press the OK
button [2] to select.
· Highlight “YES” in red using the Left [3] and Right [7] key and push the OK but-
ton [2] to set all settings back to the default factory settings.
(Pushing the OK button [2] with “NO” highlighted in red takes you back to the
menu.
Palette
Palette
Temp Unit
Measure
Emissivity
Memory
Language
Setup
Time/Date
°C
>
0.95
>
>
>
>
Time/Date
Year
Mon
Day
Hour
Min
24Hr
20
2
23
11
<
54
ON
Time/Date
Information
Factory Set
>
>
>
Time/Date
Information
Factory Set
>
>
>
Palette
Temp Unit
°C
Temp Unit
Measure
Emissivity
Memory
Language
Setup
Time/Date
Information
°C
>
0.95
>
>
>
>
>
Information
Hardware:
Firmware:
Ir:
V2.00
V1.17
<
Factory Set
>
Information
Factory Set
>
>
Measure
Emissivity
Memory
Language
Setup
Time/Date
Information
Factory Set
>
0.95
>
>
>
>
>
>
Information
Factory Set
>
>
Restore factory
settings
Yes
No


