Operation
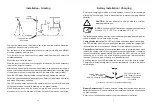
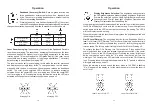
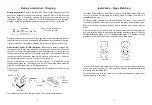
Deadband (Accuracy) Switch:
Each on-grade location has
three deadband or accuracy selections - fine, standard, and
wide. The center or grading deadbands are smaller than the
offset or excavating deadbands.
Pressing the switch once flashes the status LED of the current
selection. Pressing the switch again while the status LED is activated
changes the selection, sequencing from fine to standard to wide to fine, etc.
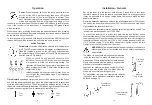
Fine
Standard
Wide
Center On-Grade
(Grading)
5 mm
(3/16 in)
10 mm
(3/8 in)
20 mm
(3/4 in)
Offset On-Grade
(Excavating)
12 mm
(1/2 in)
25 mm
(1.0 in)
50 mm
(2.0 in)
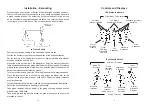
Laser Beam Averaging:
The secondary function for the Deadband Switch is
laser beam averaging. The laser beam averaging function senses the laser
strikes and applies the highest level of averaging appropriate for the laser
rotation speed. This may stabilize the LED grade display if the laser set-up
is unstable due to windy conditions or long range applications. The factory
default setting is Laser Beam Averaging ON.
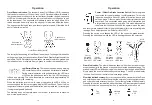
The receiver can be set for no averaging. In this mode the receiver processes
and displays every single laser strike. To change between the two modes,
press and hold the power switch and then press and release the deadband
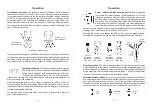
switch. The outer green on-grade LED's will flash to indicate averaging
selection. When the center LED is on, averaging is on. When the center LED
is off, averaging is off. Pressing this switch combination while the LED's are
activated will change the current selection between on and off.
Averaging ON
Averaging OFF
11
10
Operation
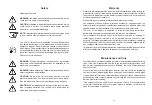
Display Brightness Selection:
The brightness switch controls
the LED grade display and blade tilt display brightness. Bright and
Dim are the selection options. Use Bright for daytime operation
if necessary and Dim for lower light conditions. Operating with
Display Dim selected will extend battery life.
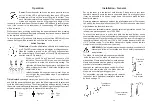
When the brightness switch is pressed and the receiver is out of the laser beam,
the LED's will display a circle with the current setting. Press the brightness
switch again while the LED's are activated to change the setting. The LED's
will then display the new setting.
When the receiver is in the laser beam, simply press the brightness switch and
the setting will change.
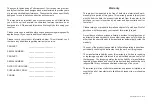
Out Of Level Warning:
The secondary function for the Brightness Switch is
laser Out of Level (OOL) Warning. The Out of Level Warning is used with certain
lasers that have the ability to indicate they are out of level by changing their
rotation speed. The factory default setting is Laser Out of Level Warning off.
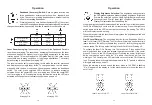
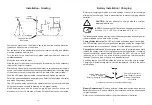
To activate the laser OOL Warning, turn the receiver on. Press and hold the
power switch and then press and release the brightness switch. If the center
green LED is not lit, the OOL Warning is off. Pressing the power / brightness
switch combination again while the "X" pattern is activated will turn the
warning on. The center green LED will come on to confirm the OOL Warning
is on. Pressing the switch combination again while the "X" pattern is activated
will toggle between on and off.
When the warning is turned on and the laser drops to 140 RPM, a flashing
"X" will appear on the display to let the machine operator know the laser is
out of level.
Laser Out of Level OFF
Laser Out of Level ON


