DE
Vielen Dank für den Kauf eines Produkts GAMA BY GAMA BARBER SERIES. Wir sind zuversichtlich, dass Sie die Sorgfalt
zu schätzen wissen, mit der er entwickelt und hergestellt wurde. Die Forschung von GAMA kombiniert ständig Innovation
und Technologie, um Qualitätsprodukte anzubieten. Ausgezeichnete Leistungen sind garantiert, da wir die
fortschrittlichsten Methoden anwenden und die besten Materialien verwenden. Die Produkte sind für die
anspruchsvollsten Kunden konzipiert, die hervorragende Ergebnisse erzielen möchten. Bitte lesen Sie die folgenden
Anweisungen vor dem Gebrauch sorgfältig durch und bewahren Sie sie auf.
WARNUNG:
VOR DEM GEBRAUCH DES GERÄTES SORGFÄLTIG LESEN.
BEWAHREN SIE DIESE ANLEITUNG AUF.
1- Verwenden Sie das Gerät nicht mit nassen Händen, in feuchter Umgebung
oder auf nassen Oberflächen. Tauchen Sie das Gerät nicht in Wasser oder
andere Flüssigkeiten ein. 2- Verwenden Sie dieses Gerät nicht in der Nähe von
Badewannen oder anderen Behältern, die Wasser enthalten. 3- Ziehen Sie den
Netzstecker aus der Steckdose, wenn das Gerät ausgeschaltet ist, da die Nähe
von Wasser eine Gefahr darstellen könnte; seien Sie besonders vorsichtig, wenn
Sie es im Badezimmer benutzen. 4- Benutzen Sie dieses elektrische Gerät nicht,
wenn es mit Flüssigkeiten in Berührung gekommen ist, wenn sein Stromkabel
beschädigt ist oder wenn sein Gehäuse und/oder sein Zubehör deutliche
Anzeichen einer Beschädigung aufweisen. Wenn das Gerät nicht
ordnungsgemäß funktioniert, trennen Sie es sofort von der Steckdose und
bringen Sie es zu einem zugelassenen Kundendienstzentrum. 5- Wenn das
Stromkabel beschädigt ist, muss es sofort durch den Hersteller oder qualifizierte
15
USE INSTRUCTIONS:
• Insert the desired attachment. This operation should always be done with the hair clipper turned off.
• Turn on the hair clipper by pressing the (O/I) button.
• Turn off the hair clipper by pressing the (O/I) button
INSERTION OF COMBS:
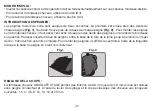
The supplied combs have two snap on seats. One near the teeth of each comb (Fig. 1) and the other near the base of each comb (Fig. 2). To
insert the combs in the hair clipper, set the snap on base near the teeth of the comb on the hair clipper blade and then push the base of the
comb against the base of the blade head until you hear a slight click: insertion will be now be completed. Remove the combs using the tab
located on the base of the comb, exerting an outward force.
BEFORE USING THE APPLIANCE:
Before charging the hair clipper for the first time we recommend fully discharging the battery and then fully charging it.
1. Make sure that the appliance is switched off.
2. Plug the appliance into the power outlet and then connect it to its adapter. The charging LED will light up and
remain red for the whole charging process. As soon as the product is fully charged, the LED will change colour.
Attention: to prolong battery life, the first charge should be much longer even if the LED changes colour.
The first charge takes 12 hours. Subsequent charges take about 90 minutes. When fully charged, the battery will
last about 120 minutes.
3. Disconnect the adapter from the outlet once it is fully charged.
4. The hair clipper may be used connected directly to the power outlet if the battery charge is depleted. It needs to be charged when the red
charging LED, starts blinking.
The duration of the battery varies based on usage frequency and times. To increase the lifespan of the batteries, this procedure should be
carried out at least twice every 12 months, discharging the battery completely and recharging it for the maximum time. If the appliance is not
used often, remember in any case to carry out a charging cycle every so often during the year to keep it working efficiently. On the contrary,
when the charging is finished, do not keep the appliance connected to the mains to prevent the battery from overcharging and damaging the
appliance.
WARNING: Do not attempt to replace the internal battery of the hair clipper. This can lead to the risk of fire or electric shock. Tamper-
ing invalidates the warranty on the product.
CAUTION:
Lubricate the blade before the first use. Read the instructions contained in the section “HOW AND WHEN TO LUBRICATE THE BLADE”
Summary of Contents for Barber Series
Page 40: ...RU GAMA GAMA 1 2 3 4 40...
Page 41: ...5 6 7 8 41...
Page 42: ...9 10 11 12 13 RCD 30 42...
Page 43: ...43...
Page 44: ...24 12 60 44 ABSOLUTE STAGE 5300 RPM 1 2 12 90 120...
Page 45: ...45 3 4 O I O I 1 2 2 1...
Page 46: ...46 ABSOLUTE STAGE 0 8 3 8 1 5 3 4 5 6 10 13 19 25 3 0 8 3 8...
Page 47: ...47 4 www gamaprofessional ru XXX XX...
Page 48: ...GAMA BARBER SERIES 1 2 3 4 48...
Page 49: ...5 6 7 8 9 10 11 49...
Page 50: ...12 13 RCD 30mA 50...
Page 51: ...1 2 1999 44 51...
Page 52: ...ABSOLUTE STAGE 5300 RPM 1 2 LED LED LED 12 90 120 3 4 LED 12 52...
Page 53: ...O I O I 1 2 ABSOLUTE STAGE 0 8 mm 3 8 mm 1 5 3 4 5 6 10 13 19 25 mm 53 1 2...
Page 54: ...4 54 3 0 8 mm 3 8 mm...
Page 55: ...55 www gamaprofessional com...
Page 77: ...77 GAMA 1 2 3 4 5 6 7 8 SERIES BARBER GAMA...
Page 78: ...78 9 10 11 12 13 RCD 30...
Page 79: ...79 1999 44 EC ABSOLUTE STAGE 5300 1 2 LED LED LED...
Page 80: ...80 12 90 120 3 4 LED 12 O I O I...
Page 81: ...81 1 2 1 2...
Page 82: ...82 ABSOLUTE STAGE 1 5 3 4 5 6 10 13 19 25 3...
Page 83: ...83 3 www gamaprofessional com...


