background image


3


CO


Pow

bac


KE


KE

In a

 
Wh


To


SY


 It 

tim
go 


To
  

Th

the

If it
P7 


i


P
a
8
 

. –OPE

 CA

ONNECTIO

wer switch.Al

ck side panel. 

EYBOARD:


EYBOARD L

any operation

hen the keybo

o unlock the k

YSTEM TIME

is necessary t

me periods. Of

to “General S

o set the syste

en press the  

e week day if w

t is necessary 

setting to “O

 ECOMB

change t

i

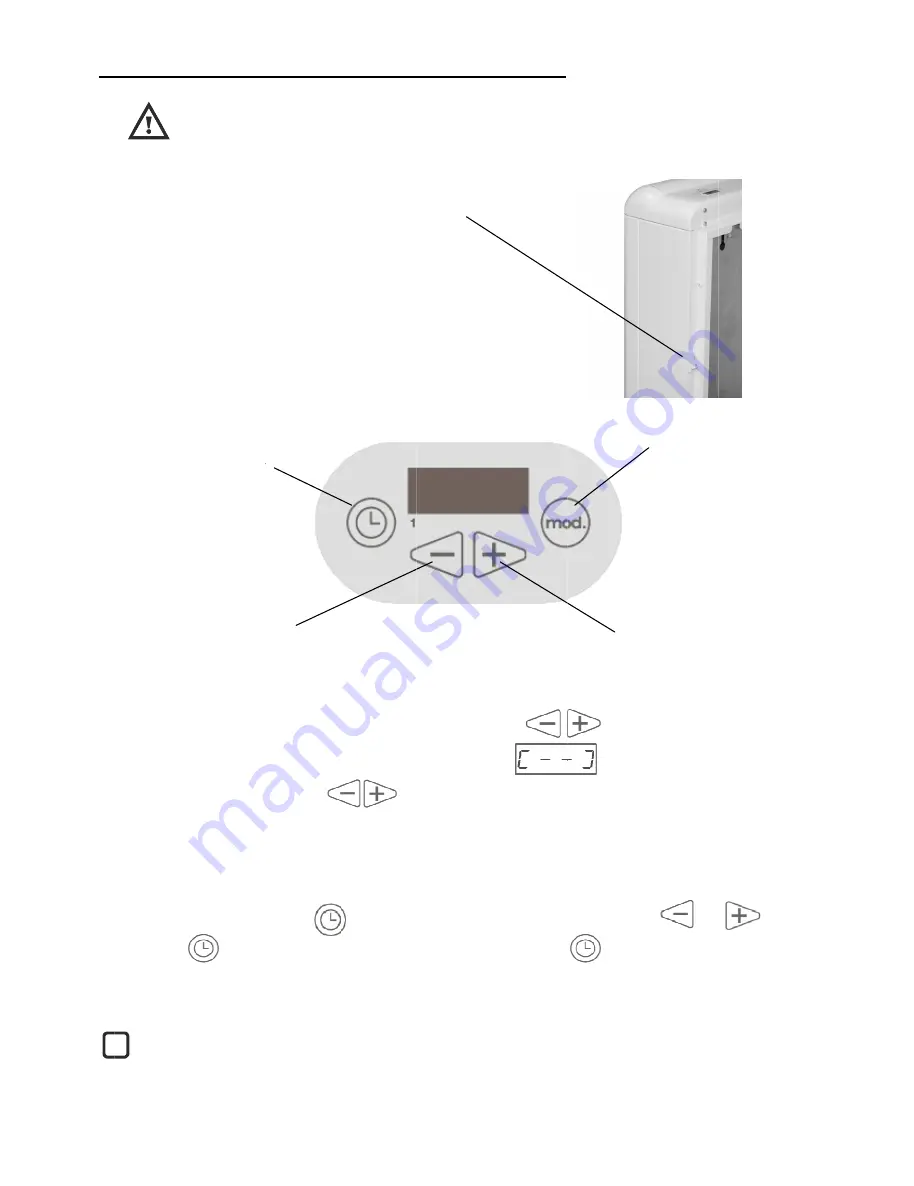
“Clock” key: 

Press the key to
and time. Hold it
8 seconds to cha

KEY “
 

Press 
decrea
values

ERAT

AUTION: DO

ON / DISCON

ll models are 

It is used to c

LOCK: 

n mode it is po

oard is locked

eyboard, hold

E SETTING

to set the syst

ff peak period

Settings”).  

m time, hold 

        key to s

weekly progra

to set up diff

ON” position. 

I does not c
the clock se

o display date 

t for more than 

ange values. 

-

 “ 

the key to 

ase different 

ING IN

O NOT USE T

NNECTION

equipped with

connect and d

ossible to lock

d, if any button

d the keys      

G  

tem time for t

ds have to fit w

the key         

save and proc

amming optio

ferent values f

Once it is cha

hange autom

ettings to fit 

NSTR

THIS HEATER

N. 

h a switch on 

disconnect EC

k the keyboar

n is pressed, d

                 si

the appliance 

with the ones

   for 8 secon

ceed to change

on is enabled i

for different d

anged come b

matically fro

these two t

RUCTI

 TO DRY CL

the 

COMBI..


rd holding the

display will sho

imultaneously

to follow cor

 established in

nds. The Hour

e the minute’s

n the GENER

days in a week
back to “Syste

om summer

imings.

ONS.

LOTHES. Do n

 keys            

ow                

y again for sev

rect program

n GENERAL S

r values are ch

s values. Press

RAL SETTING

k, please go to

m time settin

r time to win

not cover this


          simulta

         and the

eral seconds. 

ming and to a

SETTINGS pa

hanged with t

s         again t

GS part: 

o “General Set

g”, set hour, m

nter time or

К

EY 


Press
differ
 

s heater at any

aneously for s

e appliance w

adjust it corre

art as P1, P2, P

the           and

to save and pr

ttings” in this 
minutes, week

r vice versa. 


 “ 

+

”: 

s the key to incr

rent values


“Operation m
 

Press the key
operation mod
FROST PROT
AUTOMATIC 
EMITTER 
ECOMBI MAN
ECOMBI AUT


y time. 

several second

will not respon

ectly to the off

P3, and P4 (ple

d           keys. 

roceed to cha

manual and c

k, day and vali

It is necessa

rease 

mode” key: 

y to select differe

des.  
TECTION 

STORAGE HE

NUAL 

TOMATIC 

ds.  

d

.


f peak 

ease 


nge 

change 

idate.  

ary to 

ent 

EATER 

All manuals and user guides at all-guides.com

Summary of Contents for ECOMBI ECO158

Page 1: ...CO158 ECO208 ECO308 ECO408 HOURS CH ARGE DE 8 H N MANUAL LATION ET ULLY before inst NT avant d insta BI STORAGE H ULATION M 8 8 8 8 HARGE HEURES AND USE T GUIDE D talling or using t aller ou d utilise...

Page 2: ...and they have been given supervision or instruction concerning use of the appliance in a safe way and understand the hazards involved Children aged from 3 years and less than 8 years shall not plug in...

Page 3: ...of damage it must be replaced This heater should be switched off at the circuit breaker before any repair work is carried out This should also be done during times of the year when heat is not requir...

Page 4: ...as a template and mark the wall through the fixing holes with a pencil Drill the required holes into the wall Place the dowels and screws into the holes before the appliance installation but do not fa...

Page 5: ...e element WARNING Steel edges can cut Next unscrew the inner panel and remove it CAUTION In the interior part of this inner panel there is a very delicate thermal insulation MICROTHERM panel It has to...

Page 6: ...heater 9 Place the storage bricks carefully with the flat side facing the back of the heater Arrange two row levels of bricks 10 Place the heating elements back into their original position Place the...

Page 7: ...t by an experienced technician If during reinstallation the thermal insulation shows any sign of damage it must be removed and replaced by an identical part MANUALLY RESET TEMPERATURE LIMITER This hea...

Page 8: ...n is pressed d si the appliance with the ones for 8 secon ceed to change on is enabled i for different d anged come b matically fro these two t 8 RUCTI TO DRY CL the COMBI rd holding the display will...

Page 9: ...e the reduced ra consumption optimizing the ge at 50 thi d This means ption please g S OF TEMPE ings and avoid s the temperat in the room 9 ay be selected UTOMATIC until the mess hrough convec until t...

Page 10: ...n s in the room me temperatur the Storage H f AUTOMAT re ECOMBI m several times I e ure by using t orking a small ed dot will app work at the sa with charge c ned way Stor room if nece C CHARGE CO 10...

Page 11: ...nual a certain value xceed this valu the real therm the Storage H TER MODE a I will work an this option wi for 8 se key the ek day if neces ys of the week n be seen here N permanent m st mode select h...

Page 12: ...has been programmed it will be repeated every day If WEEKLY PROGRAMMING is activated it is possible to override the ECO TEMPERATURE time period on Saturday and or Sunday Under clock settings and only...

Page 13: ...nd reduce econd reduced correction v N charge ends F charge start g ON OFF er operation m 0 10 0 15 0 2 atic charge re re protection he charge is in Fahrenheit Va ECO TEMPER CO TEMPERA key to ent all...

Page 14: ...performed by an authorized technician ECOMBI has been manufactured under a fully assured quality system and using environmentally friendly processes Once its useful life is finished please take the d...

Page 15: ...168 lbs 111kg 245 lbs 147kg 324 lbs CONNECTION 240V 60Hz 240V 60Hz 240V 60Hz 240V 60Hz CONVECTOR POWER 450W 600W 900W 1200W STORAGE HEATER POWER 985W 1310W 1960W 2620W CHARGING 8h 7 9 kWh 10 5 kWh 15...

Page 16: ...sur l utilisation s re de l appareil et comprennent les risques encourus Les enfants entre 3 ans et 8 ans ne doivent pas brancher r gler et nettoyer l appareil ou r aliser un entretien d utilisateur L...

Page 17: ...installation elle doit tre remplac e Ce radiateur doit tre teint avec le coupe circuit avant toute t che de r paration Les t ches de r paration doivent en outre tre r alis es des poques de l ann e ne...

Page 18: ...comme masque et marquez le mur travers ces orifices l aide d un stylo Percez les trous requis dans le mur Placez les goujons et vis dans les trous avant l installation de l appareil mais ne les serre...

Page 19: ...Les bords en acier peuvent couper D vissez ensuite le panneau int rieur et retirez le ATTENTION Un panneau d isolation thermique MICROTHERM tr s sensible se trouve dans la partie int rieure de ce pan...

Page 20: ...cez soigneusement les briques d accumulation avec le c t plat orient face l arri re du radiateur Disposez deux rang es de briques 10 Remettez les l ments de chauffage dans leur position initiale Posit...

Page 21: ...it tre r alis par un technicien exp riment Si l isolation thermique pr sente des signes d endommagement pendant une r installation elle doit tre retir e et remplac e par une pi ce identique R INITIALI...

Page 22: ...sser la m GES G N RA NS D U PAS CE RADIA NT les sont qui Il sert bran il est possible s ton est action ouveau simult ME r que l appare euses doivent er R glages g ur la touche enregistrer e modificati...

Page 23: ...la UMULATION tion standard m 5 charge ensemble des ommation lec t d optimiser l e de charger q eures creuses ages g n raux S TEMP RA nomies possib e la temp ratu squ ce que l 23 rents jours d V Une fo...

Page 24: ...ifier la fonctionneme n des r glages t de baisse de librer la temp touche E ne s affich ar d faut consigne en ut droite de l af c t gauche d ur ne fonction E avec corre ctionnements teur pour four UTO...

Page 25: ...rse si les he on est r duit n aux besoins nte du niveau modifi e en pa IRE s desquels EC P7 dans R G appuyez sur Appuyez sur la affichage du pr et nner les jours nement PROT r 1 t PROTECTIO LECTIONN o...

Page 26: ...TURE CO se r p te tous les jours une fois qu elle est r gl e Il est possible d annuler la p riode TEMP RATURE CO samedi et ou dimanche si la PROGRAMMATION HEBDOMADAIRE est activ e Il est possible de p...

Page 27: ...condes po 27 vent tre mod la touche at ral droit e de tarif r du tarif r duit e p riode de t riode de tarif mp rature va a charge se te charge comme e MARCHE A fonctionneme 0 15 0 20 de charge auto at...

Page 28: ...un technicien agr ECOMBI a t fabriqu conform ment un syst me d assurance qualit complet et en employant des proc d s respectueux de l environnement Une fois sa dur e de vie expir e veuillez apporter...

Page 29: ...245 lb 147 kg 324 lb RACCORDEMENT 240 V 60 Hz 240 V 60 Hz 240 V 60 Hz 240 V 60 Hz PUISSANCE DU CONVECTEUR 450 W 600 W 900 W 1 200 W PUISSANCE DU RADIATEUR ACCUMULATION 985 W 1 310 W 1 960 W 2 620 W CH...

Page 30: ...30 NOTES COMMENTARIES All manuals and user guides at all guides com...

Page 31: ...vou anipulation inap age de ce prod ers dont vous d au sein des ta not cover the h fe ne couvrez that this produ int for the rec elp prevent pot inappropriate w ct your local cit ctions are only e ce...

Page 32: ...Suppl ok Village Par Nova Scotia R 1B9 02 679 1065 679 1940 bi northamer bi northameri ured by Ma Villa Esther GETE Madrid global com nur global com cal modifications po r ly Company rk Drive rica com...

Reviews: