Elnur
powered by Gabarrón | RBC | Installation Guide
3
9
EN
2.- INSTALLATION INSTRUCTIONS
- Open the package and check that it is the correct model and it is in good condition.
- To obtain optimum performances it is necessary to maintain a minimum clearance of 15 cm between the radiator and any
inflammable material as furniture, curtains etc.
- The rest of clearances required to maintain are indicated on
the following figure:
- The studs and screws to attach the
supports are in the accessories bag.
- Hang the unit on the hooks of the
brackets.
- By turning the screws, the metallic
square will go downwards, retaining the
heater. Repeat this on the other bracket.
Mark the fixing points on the
wall using a pencil through the
two fixing holes in the square
brackets and perform
corresponding bores.
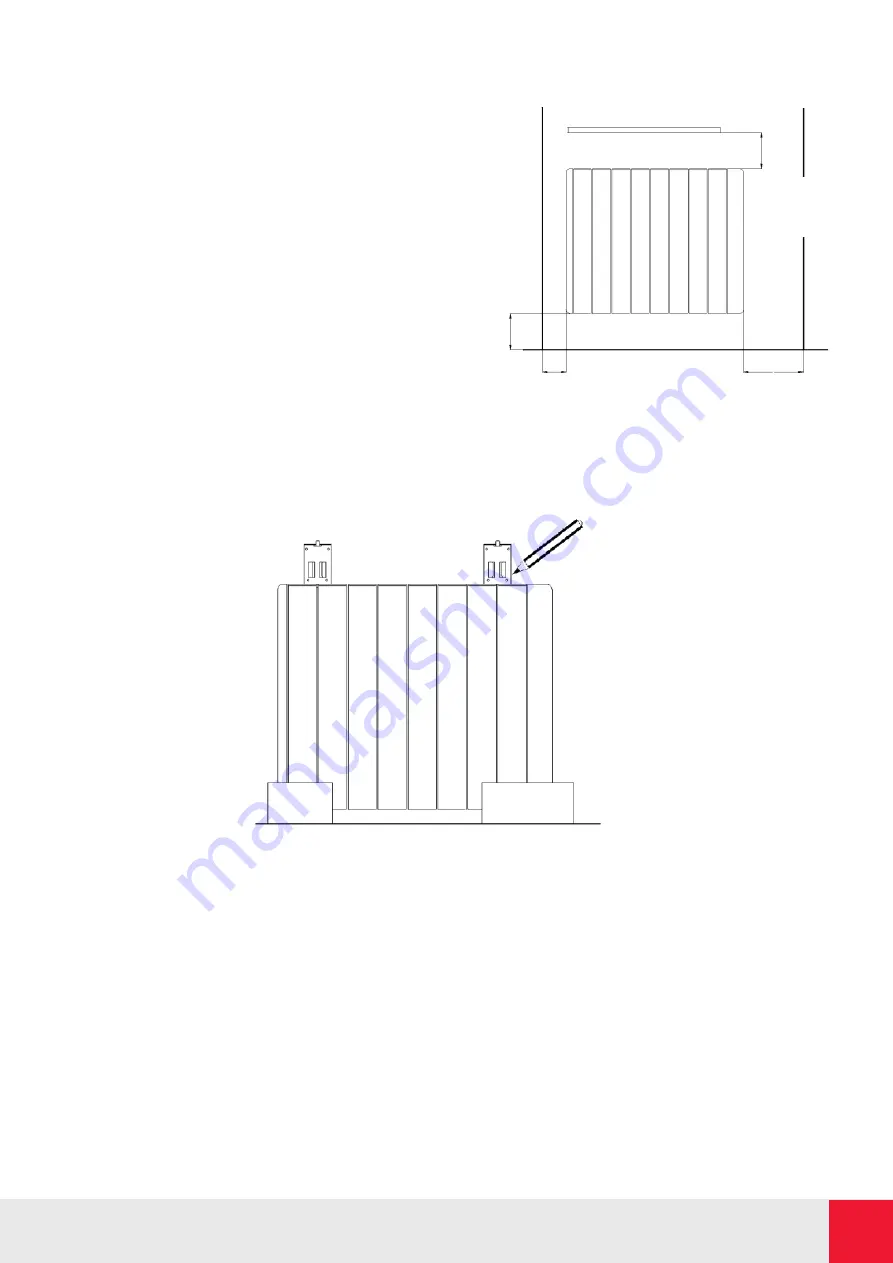
Position and fix the brackets at the correct
distance from the floor. It is possible to use
the radiator as measuring unit by positioning
it on two polyester package elements and
placing two supports above as indicated on
the figure:
Shelf
Minimum 10cm
Minimum
15cm
Minimum 25cm
Control panel side
Minimum 15cm
Closest
object
to the
left end
Closest
object
to the
right end
2. INSTALLATION INSTRUCTIONS
- Open the package and check that it is the correct
model and it is in good condition.
- To obtain optimum performances it is necessary to
maintain a minimum clearance of 15 cm between
the radiator and any inflammable material as
furniture, curtains etc.
- The rest of clearances required to maintain are
indicated on the following figure:
9
EN
2.- INSTALLATION INSTRUCTIONS
- Open the package and check that it is the correct model and it is in good condition.
- To obtain optimum performances it is necessary to maintain a minimum clearance of 15 cm between the radiator and any
inflammable material as furniture, curtains etc.
- The rest of clearances required to maintain are indicated on
the following figure:
- The studs and screws to attach the
supports are in the accessories bag.
- Hang the unit on the hooks of the
brackets.
- By turning the screws, the metallic
square will go downwards, retaining the
heater. Repeat this on the other bracket.
Mark the fixing points on the
wall using a pencil through the
two fixing holes in the square
brackets and perform
corresponding bores.
Position and fix the brackets at the correct
distance from the floor. It is possible to use
the radiator as measuring unit by positioning
it on two polyester package elements and
placing two supports above as indicated on
the figure:
Shelf
Minimum 10cm
Minimum
15cm
Minimum 25cm
Control panel side
Minimum 15cm
Closest
object
to the
left end
Closest
object
to the
right end
Position and fix the brackets at the correct distance
from the floor. It is possible to use the radiator as
measuring unit by positioning it on two polystyrene
package elements and placing two supports above
as indicated on the figure:
Mark the fixing points on the wall
using a pencil through the two
fixing holes in the square brackets
and perform corresponding bores.
- The studs and screws to attach the supports are in
the accessories bag.
- Hang the unit on the hooks of the brackets.
- By turning the screws, the metallic square will go
downwards, retaining the heater. Repeat this on the
other bracket.


