background image

12


REV. 12/22


GB7310S/206 

INSTALLATION TOOL 

S/N: 1118


AND ABOVE.


PLEASE CONTACT GAGE BILT FOR ALL OTHER SERIAL NUMBERS.


Providing all maintenance conditions have been met, follow this systematic approach to diagnosis.


  1.  MORE THAN ONE PULL IS REQUIRED TO BREAK FASTENER.


a)


Tool needs to be bled. (See filling and bleeding procedure pg. 11).


b)


Spring has fatigued, replace.


c)


Jaws are stripped or packed with chips. Clean or replace.


d)


Incorrect nose tip.


  2.  SLOW OR PARTIAL OPERATION WHEN THE ACTUATOR LEVER ASSEMBLY (704343) IS DEPRESSED.


a)


Back

-

up rings (401113) and o

ring (A

-

1044) on the piston (731909) could be worn or damaged. Replace.


b)


Back

-

up rings (731134) and o

ring (A

-

914) on the piston rod assembly (731333) could be worn or damaged. Replace.


c)


Muffler (704146) or filter inside the valve spool assembly (703142) may be plugged with dirt. Clean thoroughly and back

-

blow with compressed air.


d)


Hole in metering screw in valve spool assembly (703142) may be blocked or damaged. Hole diameter should be .028" (.71 mm). 

Clear and size or replace.


  3.  NO OPERATION WHEN ACTUATOR LEVER ASSEMBLY (704343) IS DEPRESSED.


a)


Tool seized due to mechanical failure or damaged parts.


  4.  OIL LEAKAGE.


a)


DO NOT

 OPERATE WITH OIL LEAKING FROM TOOL. HIGH PRESSURE OIL MAY CAUSE SEVERE PERSONAL INJURY.


b)


Any oil leaking externally should be traced to its source. An o'ring or seal that leaks must be replaced.


  5.  AIR BYPASS FROM VALVE HOUSING.


a)


If the spring (704141) breaks or dislodges, air will flow freely through the muffler (704146). Replace or reset. Valve spring 

installation tool assembly (704262) is recommended.


b)


Check o'rings on valve sleeve (703139), valve spool assembly (703142), and valve plug (704145). If worn or damaged, 

replace. Valve sleeve removal tool assembly (704163) is recommended.


  6.  FASTENER STEM JAMMED IN NOSE ASSEMBLY.


a)


Nose assembly components require service. 

DISCONNECT AIR FROM TOOL

, remove the nose from the tool and disassemble. 

Replace worn or broken parts. Clean the surface the jaws ride on.


b)


Stems lodged side by side in the follower. Disassemble, remove stems, and reassemble.


c)


Incorrect follower.


TROUBLESHOOTING


Summary of Contents for GB731OS/206

Page 1: ...YOU GB731OS 206 ORIGINAL INSTRUCTIONS S N 1126 AND ABOVE PLEASE CONTACT GAGE BILT FOR ALL OTHER SERIAL NUMBERS INSTALLATION TOOL 44766 Centre Court Clinton Twp MI 48038 USA Ph 1 586 226 1500 Fax 1 586...

Page 2: ...d Warranty 3 Description and Technical Specifications 4 Description of Functions 5 Warnings 6 Principle of Operation 7 How to set up the GB731OS 206 8 How to use the GB731OS 206 9 Maintenance 10 Filli...

Page 3: ...buyer or subsequent user in repairing or replacing defective goods or if the goods covered by this warranty are reworked or subjected to any type of additional processing This warranty is void if Sel...

Page 4: ...cally for the efficient installation of blind fasteners and lockbolts It weighs 5 75 lbs 2 6 kg and can be operated in any position It has a 500 12 7mm fastener setting stroke and a rated pull load of...

Page 5: ...TALLATION TOOL S N 1118 AND ABOVE PLEASE CONTACT GAGE BILT FOR ALL OTHER SERIAL NUMBERS DESCRIPTION OF FUNCTIONS Actuator Handle Assembly Head Cylinder Air Inlet Image may not reflect actual tool Actu...

Page 6: ...vel 5 Select maintain and replace the consumable inserted tool as recommended in the instruction handbook to prevent an unnecessary increase in noise 6 If the power tool has a silencer always ensure t...

Page 7: ...the head cylinder assembly causing the piston to move to the rear of the head cylinder assembly The oil from the rear of the head cylinder assembly is directed to the top of the piston rod assembly in...

Page 8: ...r and liquid WARNING Do not carry from hoses or use as a hammer WARNING Do not use in explosive atmosphere WARNING Ensure air hose is securely connected to avoid possible hose whipping WARNING Always...

Page 9: ...the tool exhausted air away from operator other persons working in the vicinity foreign matter and liquid WARNING Do not carry from hoses or use as a hammer WARNING Do not use in explosive atmosphere...

Page 10: ...t hydraulic hose fittings and couplings air and electrical connections are secure Tighten Replace or Repair if necessary Cycle the tool several times to assure there are no leaks during use Keep hydra...

Page 11: ...ure rear button head cap screw 402482 and stat o seal S572 are in place 7 Squeeze fill bottle assembly 745263 gently until no air rises in the bottle 8 Connect tool to air supply Piston 731909 will th...

Page 12: ...ocked or damaged Hole diameter should be 028 71 mm Clear and size or replace 3 NO OPERATION WHEN ACTUATOR LEVER ASSEMBLY 704343 IS DEPRESSED a Tool seized due to mechanical failure or damaged parts 4...

Page 13: ...or all applicable materials WARNING When operating repairing or overhauling tool wear approved eye protection Do not look in front of tool or rear of tool when installing fastener WARNING Ensure air h...

Page 14: ...343 including pin 400608 from the handle assembly 722132 2 Insert a 5 8 open end box wrench adjustable wrench around actuator assembly air 704130 3 Loosen the actuator assembly air 704130 4 Remove wre...

Page 15: ...tap or push on the piston rod wrench assembly 704149 to eject air piston assembly 704121 from bottom of handle assembly 722132 6 After removal of air piston assembly 704121 slide piston rod assembly...

Page 16: ...16 REV 12 22 GB7310S 206 INSTALLATION TOOL S N 1118 AND ABOVE PLEASE CONTACT GAGE BILT FOR ALL OTHER SERIAL NUMBERS PARTS LIST...

Page 17: ...anic compounds will be evolved when this material undergoes combustion ACCIDENTAL RELEASE MEASURES Protective Measures Eliminate all sources of ignition in vicinity of spilled material Spill Managemen...

Page 18: ...MBC04 206G 27OS 3 MBC04 206G 37OS 3 5 32 MBC05 206G 27OS 3 MBC05 206G 37OS 3 3 16 MBC06 206G 27OS 3 MBC06 206G 37OS 3 13 64 GS8 206G 32OS GS8 206G 42OS 17 64 GS10 206G 32OS GS10 206G 42OS 2 BACS53B 1...

Page 19: ...ke 600 15 24 mm Hand held weight 5 75 lbs 2 61 kg Entire tool weight 5 75 lbs 2 61 kg Pull load 4 800 21 35 kN Alternative Styles Sold Separately GB731OS Stroke 500 12 70 mm Hand held weight 5 75 lbs...

Page 20: ...SERIAL NUMBERS Alternative Styles Sold Separately GB731SH Stroke 600 15 24 mm Hand held weight 2 25 lbs 1 02 kg Entire tool weight 10 5 lbs 4 76 kg Pull load 4 800 21 35 kN GB731OS 206SH Stroke 500 12...

Page 21: ...T GAGE BILT FOR ALL OTHER SERIAL NUMBERS Alternative Styles Sold Separately GB731SR Stroke 600 15 24 mm Hand held weight 2 00 lbs 0 91 kg Entire tool weight 7 0 lbs 3 20 kg Pull load 4 800 21 35 kN Sp...

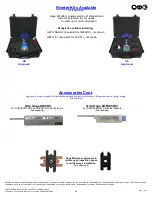
Page 22: ...atcher Bag Stem 756610 Sold Separately Catcher Bag Stem 704214 Sold Separately Fill Bottle Assembly 745163 Sold Separately Tool Stroke Depth Gage A 1935 Sold Separately Accessories Cont Approved for u...

Page 23: ...23 REV 12 22 GB7310S 206 INSTALLATION TOOL S N 1118 AND ABOVE PLEASE CONTACT GAGE BILT FOR ALL OTHER SERIAL NUMBERS This page intentionally left blank...

Page 24: ...to G84LBK not shown GB731 51 Equivalent to 352 51 not shown Riveter Kits Available Sold Separately Gage Bilt offers a wide selection of standard and custom kits tailored to your needs Contact us for m...

Reviews: