15
REV. 12/22
GB735 INSTALLATION TOOL
OVERHAUL
ACTUATOR ASSEMBLY
-
AIR
WARNING
:
Disconnect tool from its power source before actuator removal or installation. Severe personal injury may occur if
power source is not disconnected.
CAUTION:
Actuator assembly
-
air (704130) can break if not careful.
CAUTION:
Do not over tighten actuator assembly
-
air (704130). Snug tighten only.
REMOVING ACTUATOR ASSEMBLY
-
AIR (704130)
1.
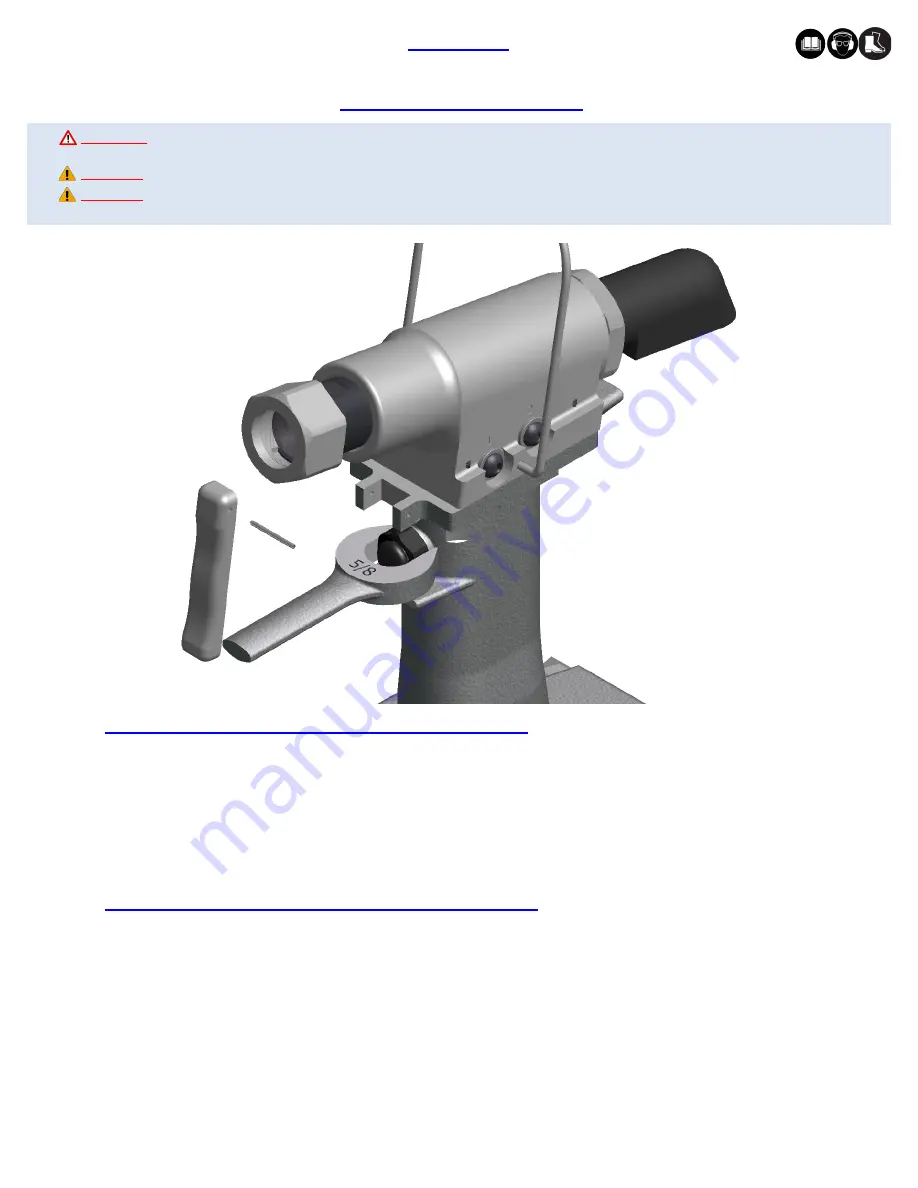
Remove actuator lever assembly (704343) including pin
-
slotted (400608) from handle assembly (722132).
2.
Insert a
5/8”
open end box wrench / adjustable wrench around actuator assembly
-
air (704130).
3.
Loosen the actuator assembly
-
air (704130).
4.
Remove wrench. Unthread and remove the actuator assembly
-
air (704130) with fingers from the handle
assembly (722132).
INSTALLING ACTUATOR ASSEMBLY
-
AIR (704130)
1.
Apply Teflon® tape onto threads of actuator assembly
-
air (704130) one to two wraps.
2.
Thread the actuator assembly
-
air (704130) all the way into handle assembly (722132) with fingers.
3.
Insert and turn
5/8”
open end box wrench / adjustable wrench and snug tight approximately 1/4
-
1/2 turn.
4.
Re
-
attach actuator lever assembly (704343) including pin
-
slotted (400608) to handle assembly (722132).


