background image


T

T

F

F

-

-

D

D

G

G


C

C

A

A

L

L

-

-

P

P

A

A

K

K


F

F

i

i

x

x

t

t

u

u

r

r

e

e


M

M

a

a

n

n

u

u

a

a

l

l


MIC TRAC MT-3000 


14 

 2010 Gagemaker, LP 

RCDMMT300010-10 


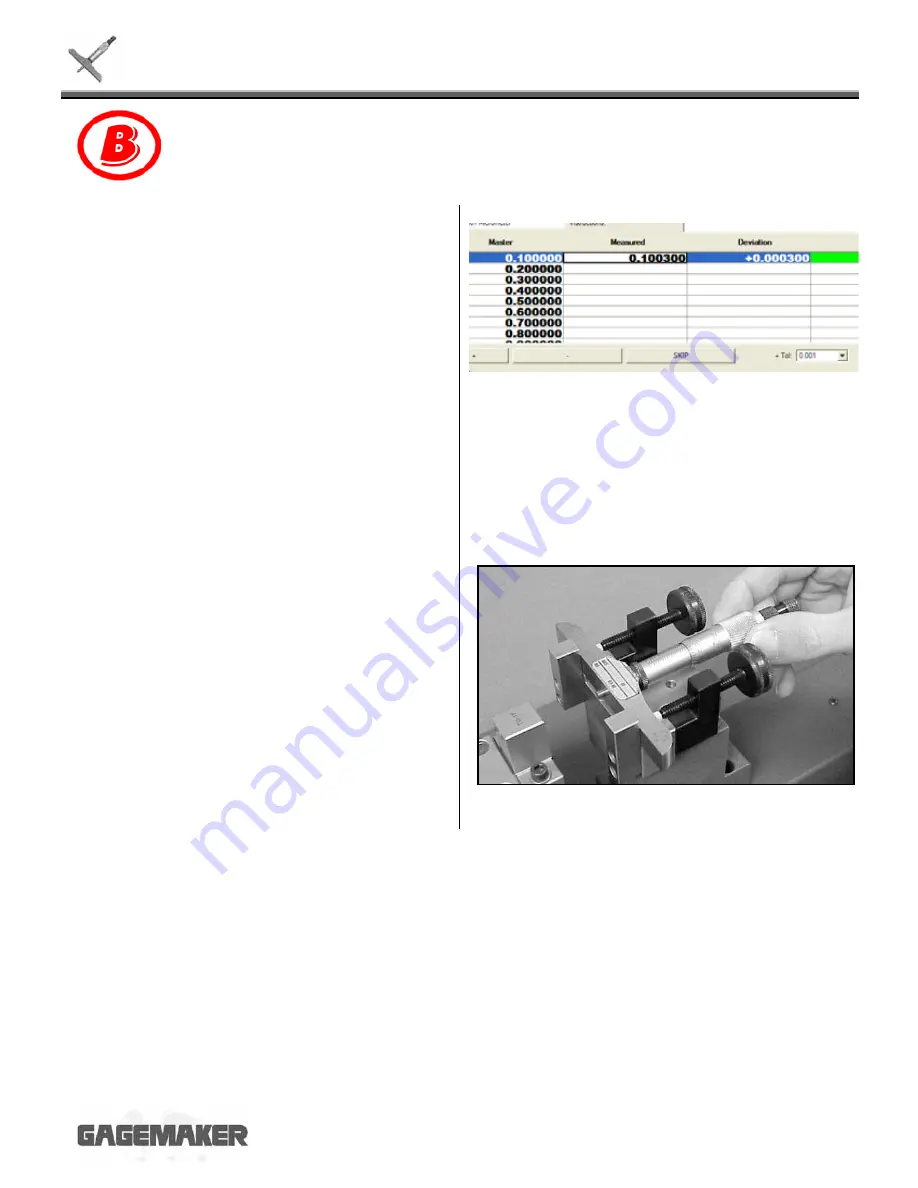
14. Enter the first measurement in the Measured 

column as follows: 


  Continue turning the Y axis adjust knob 

until the X axis moves approximately ½ 
inch. Secure Locks 1 and 2. 

  Click the Send to Table bar. 

 
CERTIFI records the value and displays a 
green box in the Pass/Fail column if the value 
is within tolerance. A red box displays if the 
value is not within tolerance. The Deviation 
column shows the deviation of the measured 
value from the master value. 


15. Adjust the depth micrometer to the first 

calibration value. 


Note:

  If you pass the calibration value, turn the 

spindle back and approach the value again, 
from the same direction. This practice will 
increase the accuracy of the calibration.


Calibration 

Summary of Contents for MIC TRAC MT-3000

Page 1: ...M MI IC C T TR RA AC C M MT T 3 30 00 00 0 T TF F D DG G D De ep pt th h M Mi ic cr ro om me et te er r F Fi ix xt tu ur re e C CA AL L P PA AK K F Fi ix xt tu ur re e M Ma an nu ua al l...

Page 2: ...T TF F D DG G C CA AL L P PA AK K F Fi ix xt tu ur re e M Ma an nu ua al l MIC TRAC MT 3000 2 2010 Gagemaker LP RCDMMT300010 10...

Page 3: ...d excessive wear Check for burrs nicks and wear on measuring faces Check for damage to measuring rods rod seating surfaces and rod reading surfaces Inspect for slack in the spindle thread by pushing t...

Page 4: ...on either side of the fixture 5 While applying pressure toward the receiver pad shoulder use a 5 32 hex wrench to slightly tighten the screws 6 Use a 50 in lbs torque wrench to secure the cap screws 7...

Page 5: ...C MT 3000 5 2010 Gagemaker LP RCDMMT300010 10 9 While applying pressure toward the receiver pad use a 5 32 hex wrench to slightly tighten the screws 10 Use a 50 in lb torque wrench to secure the cap s...

Page 6: ...RCDMMT300010 10 12 Zero the depth micrometer on a flat surface and lock the spindle 13 Retract the thumb screws on the depth gage fixture enough to fit the depth micrometer 14 Mount the depth microme...

Page 7: ...holding down on the base and tightening the thumb knob on each side of the depth gage fixture 16 Turn the coarse adjust knob counterclockwise until the depth micrometer barely touches the flat face a...

Page 8: ...ng the depth micrometer face in contact with the flat face anvil 2 Verify that the readout on the CPU displays 0 00000 3 Loosen the coarse adjust lock and turn the coarse adjust knob clockwise to slid...

Page 9: ...nt record of the measurement prints 8 Record any deviations on the Gage Calibration Record or in house calibration report Continue with remaining measurements for the first depth rod Note It is recomm...

Page 10: ...e anvil Secure the coarse adjust lock 13 Continue turning the fine adjust knob until the in the axis display lights up Record any deviations on the Gage Calibration Record or in house calibration repo...

Page 11: ...h CERTIFI software Lightweight gage oil MT 4 USB Digital Data Acquisition Card Brother P Touch Label Printer optional 1 Start Certifi by double clicking the Certifi icon CERTIFI Icon 2 Click the New C...

Page 12: ...Date automatically displays but can be changed by typing over the displayed date Print 6 Enter the following information about the gage you are calibrating Serial Number Location Gage Manufacturer Mo...

Page 13: ...he CERTIFI Monitor icon to open the CERTIFI Monitor Window 10 Choose the Y axis from the pull down box 11 Bring the MIC TRAC jaws together and click the Zero button twice 12 Turn the X axis adjust kno...

Page 14: ...to Table bar CERTIFI records the value and displays a green box in the Pass Fail column if the value is within tolerance A red box displays if the value is not within tolerance The Deviation column s...

Page 15: ...inch Secure Locks 1 and 2 Click the Add Value button 17 Then using each master value continue measuring the depth micrometer until the values for the first depth rod are recorded in CERTIFI 18 Loosen...

Page 16: ...he Y axis adjust knob counterclockwise until the depth micrometer rod touches the flat face anvil 23 Enter the gage measurement for the depth rod in the Measured column as follows Continue turning the...

Page 17: ...the single box press the Enter key to bring up a list of current NIST information For new NIST information select Edit from the menu and press the Preferences box Select the NIST tab to enter new inf...

Page 18: ...Label Printer for printing calibration stickers the Confirm window for printing a calibration tag displays 28 Click the Yes button to print the calibration tag Affix the Calibration Tag to the calipe...

Page 19: ...T TF F D DG G C CA AL L P PA AK K F Fi ix xt tu ur re e M Ma an nu ua al l MIC TRAC MT 3000 19 2010 Gagemaker LP RCDMMT300010 10 Notes...

Page 20: ...Gagemaker LP P O Box 87709 Houston Texas 77287 7709 710 East Southmore Ave Pasadena Texas 77502 Phone 713 472 7360 Fax 713 472 7241 Website www gagemaker com...

Reviews: